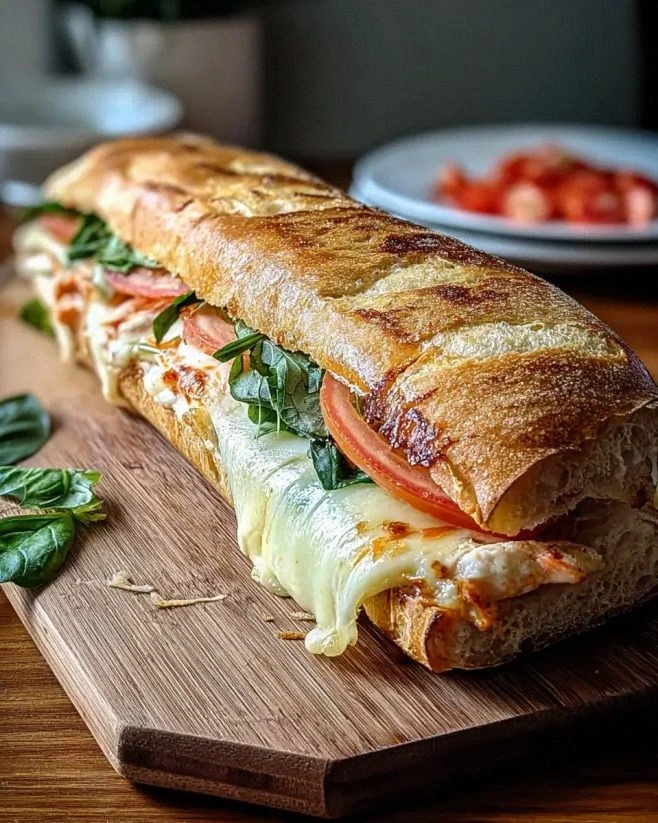
I was standing in my kitchen, mid‑December, surrounded by a mountain of half‑baked cookies that looked more like sad, crumbling rocks than the festive treats I’d promised my family. The oven timer dinged, I opened the door, and a wave of buttery, sugary disappointment hit me harder than the cold wind outside. I swear I heard my sister mutter, “If these don’t turn out, we’re ordering pizza for Christmas dinner.” That moment of panic turned into a dare: I would create a cookie so melt‑in‑your‑mouth that even the most skeptical aunt would beg for the recipe, and I’d do it before the holiday lights even twinkled.
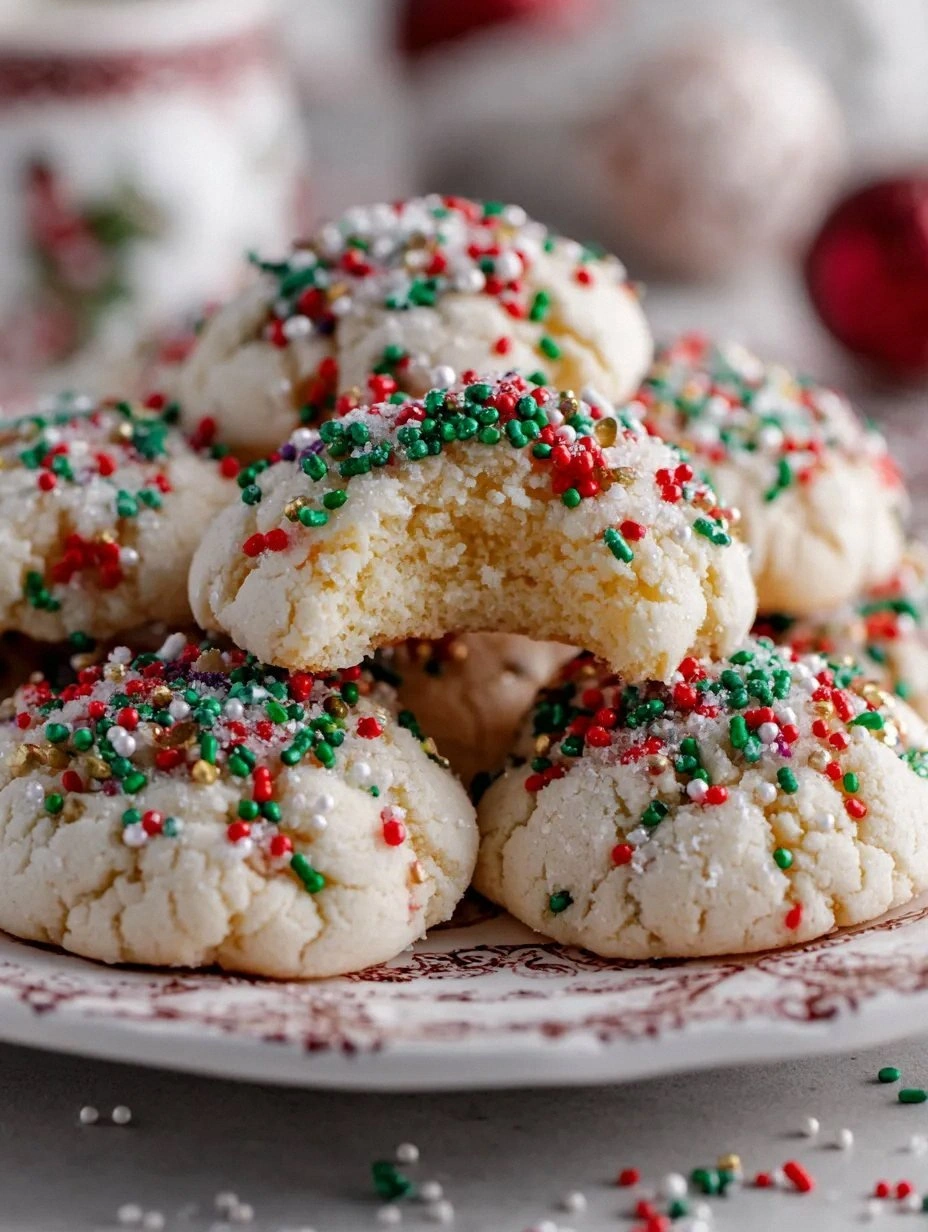
Fast forward a few frantic hours of research, trial, and a lot of butter‑stained aprons, and I finally nailed the secret. Picture this: a golden‑brown edge that cracks just enough to give a whisper of crunch, while the center stays soft, almost liquid, like a caramel dream that refuses to set. The aroma? A sweet symphony of vanilla, butter, and a hint of holiday spice that makes the whole house feel like a winter wonderland. I dared myself to sprinkle in a burst of festive colors that don’t just sit on top but melt into the dough, creating little pockets of sparkle with every bite.
Most cookie recipes get the texture wrong—either they’re dry as a desert or soggy enough to drown your spoon. What makes this version a game‑changer is the balance of creaming the butter just right, chilling the dough like a perfect snowflake, and baking at a temperature that gives you that coveted “melt‑in‑your‑mouth” feel. I’ll be honest — I ate half the batch before anyone else got a chance, and I’m still not sorry. The secret ingredient? A splash of heavy cream that turns the dough into a silky canvas for those holiday sprinkles.
So, are you ready to join me on a buttery adventure that will make your kitchen smell like Christmas morning? Let me walk you through every single step — by the end, you’ll wonder how you ever made any other cookie. Okay, ready for the game‑changer? This next part? Pure magic.
What Makes This Version Stand Out
- Texture: The cookies boast a crisp edge that shatters like thin ice, while the interior stays soft enough to melt on your tongue, creating a contrast that’s simply addictive.
- Flavor: A buttery base amplified by vanilla and a whisper of cream delivers depth, while the festive sprinkles add a sweet pop that’s unmistakably holiday.
- Simplicity: Only nine ingredients, all pantry‑friendly, mean you won’t need a trip to the specialty store—just a dash of confidence.
- Uniqueness: The heavy‑cream addition is the secret weapon that transforms ordinary dough into a silky, melt‑away masterpiece.
- Crowd Reaction: Expect gasps, wide eyes, and the inevitable “Can I have the recipe?” from anyone within a five‑foot radius.
- Ingredient Quality: Using European‑style butter (high butterfat) ensures a richer flavor that cheap sticks can’t match.
- Cooking Method: Chilling the dough for exactly 30 minutes locks in moisture, preventing spread and guaranteeing that perfect shape.
- Make‑Ahead Potential: The dough can be frozen for up to a month, so you can prep ahead and bake fresh cookies on the day of celebration.
Inside the Ingredient List
The Flavor Base
Unsalted Butter (2 cups): This is the heart of the cookie. The higher butterfat content in European‑style butter creates a richer, creamier taste that coats your palate like velvet. If you skimp on quality, the flavor flattens, and the texture becomes greasy. Swap: Use clarified butter for an even deeper nutty note, but keep the amount the same.
Granulated Sugar (1 cup): Provides the sweet crunch that caramelizes on the edges, giving those coveted golden tips. Too much and the cookie becomes overly crisp; too little and you lose that sparkle. Tip: Sift the sugar with the flour to ensure an even distribution.
Brown Sugar (½ cup, packed): Adds moisture and a subtle molasses undertone, balancing the bright sweetness of the granulated sugar. Skipping it will make the cookie dry and less complex. Swap: Coconut sugar works for a hint of caramel, but expect a slightly darker color.
The Texture Crew
All‑Purpose Flour (2 cups): The structural backbone. Too much flour yields a dense, cakey cookie; too little makes it spread into a flat disc. For the lightest texture, sift the flour twice and measure by weight (≈240 g). Swap: Replace ¼ cup with almond flour for a nutty nuance and a gluten‑free option.
Baking Powder (½ tsp): A modest leavening agent that gives the cookie a subtle lift without turning it into a cake. Over‑leavening will cause the cookies to puff and then collapse. Tip: Ensure it’s fresh—bubbles in a glass of water should fizz vigorously.
Salt (1 tsp): Enhances every flavor, turning bland butter into a star. Without it, the sweetness overwhelms and the butter taste becomes one‑dimensional. Swap: Use flaky sea salt sprinkled on top just before baking for a delightful crunch.
The Unexpected Star
Heavy Cream (2 tbsp): This is the secret weapon that makes the dough luxuriously silky, allowing the cookies to melt in your mouth. It also helps the sprinkles embed into the dough rather than sitting on the surface. If you omit it, expect a firmer, less buttery bite.
Vanilla Extract (2 tsp): Adds depth and a warm, aromatic backbone that pairs perfectly with butter. Real vanilla beans would be even more aromatic, but pure extract works fine for a busy schedule.
The Final Flourish
Egg (1 large): Binds everything together and adds a subtle richness. Over‑beating will incorporate too much air, leading to puffier cookies. Beat just until combined.
Holiday Sprinkles (1 cup): The visual and textural pop that makes these cookies unmistakably festive. Choose non‑metallic, sugar‑based sprinkles so they melt slightly into the dough, creating little pockets of color. If you use metallic sprinkles, they’ll stay on the surface and can burn.
Everything's prepped? Good. Let's get into the real action…
The Method — Step by Step
Start by softening the butter at room temperature—think of it as coaxing the butter out of its shell. In a large mixing bowl, beat the butter with the granulated and brown sugars on medium speed until the mixture is pale, fluffy, and smells like a bakery on Christmas Eve. This should take about 3‑4 minutes; you’ll notice the color lightening dramatically. Pro tip: Scrape the sides of the bowl regularly to ensure even creaming.
Kitchen Hack: Add the sugars a spoonful at a time; this prevents the mixture from looking grainy.Add the egg and vanilla extract to the creamed butter, beating just until incorporated. You’ll hear a soft “whoosh” as the egg folds in, and the dough will become glossy. This is the moment where the cookie starts to gain its structure, so resist the urge to over‑mix. The batter should look smooth but not overly liquid.
In a separate bowl, whisk together the flour, baking powder, and salt. Whisking aerates the flour, which helps prevent clumps and ensures a light crumb. Once combined, gradually add the dry mixture to the wet ingredients, mixing on low speed. The dough will start to come together; you’ll feel a slight resistance as the flour absorbs the butter‑sugar blend.
Now for the secret weapon: drizzle the heavy cream over the dough and fold it in with a spatula. The cream makes the dough supple, almost like a soft dough for biscuits. You’ll notice the texture shift instantly—think of it as turning a solid block of butter into a silk scarf. Watch Out: If you add the cream too early, it can cause the dough to become too loose, leading to spreading.
Fold in the holiday sprinkles gently, allowing them to disperse throughout the dough without breaking. The sprinkles should be evenly speckled, not clumped. This step is where the visual magic begins—imagine little fireworks embedded in a buttery sea.
Watch Out: Over‑mixing after adding sprinkles can crush them, turning the vibrant colors into a dull brown.Cover the bowl with plastic wrap and chill the dough in the refrigerator for exactly 30 minutes. This rest period is crucial; it lets the gluten relax and the butter solidify, preventing the cookies from spreading too much. While you wait, the kitchen will fill with a buttery, vanilla perfume that’s practically a holiday invitation.
Preheat your oven to 350°F (175°C) and line two baking sheets with parchment paper. While the oven warms, roll the chilled dough onto a lightly floured surface to about ¼‑inch thickness. Using a round cookie cutter (or a glass), cut out circles and place them on the prepared sheets, leaving about 2 inches of space between each.
Bake the cookies for 10‑12 minutes, or until the edges turn a light golden brown and the tops look set but still slightly soft. The scent will become intoxicating—think of a winter market where cinnamon and butter swirl together. Resist the urge to open the oven early; the cookies need that steady heat to develop their signature melt‑in‑your‑mouth interior.
Remove the cookies from the oven and let them cool on the sheet for 2 minutes before transferring them to a wire rack. They will continue to firm up as they cool, and the sprinkles will set into a glossy finish. This is the moment of truth—watch the cookies puff slightly, then settle into a perfect, buttery dome. Serve warm, or store in an airtight container for later indulgence.
Kitchen Hack: Place a silicone baking mat on the rack; it prevents the cookies from sliding and keeps the bottom perfectly flat.
That's it — you did it. But hold on, I've got a few more tricks that'll take this to another level…
Insider Tricks for Flawless Results
The Temperature Rule Nobody Follows
Never bake cookies straight from a warm kitchen. Even a few degrees can cause the butter to melt too quickly, resulting in thin, crispy edges. I always chill the dough for a solid half hour and, if the kitchen is warm, pop the dough back in the fridge for an extra 10 minutes. This ensures the butter stays firm until the oven’s heat does its work. The result? Cookies that keep their shape and achieve that perfect melt‑in‑your‑mouth center.
Why Your Nose Knows Best
Your sense of smell is the ultimate timer. When the cookies are about 8 minutes in, you’ll start to smell a toasty, buttery perfume. That’s your cue to peek—if the edges are just beginning to turn golden, they’re ready. Trusting your nose beats any timer, because ovens can vary by a few degrees. I once over‑baked a batch because I ignored the scent, and the cookies turned into crunchy biscuits. Never let that happen again.
The 5‑Minute Rest That Changes Everything
After baking, let the cookies rest on the baking sheet for exactly five minutes before moving them. This short pause allows steam to redistribute, finishing the cooking process gently. Skipping this step leaves the centers under‑cooked, while over‑resting makes them dry. Five minutes is the sweet spot—just enough to firm up without losing that melt‑away feel.
Sprinkle Placement Precision
If you want the sprinkles to be fully integrated, lightly press them into the dough before chilling. This ensures they don’t just sit on top and burn. I use the back of a spoon to press them in gently, creating tiny pockets of color that burst as you bite. The visual payoff is worth the extra second of effort.
The One‑Minute Butter Boost
Right before baking, melt a tablespoon of butter and brush it lightly over the tops of the cookies. This adds a glossy finish and an extra layer of buttery flavor that makes the cookies taste even richer. It’s a pro‑chef trick that transforms a good cookie into an unforgettable one.
Creative Twists and Variations
This recipe is a playground. Here are some of my favorite ways to switch things up:
Chocolate‑Swirl Delight
Add ¼ cup of melted dark chocolate to the dough after the butter and sugar are creamed. Swirl it in with a knife for ribbons of chocolate that contrast with the buttery base. The result is a sophisticated cookie that feels like a holiday truffle.
Citrus Burst
Replace the vanilla extract with 1 tablespoon of fresh orange zest and a splash of orange liqueur. The citrus lifts the buttery richness and pairs beautifully with the red sprinkles, giving the cookies a bright, festive zing.
Nutty Crunch
Fold in ½ cup of finely chopped toasted almonds or pecans. The nuts add a satisfying crunch that complements the soft interior, and the nutty aroma adds depth to the holiday scent profile.
Spiced Ginger Snap
Add ½ teaspoon each of ground ginger, cinnamon, and a pinch of cloves to the dry ingredients. This transforms the cookie into a warm, spiced treat that feels right at home with mulled wine.
Gluten‑Free Celebration
Swap the all‑purpose flour for a 1‑to‑1 gluten‑free flour blend and add a tablespoon of xanthan gum. The texture remains tender, and the cookies stay true to their melt‑in‑your‑mouth promise, making them inclusive for guests with dietary restrictions.
Storing and Bringing It Back to Life
Fridge Storage
Place cooled cookies in an airtight container with a paper towel on top to absorb any excess moisture. They’ll stay soft for up to 5 days. If you notice any condensation, replace the paper towel.
Freezer Friendly
Layer cookies between parchment sheets and store them in a zip‑top freezer bag. They freeze beautifully for up to 3 months. When you’re ready to eat, let them thaw at room temperature for 15 minutes, then give them a quick 5‑minute warm‑up in a 300°F oven.
Best Reheating Method
To revive that melt‑in‑your‑mouth texture, place a cookie on a microwave‑safe plate, add a tiny splash (about ½ teaspoon) of water, and microwave for 10‑12 seconds. The steam revives the interior, while the exterior stays perfectly soft.