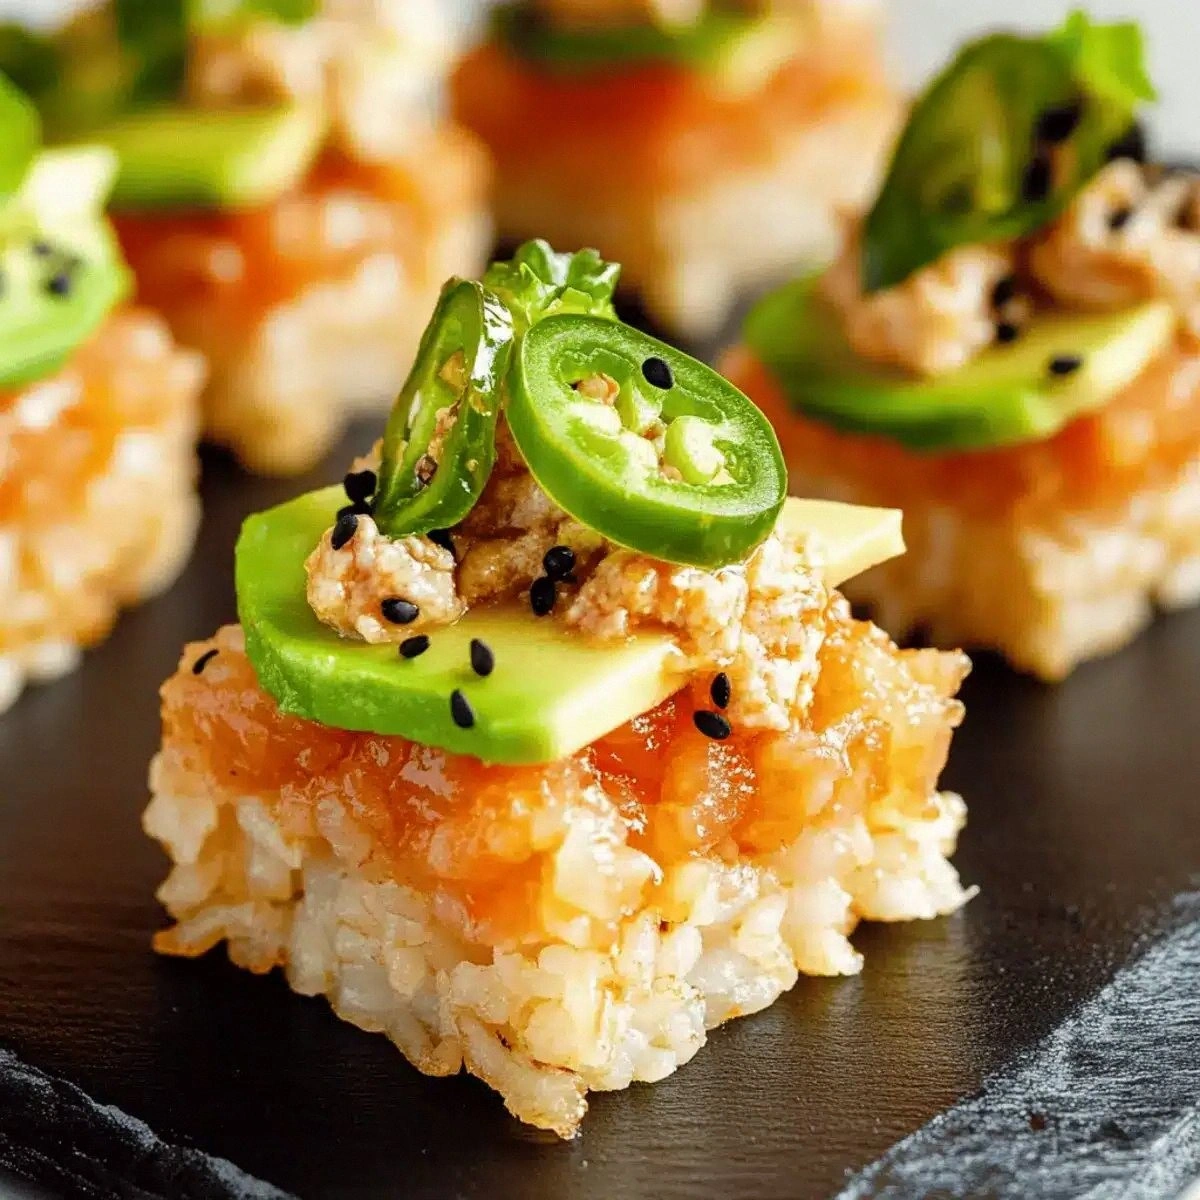
I was standing in my kitchen, staring down a pan of soggy sushi rice that had somehow decided to turn into a mushy swamp. My roommate walked in, sniffed the air, and asked if I was trying to make a rice‑pudding disaster. I laughed, grabbed a bottle of sriracha, and thought, “What if I could turn this mess into something that makes people gasp, “Whoa, that’s insane!”? That moment sparked the birth of the ultimate crispy rice spicy tuna bite that has since become the unofficial party starter in my apartment building. I dare you to taste this and not go back for seconds.
Picture this: a golden‑crisp square of rice that shatters like thin ice when you bite into it, revealing a silky, buttery tuna mixture that tingles your palate with a controlled heat that makes your tongue dance. The aroma of toasted rice mingles with the sweet‑sour perfume of rice vinegar and the smoky whisper of sriracha, while the fresh zing of lime cuts through the richness like a razor‑sharp saxophone solo. You can hear the faint sizzle as the rice hits the hot oil, feel the heat radiating from the pan, and taste the contrast of crunchy and creamy in one bite. It’s a full‑sensory assault that makes you feel like you’ve just discovered a secret menu item at a five‑star sushi bar.
Most recipes get this completely wrong. They either fry the rice too long, turning it into a brick, or they under‑season the tuna, leaving it bland and forgettable. This version stands out because I’ve fine‑tuned every single element: the rice is washed, soaked, and seasoned with a perfect balance of vinegar, sugar, and salt; the tuna is hand‑mashed with Kewpie mayo, sriracha, soy sauce, lime, and a whisper of jalapeño; the final assembly includes a dusting of toasted sesame seeds that add a nutty crunch you can’t ignore. If you’ve ever struggled with this, you’re not alone — and I’ve got the fix.
And now the fun part: I’m going to reveal a technique that most home cooks overlook — the “dry‑toast” method that gives the rice that unmistakable, airy crunch without soaking up oil like a sponge. It’s a game‑changer, and you’ll thank me when you pull the finished plates out of the oven and the whole kitchen smells incredible. Let me walk you through every single step — by the end, you’ll wonder how you ever made it any other way.
What Makes This Version Stand Out
- Flavor Explosion: The tuna mixture balances heat, acidity, and umami so perfectly that each bite feels like a tiny fireworks show in your mouth.
- Texture Symphony: You get a crisp, golden rice crust that shatters on contact, followed by a melt‑in‑your‑mouth tuna center that’s creamy yet firm.
- Simplicity: Fewer than ten ingredients, all of which are pantry‑friendly or easy to find at a good fish market.
- Uniqueness: The dry‑toast technique creates a rice texture you won’t find in any take‑out spot, giving you brag‑worthy street‑food cred.
- Crowd Reaction: Guests immediately ask for the recipe, and the look on their faces is priceless — it’s the kind of dish that turns a casual get‑together into a culinary celebration.
- Ingredient Quality: Using sushi‑grade ahi tuna and authentic Japanese Kewpie mayo elevates the dish from “good” to “legendary.”
- Cooking Method: The two‑stage fry (low‑heat crisping then high‑heat sear) guarantees a uniform crunch without greasy leftovers.
- Make‑Ahead Potential: You can prep the rice and tuna separately, store them, and assemble minutes before serving, making it perfect for parties.
Inside the Ingredient List
The Flavor Base
The combination of unseasoned rice vinegar, sugar, and salt creates the classic sushi rice profile that is simultaneously tangy, slightly sweet, and lightly salty. This trio is the backbone of the dish; without it, the rice would taste flat and the tuna mixture would dominate the palate. If you skip the sugar, the vinegar’s acidity becomes harsh; if you omit the salt, the whole bite feels dull. A quick swap: use apple cider vinegar for a fruitier note, but remember to reduce the sugar by a teaspoon to keep the balance.
The Texture Crew
Sushi rice is the star here because its short‑grain nature yields a sticky yet tender bite after cooking, which is essential for forming a cohesive rice cake. Vegetable oil (or sunflower/peanut oil) is chosen for its high smoke point, allowing you to achieve that perfect golden crust without burning. If you’re allergic to peanuts, go with avocado oil – it’s neutral and will still give you that crisp finish. The sesame seeds add a subtle nutty crunch that rounds out the texture profile, and they also bring a visual pop that makes the dish look restaurant‑ready.
The Unexpected Star
Kewpie mayonnaise is not just any mayo; it’s enriched with egg yolks and a dash of MSG, giving it a silkier mouthfeel and an umami boost that regular mayo can’t match. Pair it with sriracha sauce, and you get a heat that’s bright rather than lingering, perfect for those who love a little kick without overwhelming the fish. The fresh lime juice cuts through the richness, acting like a bright counterpoint that lifts the entire flavor stack. If you’re out of lime, a splash of yuzu juice works wonders, adding an exotic citrus twist.
The Final Flourish
Ahi tuna is the premium choice because its deep‑red flesh stays buttery even when mixed with mayo and sauce. When you buy sushi‑grade, you’re guaranteed that the fish has been flash‑frozen at sea level, preserving its texture and flavor. If you can’t find ahi, a high‑quality yellowfin works, but avoid canned tuna – it will turn the mixture mushy. The avocado adds a velvety richness that balances the heat, while the jalapeños introduce a fresh, green heat that’s more aromatic than the lingering burn of chili powder.
Everything's prepped? Good. Let's get into the real action…
The Method — Step by Step
- Rinse and Soak the Rice. Place 1 cup of sushi rice in a fine‑mesh sieve and rinse under cold water until the water runs clear. Transfer the rice to a bowl, cover with 1.25 cups of water, and let it soak for 30 minutes. This step ensures each grain absorbs water evenly, preventing a gummy texture later. After soaking, drain the rice and set it aside; the anticipation is already building.
- Season the Cooked Rice. Transfer the cooked rice to a large wooden bowl (or a non‑reactive bowl). In a small saucepan, gently warm 0.25 cup rice vinegar, 2 tablespoons sugar, and 0.5 teaspoon salt until the sugar dissolves — do not boil. Drizzle the seasoned vinegar over the rice while fanning it to cool, which gives each grain a glossy sheen. The rice should feel slightly tacky but not wet; this is the foundation for that coveted crunch.
- Form the Rice Cakes. Lightly oil a shallow dish with vegetable oil. Scoop a heaping tablespoon of seasoned rice, press it into a compact rectangle about 2 inches wide and 1 inch tall. Repeat until you have a dozen cakes. Let them rest for 10 minutes; this “dry‑rest” allows the surface to dry out just enough to crisp up without soaking up oil later.
- Fry the Rice Cakes (First Pass). Heat a large skillet over medium‑low heat and add enough vegetable oil to coat the bottom (about 1/4 inch deep). When the oil shimmers, gently place the rice cakes in a single layer. Fry for 2‑3 minutes on each side, watching for a light golden hue. You’re looking for a gentle sizzle, not a roar; this low‑heat stage builds a thin crust without burning.
- Prepare the Spicy Tuna. While the rice cakes are frying, dice the 8‑ounce ahi tuna into 1‑centimeter cubes. In a mixing bowl, combine the tuna with 0.25 cup Kewpie mayo, 2 tablespoons sriracha, 1 teaspoon soy sauce, 0.5 lime’s fresh juice, a finely chopped jalapeño (adjust to heat preference), and a pinch of salt. Fold in diced avocado just before serving to keep its bright color. The mixture should be glossy, with the mayo coating each tuna piece like a silky veil.
- Second Fry for Maximum Crunch. Increase the skillet heat to medium‑high. Carefully flip each rice cake and fry for an additional 1‑2 minutes per side until the edges turn deep amber and start to pull away from the pan. That sizzle when it hits the pan? Absolute perfection. The surface should be crisp enough to crack under a fork but still hold the interior fluffy.
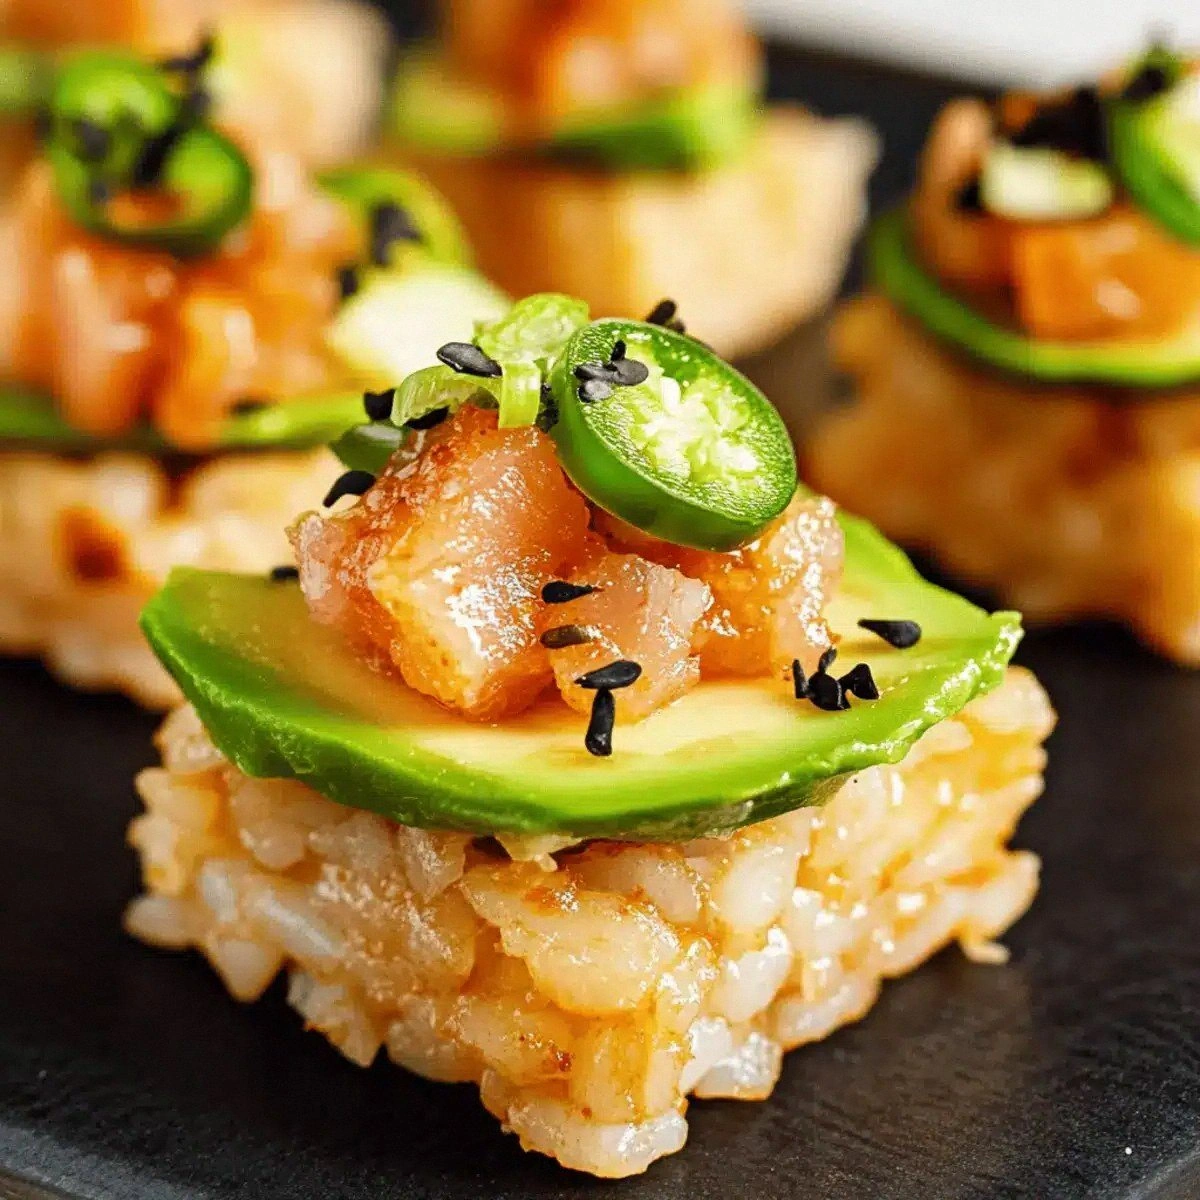
- Assemble the Appetizer. Place each crispy rice cake on a serving platter. Top each with a generous spoonful of the spicy tuna mixture, then sprinkle toasted sesame seeds over the top. For an extra pop of color, shave a thin ribbon of fresh lime zest and add a micro‑sprig of cilantro if desired. The final look should be a contrast of golden squares, bright orange‑red tuna, and speckled black sesame — a visual that promises a flavor explosion.
- That’s it — you did it. But hold on, I’ve got a few more tricks that’ll take this to another level. Stay with me here — this is worth it.
Insider Tricks for Flawless Results
The Temperature Rule Nobody Follows
Never fry rice over high heat from the start. Starting low gives the rice a chance to form a thin crust without scorching, then cranking the heat finishes the crunch. I once tried to rush the process on a busy night and ended up with a charcoal‑black disaster. Trust the two‑stage method, and you’ll get a uniform golden color every time.
Why Your Nose Knows Best
When the rice is ready to flip, you’ll smell a faint toasted nut aroma. That scent is your cue that the surface has reached the perfect temperature. If you rely solely on visual cues, you might miss the sweet spot and end up with a pale or burnt piece. Let your nose be the sous‑chef.
The 5‑Minute Rest That Changes Everything
After forming the rice cakes, let them sit uncovered for five minutes. This short air‑drying period evaporates excess surface moisture, which otherwise would turn into steam and sabotage the crispness. One friend tried to skip this step, and the result was soggy rice that clung together like a sticky note.
Avocado Timing Trick
Fold the avocado into the tuna mixture just before plating. If you mix it too early, the avocado oxidizes and turns brown, ruining the visual appeal. A quick squeeze of extra lime juice over the diced avocado keeps it vibrant and adds an extra layer of acidity.
Sesame Seed Toasting Shortcut
Instead of toasting sesame seeds in a separate pan, toss them into the hot oil during the second fry for the last 30 seconds. The oil instantly lifts the seeds, giving them a perfect toasty flavor and saving you an extra step. Just be careful not to burn them; they go from toasted to bitter in a heartbeat.
Creative Twists and Variations
This recipe is a playground. Here are some of my favorite ways to switch things up:
Miso‑Glazed Tuna
Swap the sriracha for 1 tablespoon white miso mixed with a teaspoon of honey. The result is a sweet‑savory glaze that pairs beautifully with the crisp rice, appealing to those who prefer a milder heat.
Coconut‑Lime Fusion
Add 1 tablespoon coconut cream to the tuna mixture and replace lime juice with a splash of lemongrass-infused oil. This gives a tropical vibe that’s perfect for summer gatherings.
Spicy Peanut Crunch
Stir 1 tablespoon smooth peanut butter and a pinch of crushed peanuts into the tuna. The nutty depth adds a new dimension, and the peanuts on top provide an extra crunch.
Veggie‑Only Version
Replace tuna with finely diced shiitake mushrooms marinated in soy and sriracha. The mushrooms mimic the meaty texture while keeping the dish fully plant‑based.
Black Garlic Elegance
Mix 1 teaspoon black garlic paste into the mayo‑sriracha blend. The sweet, umami‑rich flavor of black garlic adds sophistication, making it ideal for a dinner party appetizer.
Storing and Bringing It Back to Life
Fridge Storage
Store the cooked rice and tuna mixture separately in airtight containers. The rice stays crisp for up to 24 hours if covered with a paper towel to absorb moisture. The tuna mixture can be refrigerated for 2 days; give it a quick stir before using.
Freezer Friendly
Freeze the rice cakes on a parchment sheet, then transfer them to a zip‑top bag. They’ll keep for up to a month. Thaw in the refrigerator overnight, then re‑fry for a minute on each side to restore crunch.
Best Reheating Method
To revive leftover rice cakes, drizzle a tiny splash of water over each piece, cover with foil, and bake at 350°F for 5‑7 minutes. The steam re‑hydrates the crust just enough to become crisp again without turning soggy.