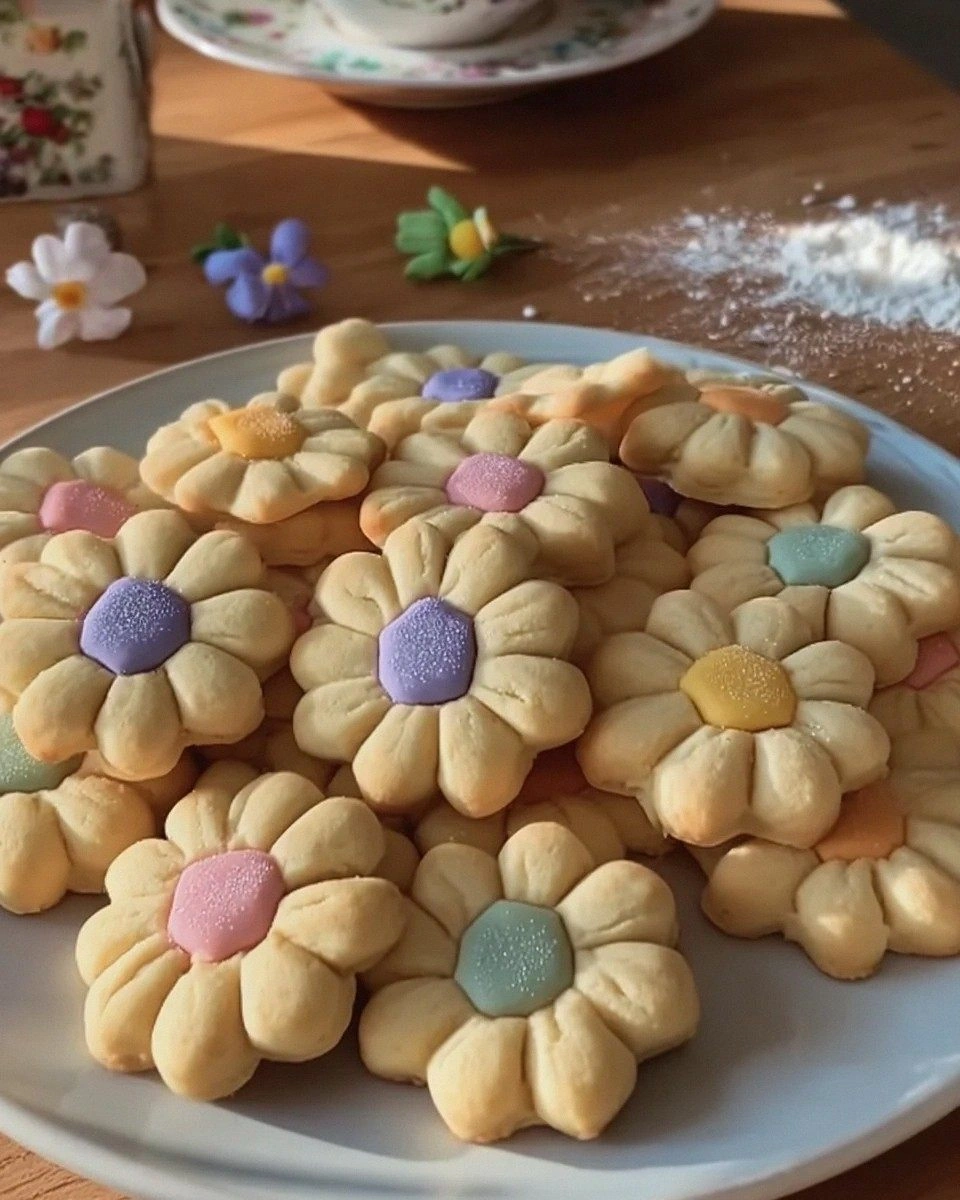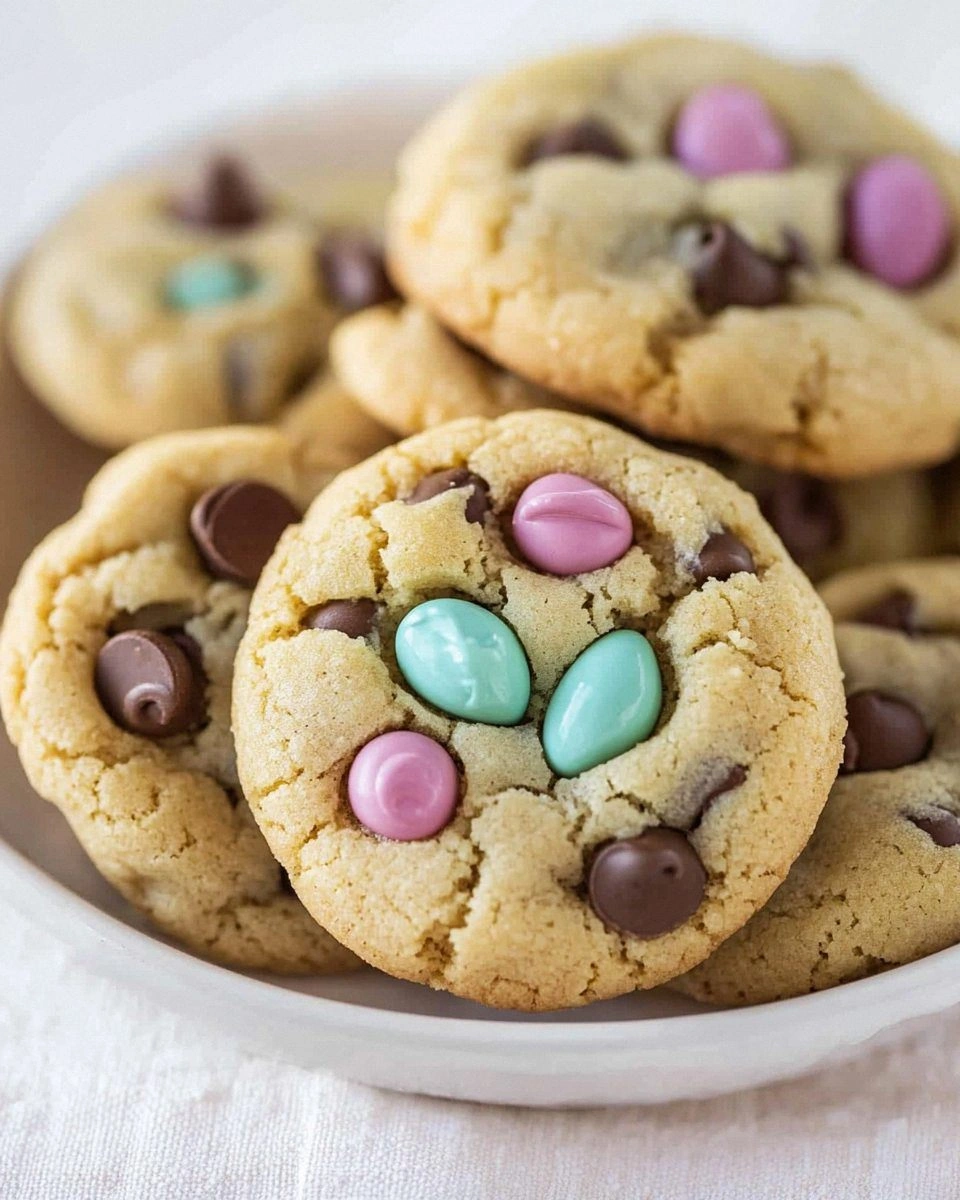
Picture this: it’s a bright Saturday morning, the garden is a riot of pastel tulips, and the only thing louder than the giggling kids is the frantic scramble of my cat trying to steal a stray chocolate egg. I was halfway through an ambitious attempt at a classic Easter cake when the batter decided to stage a mutiny, splattering the counter like a Jackson Pollock painting. In the chaos I swore I’d never bake again—until a daring friend dared me to make something “simple yet unforgettable.” That’s when I stumbled onto the idea of thumbprint cookies, the perfect canvas for a burst of springtime color and chocolatey surprise. I’ll be honest — I ate half the batch before anyone else got to try it, but the rest of the batch turned out to be the most addictive, melt‑in‑your‑mouth treat I’ve ever crafted.
The moment the butter hit the flour, the kitchen filled with a buttery perfume that reminded me of fresh‑baked croissants on a Parisian boulevard. The dough was silky, almost like a soft‑serve ice cream waiting to be shaped. As I pressed the thumbprints, a tiny crater formed, ready to cradle a splash of pastel icing that would later sparkle with edible glitter. The oven’s gentle hum turned into a symphony of anticipation, each tick of the timer echoing like a drumroll before the big reveal. When the cookies emerged, their golden edges shone like sunrise over a field of daffodils, and the sweet, creamy frosting glistened like dew on spring grass.
What makes this version stand out isn’t just the pretty colors or the chocolate egg surprise—it’s the perfect balance between a crisp, buttery bite and a silky, sweet center that practically melts on your tongue. Most recipes get the texture wrong, ending up either too crumbly or overly cakey. I cracked the code by chilling the dough just long enough to keep the butter from melting too quickly, and by using a double‑whisked frosting that sets just right for that glossy finish. I’m daring you to taste this and not go back for seconds; the combination of flavors is so harmonious, you’ll swear you’ve found the culinary equivalent of a perfect chord.
And here’s the kicker: I’ve added a secret ingredient—just a whisper of food coloring blended into the frosting—that makes each cookie look like a tiny Easter sunrise without overwhelming the palate. This tiny splash of hue is the game‑changer that turns an ordinary cookie into a festive masterpiece. Let me walk you through every single step — by the end, you’ll wonder how you ever made it any other way.
What Makes This Version Stand Out
- Flavor Harmony: The buttery dough pairs with a vanilla‑kissed frosting that’s sweet but never cloying, letting the chocolate egg’s richness shine.
- Texture Perfection: A crisp, golden edge gives way to a tender, melt‑in‑your‑mouth center, creating a delightful contrast in every bite.
- Simplicity: Fewer than ten ingredients and a single bowl for the dough keep the process breezy, even for novice bakers.
- Visual Wow Factor: The pastel‑colored frosting and sparkling sprinkles turn each cookie into a tiny work of art, perfect for Instagram.
- Crowd Reaction: Kids and adults alike line up for seconds; it’s the kind of cookie that sparks spontaneous “Can I have another?” chants.
- Ingredient Quality: Using real butter and pure vanilla extracts elevates the flavor profile far beyond store‑bought mixes.
- Cooking Method: Baking at a moderate temperature ensures even browning without burning the delicate frosting.
- Make‑Ahead Potential: These cookies store beautifully, and the frosting can be pre‑colored and chilled for next‑day convenience.
Alright, let's break down exactly what goes into this masterpiece...
Inside the Ingredient List
The Flavor Base
Unsalted Butter (1 cup): This is the heart of the cookie, providing richness and a tender crumb. Butter’s milk solids caramelize during baking, giving the edges that golden‑brown kiss we all love. If you swap for margarine, expect a slightly greasy texture and a loss of that buttery aroma that makes the dough sing. Pro tip: Choose European‑style butter with a higher fat content for an even richer flavor.
The Texture Crew
Granulated Sugar (½ cup): It adds sweetness and helps create a slight crunch on the surface. Skipping it will result in a bland, overly soft cookie that lacks that satisfying snap. You can substitute half with brown sugar for a deeper, caramel note, but the classic version stays crisp and clean.
All‑Purpose Flour (2 cups): Flour forms the structure, and the amount determines whether the cookie is cakey or crisp. Too much flour makes them dry; too little makes them spread. For a gluten‑free twist, use a blend of rice flour and tapioca starch, but keep the total weight the same.
Salt (¼ tsp): Just a pinch to enhance the sweet flavors and balance the butter’s richness. Omitting salt makes the cookies taste flat, like a song missing its bass line.
The Unexpected Star
Egg Yolk (1 large): It acts as a binder, adding a silky mouthfeel without the extra moisture of a whole egg. The yolk’s fat contributes to the cookie’s tender crumb. If you’re avoiding cholesterol, you can replace with a tablespoon of aquafaba, but the texture will be slightly different.
Vanilla Extract (1 tsp for dough, ½ tsp for frosting): The aromatic backbone that ties the butter and sugar together. Fresh, pure vanilla extract delivers a warm, floral note that artificial versions can’t match. If you’re out of vanilla, a splash of almond extract works, but use half the amount to avoid overpowering.
The Final Flourish
Powdered Sugar (1 cup): This creates the smooth, glossy frosting that clings to the thumbprint like a gentle hug. It dissolves quickly, preventing any gritty texture. If you prefer a less sweet frosting, cut the amount by a quarter and add a touch more milk.
Milk (2 tbsp): Provides the right consistency for the frosting, making it pourable yet thick enough to hold its shape. Whole milk yields a richer mouthfeel; skim milk works if you’re watching calories, but the frosting will be slightly less velvety.
Food Coloring: A few drops of pastel hues turn the frosting into a springtime palette. Too much will make the flavor taste like a candy store, so start with a tiny amount and build up.
Mini Chocolate Eggs or Pastel‑Colored Candy‑Coated Chocolates: These hidden treasures burst with chocolatey delight when you bite into the cookie’s center. They’re the surprise element that makes an Easter hunt truly exciting. If you’re allergic to chocolate, try white chocolate chips or fruit‑filled jelly beans.
Edible Sprinkles or Glitter: A final sparkle that catches the eye and adds a subtle crunch. Choose gluten‑free varieties if needed.
Everything's prepped? Good. Let's get into the real action...

The Method — Step by Step
Start by softening the butter at room temperature; it should be pliable but not melted. In a large mixing bowl, cream the butter with the granulated sugar until the mixture looks like a pale, fluffy cloud. This process incorporates air, which is the secret to those light, airy edges. Pro tip: Use a hand mixer on medium speed for 3‑4 minutes; you’ll hear the subtle whirring that signals it’s ready.
Add the egg yolk and the first teaspoon of vanilla extract to the butter‑sugar mixture. Beat until fully combined, noticing how the dough becomes richer and smoother.
Kitchen Hack: If the mixture looks too loose, sprinkle in a tablespoon of flour to bring it back to a workable consistency.Gradually sift in the flour and salt, stirring gently with a spatula. The dough should come together in a soft, slightly sticky ball—don’t over‑mix, or you’ll develop gluten and lose that tender crumb. At this point, the dough will feel like a plush pillow, ready for a brief chill.
Wrap the dough in plastic wrap and refrigerate for 30‑45 minutes. This chilling step is crucial; it solidifies the butter so the cookies won’t spread too much, and it firms up the dough for clean thumbprints. Watch Out: Skipping this step leads to flat, uneven cookies that lose their iconic shape.
While the dough chills, prepare the frosting. In a separate bowl, whisk together the powdered sugar, milk, and the remaining half‑teaspoon of vanilla extract until smooth. Add a few drops of your chosen food coloring, stirring until the hue is evenly distributed. The frosting should be glossy and thick enough to hold its shape when piped.
Preheat your oven to 350°F (175°C). Line two baking sheets with parchment paper; this prevents sticking and ensures even browning. Place the chilled dough onto a lightly floured surface and roll it out to about ¼‑inch thickness. Use a round cookie cutter (about 2‑inches in diameter) to cut out circles.
Transfer the circles onto the prepared baking sheets, spacing them about an inch apart. Using the back of a teaspoon, press gently into the center of each cookie to create a thumbprint.
Fill each well with a small dollop of the colored frosting—about a teaspoon per cookie.Watch Out: Press just enough to form a shallow well; too deep and the frosting will overflow, turning the cookie into a mess.Place a mini chocolate egg or a piece of pastel‑colored candy right in the center of each frosting dollop. The chocolate will melt slightly during baking, creating a luscious core. Sprinkle the tops with edible sprinkles or glitter for that final sparkle.
Slide the trays into the preheated oven and bake for 12‑14 minutes, or until the edges turn a light golden brown and the centers are set but still soft. You’ll notice a faint, buttery aroma that fills the kitchen like a warm hug. Power transition: This is the moment of truth—do not open the oven door early, or the cookies will collapse.
Remove the cookies and let them cool on the sheet for 5 minutes before transferring to a wire rack. As they cool, the frosting will set, creating a glossy finish that catches the light. Picture yourself pulling this out of the oven, the whole kitchen smelling incredible, and the anticipation building as the first cookie is broken open.
That's it — you did it. But hold on, I've got a few more tricks that'll take this to another level...
Insider Tricks for Flawless Results
The Temperature Rule Nobody Follows
Always start with room‑temperature butter, but chill the dough after mixing. The contrast of temperatures creates a perfect bake: the butter melts gradually, giving a crisp edge while the interior stays soft. I once tried baking straight from the fridge and ended up with pale, under‑baked cookies. Trust the chill, and the results will be golden every time.
Why Your Nose Knows Best
When the cookies are about 10 minutes in, lean in and sniff. A subtle, nutty aroma signals the butter is caramelizing just right. If you detect a burnt smell, the oven is running hot—pull them out immediately. Your sense of smell is a more reliable timer than any clock.
The 5‑Minute Rest That Changes Everything
After baking, let the cookies rest on the sheet for exactly five minutes before moving them. This short pause lets the frosting set and the cookie interior finish its gentle steam‑cook. Skipping this step results in frosting that slides off and a crumbly texture.
Sprinkle Strategy
Apply sprinkles while the frosting is still wet. The moisture acts like glue, ensuring the glitter adheres perfectly. If you add them after the frosting hardens, they’ll just sit on top and fall off with the slightest touch.
Batch Baking Balance
Do not overcrowd the baking sheet. Each cookie needs space to expand; otherwise, they’ll merge into a single, misshapen blob. I’ve learned this the hard way—one pan of 30 cookies turned into a chocolatey pancake. Keep them spaced, and you’ll have uniform, Instagram‑ready results.
Creative Twists and Variations
This recipe is a playground. Here are some of my favorite ways to switch things up:
Berry Burst
Swap the chocolate egg for a fresh raspberry or a dollop of strawberry jam. The tart fruit cuts through the sweetness, offering a bright, spring‑time pop that’s perfect for a brunch spread.
Nutty Delight
Replace the mini chocolate eggs with chopped toasted almonds or hazelnuts. The nutty crunch adds texture, and the buttery flavor deepens, making these cookies feel more sophisticated.
Matcha Magic
Mix a teaspoon of matcha powder into the frosting and use green food coloring for an earthy, pastel hue. The subtle bitterness of matcha balances the sweet butter, creating a harmonious flavor profile.
Caramel Swirl
Drizzle a thin line of caramel sauce over the frosting before adding sprinkles. The caramel adds a buttery, toffee note that pairs beautifully with the chocolate center.
Vegan Velvet
Swap butter for coconut oil, use a flax egg (1 tbsp ground flaxseed + 3 tbsp water) instead of the egg yolk, and choose a plant‑based milk. The result is a vegan‑friendly cookie that still boasts that coveted crisp‑soft texture.
Holiday Blend
For a winter twist, use red and green sprinkles, add a pinch of cinnamon to the dough, and hide tiny peppermint candies instead of chocolate eggs. It’s a festive spin that works for Christmas cookie swaps.
Storing and Bringing It Back to Life
Fridge Storage
Place the cooled cookies in an airtight container with a paper towel on top to absorb any excess moisture. They’ll stay fresh for up to five days, and the frosting remains glossy. If you notice the frosting drying out, add a tiny dab of melted butter to the container lid to create a humid micro‑environment.
Freezer Friendly
Arrange cookies on a parchment‑lined tray and freeze for an hour, then transfer them to a zip‑top bag. They’ll keep for three months. When you’re ready to serve, let them thaw at room temperature for 20 minutes, then give them a quick 5‑minute bake at 300°F to refresh the crisp edges.
Best Reheating Method
Pop the cookies in a preheated oven at 300°F for 5‑7 minutes. Add a tiny splash of water (just a few drops) to the baking sheet before heating; the steam revives the frosting’s sheen and restores the cookie’s interior softness. This trick works like magic, turning a day‑old cookie into a fresh‑out‑of‑the‑oven delight.