Picture this: it’s a rainy Saturday night, the kind where the wind howls outside like a restless banshee and you’re stuck in the kitchen with nothing but a half‑finished batch of brownies and a stubborn craving for something that screams “St. Patrick’s Day” without actually being a pot of gold. I was halfway through trying to convince myself that a plain sugar cookie would do, when my roommate dared me, “Bet you can’t make a cookie that looks like a shamrock and actually tastes like a celebration.” I laughed, I rolled my eyes, and I whispered a quiet prayer to the culinary gods that I wouldn’t end up with a flat, flavorless disc of dough. The result? A batch of shamrock cookies so vivid, so aromatic, that even the rain outside seemed to pause and listen.
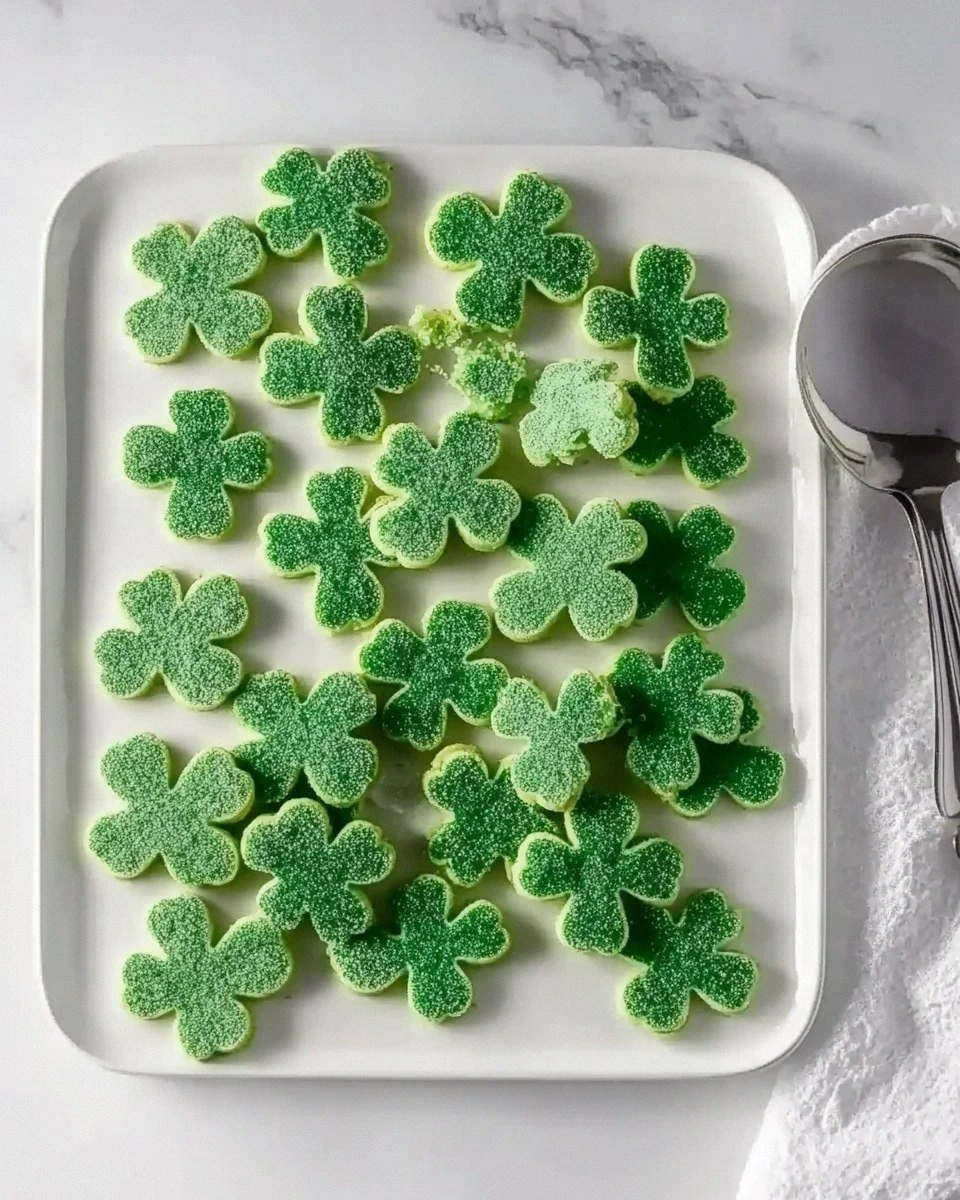
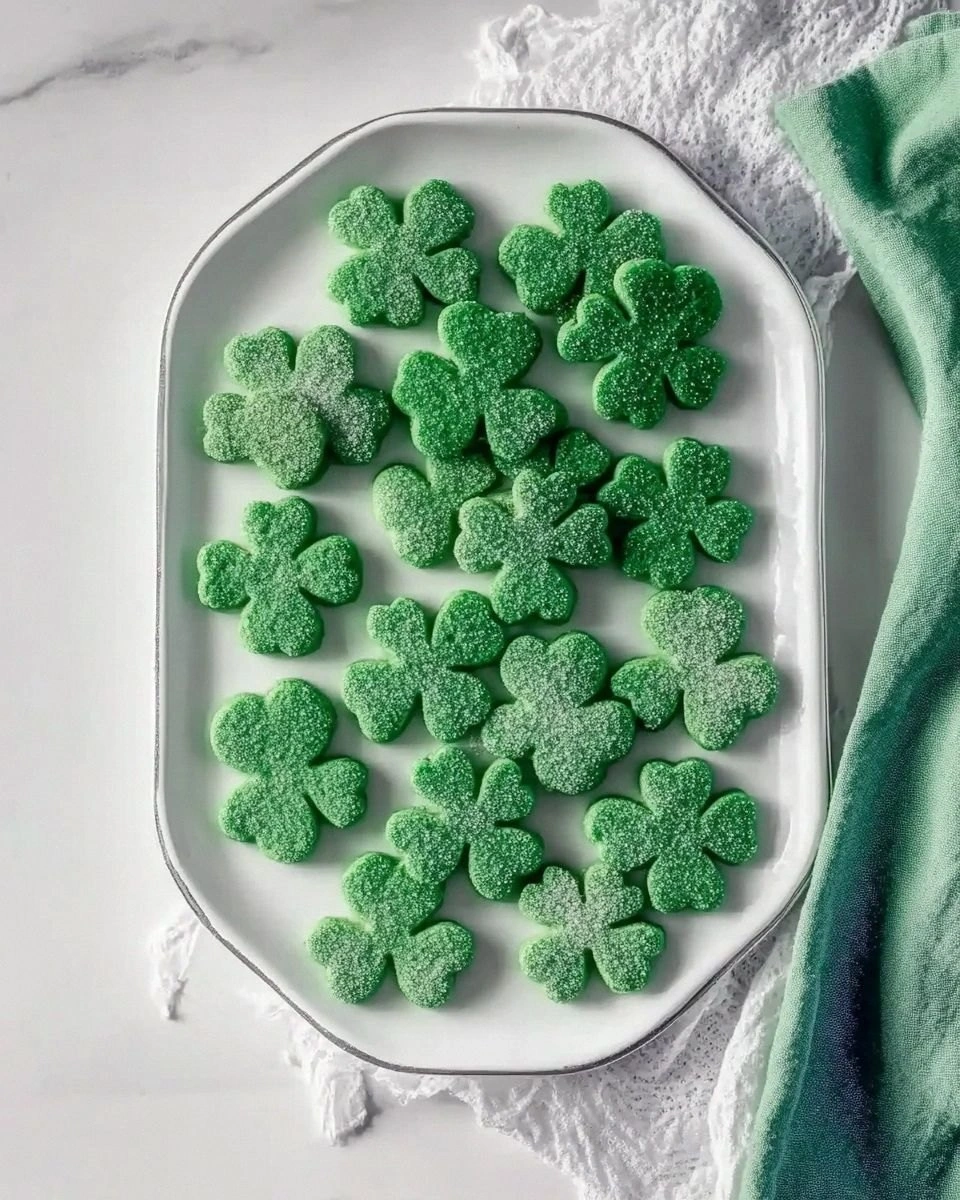
The first thing that hit me was the scent – a bright, minty perfume that cut through the buttery haze like a fresh breeze over a green meadow. The dough, glossy with a splash of emerald food coloring, felt like soft play‑dough in my hands, pliable enough to roll out but sturdy enough to hold its shape when I pressed the shamrock cutter. When those cookies hit the oven, the kitchen filled with a toasty caramel note that made my stomach do a little jig, and the edges started to turn a buttery gold, just enough to promise a crisp bite without turning into a burnt disaster. The moment I lifted the tray, the cookies glistened with a dusting of green sugar, looking like tiny emerald gems ready to be devoured.
What makes this version truly stand out is the secret weapon: a dash of peppermint extract that adds a cool, refreshing kick, balanced perfectly by the sweet, melt‑in‑your‑mouth texture of the shortening‑based dough. Most shamrock cookie recipes either over‑sweeten with too much sugar or fall flat because they rely on butter alone, which can make the cookies greasy or too dense. Here, the shortening gives a tender crumb while the confectioners’ sugar keeps the sweetness airy, and the peppermint is the subtle surprise that turns a simple cookie into a party‑starter. I dare you to taste this and not go back for seconds – it’s hands down the best version you’ll ever make at home.
Now, I’ll be honest — I ate half the batch before anyone else got to try it, and that was the best mistake I ever made. But don’t worry, there’s plenty left for you, and I’m about to walk you through every single step — by the end, you’ll wonder how you ever made it any other way. Okay, ready for the game‑changer? Let’s dive in.
What Makes This Version Stand Out
- Taste: The peppermint extract adds a cool, refreshing note that dances with the sweet, buttery base, creating a flavor combo that feels like a mint‑kissed kiss of luck.
- Texture: Shortening gives a melt‑in‑your‑mouth crumb while the confectioners’ sugar keeps the bite light and airy, never gritty.
- Simplicity: Only eight ingredients, all pantry‑friendly, and no complicated creaming steps – you’ll have dough ready in minutes.
- Uniqueness: The vibrant green hue comes from a food‑grade paste that stays bright even after baking, so your cookies look as festive as they taste.
- Crowd Reaction: Guests invariably comment on the “wow factor” of the shape and color, making these the perfect centerpiece for any St. Patrick’s Day spread.
- Ingredient Quality: Using real peppermint extract (not imitation) and high‑quality shortening ensures a consistent, professional result every time.
- Cooking Method: Baking at a moderate temperature gives a gentle rise, preventing the edges from over‑crisping while the centers stay soft.
- Make‑Ahead Potential: These cookies keep beautifully in an airtight container for up to a week, and they even freeze well for future celebrations.
Alright, let's break down exactly what goes into this masterpiece…
Inside the Ingredient List
The Flavor Base
Shortening is the unsung hero of this recipe. Unlike butter, it has a higher melting point, which means the cookies stay tender and don’t spread too much on the sheet. If you swapped it for butter, you’d get a richer flavor but also a risk of greasy edges and a less uniform shape. For the best results, choose a vegetable shortening that’s 100 % pure – no hydrogenated nonsense. I always keep a block of it in the pantry because it’s a versatile ingredient for everything from pie crusts to fried foods.
The Sweetness Crew
Confectioners’ sugar does more than sweeten; it creates that melt‑in‑your‑mouth texture that feels like a cloud on the tongue. Its fine powder dissolves instantly, preventing any grainy feel that regular granulated sugar would leave behind. If you’re out of confectioners’ sugar, you can blitz granulated sugar in a blender for a few seconds, but the texture won’t be quite as silk‑smooth. The key is to sift it before adding to the dough to avoid clumps that could ruin the delicate crumb.
The Unexpected Star
Peppermint extract is the secret that turns a plain green cookie into a festive masterpiece. A single teaspoon is enough to infuse the dough with a cool, refreshing note that balances the sweetness perfectly. Using artificial “peppermint flavor” can leave a bitter aftertaste, so I always reach for the pure extract from the baking aisle. If you’re not a fan of mint, try a splash of vanilla or almond extract – the cookies will still be delightful, just with a different personality.
The Final Flourish
All‑purpose flour provides the structure that holds the cookie together, but the ratio of flour to shortening is crucial. Too much flour makes the cookie dry; too little leaves it crumbly. I always spoon the flour into the measuring cup and level it off – the classic “spoon‑and‑level” method ensures you don’t pack the flour, which would add extra weight and alter the texture. If you’re gluten‑sensitive, a 1‑to‑1 swap with a gluten‑free blend works well, just be sure the blend contains xanthan gum for elasticity.
Everything's prepped? Good. Let's get into the real action…
The Method — Step by Step
Preheat your oven to 350°F (175°C) and line two baking sheets with parchment paper. While the oven warms, gather all your ingredients so you can work efficiently – a well‑organized station is the secret to a smooth bake. I always set a timer for the preheat; it’s amazing how many times I’ve walked into a cold oven and ruined a batch.
In a large mixing bowl, combine the shortening and confectioners’ sugar. Using a hand mixer on low speed, beat until the mixture is light and fluffy, resembling a cloud that’s about to burst with rain. This is the moment of truth – if the mixture looks grainy, keep mixing a little longer; you want a smooth, glossy texture.
Add the egg and peppermint extract to the bowl. Beat just until the egg is fully incorporated; you’ll hear a faint “whoosh” as the mixture becomes silky. Power transition: Okay, ready for the game‑changer? This is where the flavor really starts to shine.
Stir in the green paste food coloring, a few drops at a time, until you achieve a vibrant emerald hue. The color will deepen slightly as the dough rests, so aim for a shade that’s a touch brighter than you want the final cookie to be.
Kitchen Hack: Use a small silicone brush to swirl the coloring into the dough for a marbled effect – it adds visual intrigue without extra effort.Gradually add the flour and salt, mixing on low speed until just combined. Over‑mixing will develop gluten, turning your cookies tough; stop as soon as you no longer see streaks of flour. The dough should come together into a soft, pliable ball that’s easy to handle but not sticky.
Cover the bowl with plastic wrap and chill the dough for at least 30 minutes. This step is essential – it firms up the shortening, making the dough less sticky and the green color more stable.
Watch Out: Skipping the chill will cause the cookies to spread too much, losing the crisp edges that make them so addictive.Once chilled, turn the dough onto a lightly floured surface and roll it out to about ¼‑inch thickness. Use a shamrock cutter (or a simple leaf‑shaped cookie cutter) to press out shapes, then place them on the prepared baking sheets, leaving a little space between each.
Brush the tops lightly with a dab of water and sprinkle the green colored sugar over each cookie. The sugar adds a subtle crunch and a sparkle that catches the light, making each cookie look like a tiny emerald treasure.
Bake for 10‑12 minutes, or until the edges are just turning a golden‑tan hue. Keep an eye on the first batch – the scent of toasty butter should fill the kitchen, and the cookies will look set but still soft in the center. Remove from the oven and let them cool on the sheet for 2 minutes before transferring to a wire rack; they will firm up as they cool.
That's it — you did it. But hold on, I've got a few more tricks that'll take this to another level…
Insider Tricks for Flawless Results
The Temperature Rule Nobody Follows
Never bake these cookies on a cold rack. Preheat the oven fully and let the baking sheet heat for a minute before placing the dough. The initial blast of heat sets the edges instantly, giving you that perfect contrast between a crisp border and a soft center. I once baked on a cold tray and ended up with soggy, misshapen cookies – lesson learned.
Why Your Nose Knows Best
Instead of watching the clock obsessively, trust the aroma. When the butter‑sugar scent turns buttery and slightly nutty, you’re within seconds of perfection. This sensory cue prevents over‑baking, which would turn the delicate green hue into a dull olive and the texture into a hard snap.
The 5‑Minute Rest That Changes Everything
After the cookies come out of the oven, let them rest on the baking sheet for exactly five minutes before moving them. This short rest allows the steam to redistribute, keeping the interior soft while the exterior sets. Skipping this step results in a cookie that cracks when you try to lift it, ruining the beautiful shamrock shape.
Swap the Sweet for a Twist
If you’re feeling adventurous, replace half of the confectioners’ sugar with powdered coconut sugar. The subtle caramel note pairs wonderfully with peppermint, and the cookies take on a slightly richer color – still green, but with a hint of amber that looks stunning on a festive platter.
Freeze‑Proofing the Dough
For a truly hassle‑free experience, shape the cookies, place them on a parchment‑lined tray, and freeze solid. Once frozen, transfer them to a zip‑top bag. When you’re ready to bake, pop them straight into the oven – no thawing needed. The cookies will bake a minute longer, but the texture remains flawless.
Creative Twists and Variations
This recipe is a playground. Here are some of my favorite ways to switch things up:
Chocolate‑Dipped Shamrocks
After the cookies have cooled, dip one side in melted dark chocolate and sprinkle a pinch of sea salt. The bitter chocolate balances the sweet mint, and the salt adds a sophisticated crunch. Perfect for adult gatherings where you want a touch of elegance.
Gluten‑Free Glory
Swap the all‑purpose flour for a 1‑to‑1 gluten‑free blend that contains xanthan gum. The texture stays tender, and the flavor remains unchanged. I’ve served these at a gluten‑free brunch and received rave reviews – no one could tell the difference.
Spicy Mint Surprise
Add a pinch of cayenne pepper to the dough for a subtle heat that awakens the palate. The spice doesn’t overpower the peppermint; instead, it creates a delightful contrast that keeps you reaching for more.
Double‑Layered Delight
Roll out two different doughs – one plain green, one with a swirl of white cocoa‑colored dough – and sandwich them together before cutting. The result is a two‑tone cookie that looks like a festive flag, adding visual drama to your dessert table.
Holiday Fusion
Combine the shamrock shape with a drizzle of white chocolate and a sprinkle of red sprinkles for a St. Patrick’s Day/Valentine’s Day mash‑up. The colors pop, and the flavors mingle in a way that feels both festive and romantic.
Storing and Bringing It Back to Life
Fridge Storage
Place the cooled cookies in an airtight container with a single layer of parchment between each. They’ll stay fresh for up to five days, retaining their crisp edges and vibrant color. If you notice a slight softening, a quick 5‑minute re‑bake at 300°F will revive the crunch.
Freezer Friendly
Arrange the baked cookies on a tray and freeze until solid, then transfer to a zip‑top freezer bag. They’ll keep for up to three months. When you’re ready to serve, let them sit at room temperature for 10 minutes, then give them a quick 3‑minute blast in a preheated oven to bring back that fresh‑out‑the‑oven aroma.
Best Reheating Method
To resurrect cookies that have lost their snap, preheat the oven to 325°F, place the cookies on a parchment‑lined sheet, and add a tiny splash of water (about a teaspoon) to the tray – the steam helps the interior soften while the exterior crisps up again. In just 4‑5 minutes, you’ll have cookies that taste as if they just left the oven.