I was standing in my kitchen at midnight, staring at a half‑finished batch of brownies that looked more like a sad, flat pancake than the gooey masterpiece I was craving. My roommate had dared me to make something that could survive a road trip, a movie marathon, and a midnight snack attack all in one go. I tried the classic fudgy brownie, but it came out dry, and the marshmallows I tossed in turned into a rubbery mess that reminded me of a failed science experiment. I thought, “If I can’t get this right, no one ever will,” and that’s when the lightbulb flickered on – what if I treated the marshmallows like a delicate, melt‑in‑your‑mouth topping instead of a random add‑in?
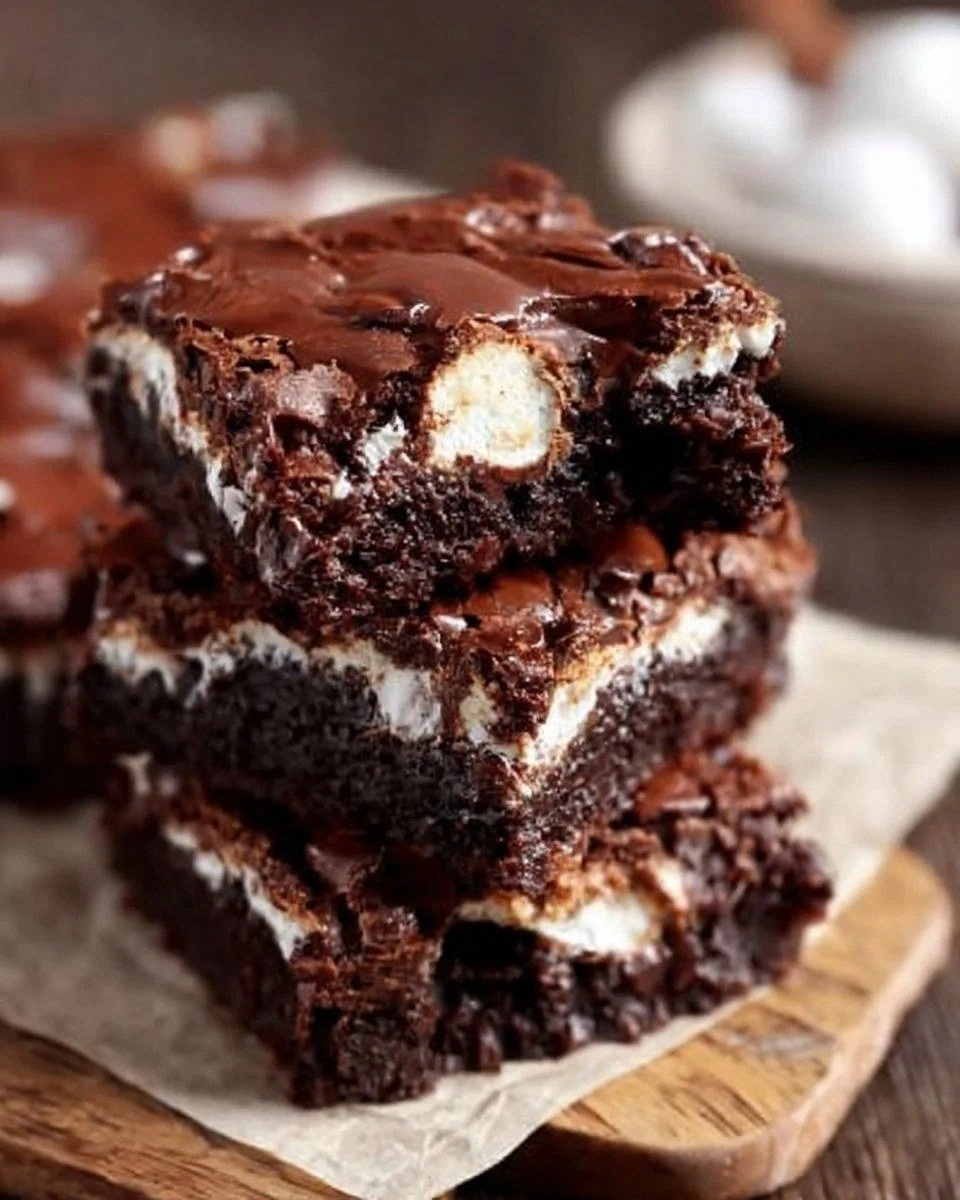
Picture this: the oven door swings open, a wave of chocolate‑rich aroma floods the room, and tiny pockets of toasted marshmallow peek through a glossy, crackly crust. The scent is a perfect marriage of cocoa and caramel, with a hint of vanilla that makes your nose do a little happy dance. The texture? Imagine a brownie that’s dense enough to satisfy a chocolate craving but soft enough that a fork glides through it like it’s cutting through satin. The marshmallows create pockets of airy sweetness that melt into a buttery, fudgy sea, giving you that “wow, I’ve never had this before” moment with every bite.
Most recipes either drown the marshmallows in a sea of sugar or bake them into a chewy, gummy mess. This version flips the script. By folding the marshmallows in at just the right moment and using a precise butter‑to‑cocoa ratio, you get a brownie that’s both crisp around the edges and molten in the middle. The secret ingredient isn’t a secret at all – it’s timing, and a dash of patience. I dare you to taste this and not go back for seconds; I guarantee you’ll be the one handing out pieces like a benevolent dessert overlord.
Let me walk you through every single step — by the end, you’ll wonder how you ever made it any other way. Okay, ready for the game‑changer? This next part? Pure magic.
What Makes This Version Stand Out
- Texture: The crust is crisp enough to snap, while the interior stays fudgy and melt‑in‑your‑mouth soft, thanks to a balanced butter‑cocoa blend.
- Flavor Depth: Unsweetened cocoa provides a deep, almost coffee‑like bitterness that balances the sugary marshmallows perfectly.
- Marshmallow Magic: Mini marshmallows are folded in at the last minute, creating pockets of airy sweetness that never turn rubbery.
- Simplicity: Only nine ingredients, all pantry staples, and no fancy equipment – just a good old mixing bowl and a trusty oven.
- Crowd Reaction: This brownie has a reputation for clearing plates faster than you can say “second helping.”
- Make‑Ahead Potential: It stores beautifully, and a quick reheating brings it back to life like it never left the oven.
- Ingredient Quality: Using high‑quality unsalted butter and real cocoa powder makes the difference between “good” and “legendary.”
- Cooking Method: A moderate oven temperature ensures the edges set while the center stays gooey – no over‑baking.
Inside the Ingredient List
The Flavor Base
Unsweetened cocoa powder is the heart of any great brownie. It provides the deep, almost earthy chocolate flavor that makes each bite feel like a small indulgent secret. If you skimp on cocoa, you’ll end up with a bland, sugary cake rather than a true brownie. A good tip: give the cocoa a quick toast in a dry skillet for 30 seconds – this unlocks hidden aromatics and adds a subtle, roasted note that’s hard to achieve otherwise. If you’re out of cocoa, a high‑quality dark chocolate (70% cacao) melted into the butter can substitute, but you’ll need to reduce the sugar slightly.
The Texture Crew
Butter is the liquid gold that carries flavor and creates that melt‑in‑your‑mouth feel. Use unsalted butter so you can control the salt level precisely. Melt it gently over low heat; overheating will cause the butter to separate, resulting in a greasy brownie. Granulated sugar not only sweetens but also helps create the thin, crackly top when it caramelizes. If you prefer a slightly softer crumb, swap half the granulated sugar for brown sugar – you’ll get a richer, almost caramel‑like undertone.
The Unexpected Star
Mini marshmallows are the surprise guest that turns a regular brownie into a party trick. Their tiny size ensures they distribute evenly, creating pockets of sweet, airy goodness. If you use regular marshmallows, they’ll clump and melt into a gooey mess. For a twist, try toasted coconut flakes mixed with the marshmallows for a tropical crunch, or a handful of toasted almond slivers for extra texture. Just remember: the marshmallows should be folded in after the batter has cooled slightly, or they’ll melt completely.
The Final Flourish
All‑purpose flour provides the structure that holds the brownie together without making it cakey. The key is to measure it by spooning into the cup and leveling off – packing it will lead to a dense, heavy texture. Salt, though used in a tiny amount, amplifies the chocolate flavor and balances the sweetness. If you’re on a low‑sodium diet, you can cut the salt in half; the brownies will still be delicious, just slightly less complex. Finally, chocolate chips or chunks melt into pockets of extra chocolatey goodness – choose dark chips for a more intense flavor, or milk chocolate for a sweeter finish.
Everything's prepped? Good. Let's get into the real action...
The Method — Step by Step
Preheat your oven to 350°F (175°C). While the oven heats, line a 9×13‑inch baking pan with parchment paper, then lightly butter the paper. This creates a non‑stick surface and adds a buttery edge that will lift the brownies off the pan in one smooth motion. The oven should be fully preheated before the batter goes in; an under‑heated oven leads to uneven rise.
Melt the butter in a medium saucepan over low heat. Once melted, remove from heat and whisk in the unsweetened cocoa powder until a glossy, thick paste forms. This is the moment where the chocolate aroma starts to fill the kitchen – that sizzle when it hits the pan? Absolute perfection.
Kitchen Hack: Add a pinch of espresso powder to the cocoa‑butter mix; it intensifies the chocolate flavor without tasting like coffee.In a large mixing bowl, combine the granulated sugar with the cocoa‑butter mixture, stirring until fully incorporated. The mixture will look slightly grainy at first, but keep mixing – the sugar will dissolve a bit, creating a glossy base. This is where the batter starts to look like a dark, velvety river of chocolate.
Watch Out: Do not over‑mix once you add the eggs; over‑mixing can incorporate too much air, leading to a cakey texture.Add the eggs one at a time, whisking after each addition. Follow with the vanilla extract. The batter should become silky and slightly glossy. If the batter looks too thick, add a tablespoon of warm water – this helps the sugar dissolve and keeps the brownies fudgy.
Sift together the all‑purpose flour, salt, and the remaining cocoa powder (if you like a double‑cocoa boost) into a separate bowl. Gently fold the dry ingredients into the wet batter using a rubber spatula. The goal is to incorporate everything without over‑working the flour; stop as soon as you see no streaks of flour. This step is crucial – it’s the reason the brownies stay dense and not cake‑like.
Now comes the marshmallow moment. Sprinkle the mini marshmallows over the top of the batter, then gently fold them in. The marshmallows should be evenly distributed but not crushed. If you’re feeling adventurous, reserve a handful to sprinkle on top for a toasted marshmallow finish after baking.
Fold in the chocolate chips or chunks, ensuring they’re spread throughout the batter. This creates pockets of molten chocolate that will ooze out as the brownies bake.
Kitchen Hack: Chill the batter for 10 minutes before pouring it into the pan; this reduces spreading and gives you a thicker, more fudgy final product.Pour the batter into the prepared pan, spreading it evenly with the spatula. Tap the pan gently on the counter to release any large air bubbles. The surface should be smooth, but you can leave a few peaks where the marshmallows sit – they’ll rise and caramelize during baking.
Bake for 28‑32 minutes, or until a toothpick inserted into the center comes out with just a few moist crumbs attached. The edges will start pulling away from the sides of the pan, and the top will have a glossy sheen. Resist the urge to open the oven door early; the sudden temperature change can cause the brownies to sink.
Remove the pan from the oven and let the brownies cool in the pan for 15 minutes. Then, using the parchment overhang, lift the whole slab onto a cutting board. Slice into squares while still warm for that perfect oozy center, or wait until fully cooled for cleaner cuts. That first bite? Pure, fudgy heaven with marshmallow pockets that melt like clouds.
That's it — you did it. But hold on, I've got a few more tricks that'll take this to another level...
Insider Tricks for Flawless Results
The Temperature Rule Nobody Follows
Most home bakers set the oven to 350°F and forget about the actual heat distribution inside. Use an oven thermometer to verify that the temperature is accurate; many ovens run 15‑25 degrees hotter, which can over‑bake the edges and leave the center undercooked. If you discover a discrepancy, adjust the dial accordingly. I once baked at a “350°F” that was really 375°F, and the brownies turned into a crunchy slab. Trust the thermometer, not the dial.
Why Your Nose Knows Best
When the brownies are done, they give off a sweet, toasty aroma that’s unmistakable. If you can smell the caramelized edges and a faint hint of marshmallow, they’re ready. Relying solely on time can lead to over‑baking, especially if your oven runs hot. Trust your nose; it’s the most reliable indicator of that perfect fudgy interior.
The 5‑Minute Rest That Changes Everything
After removing the brownies from the oven, let them rest for exactly five minutes before cutting. This short pause lets the steam settle, the chocolate set just enough to hold together, and the marshmallows firm up slightly. Cutting too early results in a mess; waiting too long makes the brownies too firm. Five minutes is the sweet spot – you’ll get clean slices with that glorious ooze still visible.
Don’t Skip the Parchment Overhang
The parchment overhang is not just for show; it acts as a built‑in handle. When the brownies have cooled, lift the slab by the overhang and place it on a cutting board. This prevents the bottom from breaking and keeps the edges intact. I once tried to slide the whole pan onto a plate and ended up with a shattered bottom – lesson learned.
The Secret of the Mini Marshmallow Toast
If you want an extra layer of flavor, toast the mini marshmallows in a dry skillet for 30 seconds before folding them in. The toasting adds a subtle caramel note that elevates the entire brownie. Be careful not to burn them; you’re looking for a light golden hue, not a blackened mess. A friend tried skipping this step once — let’s just say the marshmallows tasted like cheap camping treats.
Creative Twists and Variations
This recipe is a playground. Here are some of my favorite ways to switch things up:
Peanut Butter Swirl
Drop dollops of creamy peanut butter over the batter before baking and swirl with a knife. The salty‑nutty ribbons contrast the sweet marshmallows and create a flavor combo that’s pure comfort food.
Salted Caramel Drizzle
After the brownies have cooled, drizzle a homemade salted caramel sauce over the top and sprinkle a pinch of flaky sea salt. The salty caramel adds a sophisticated finish that makes these brownies worthy of a holiday party.
Espresso Infusion
Add a tablespoon of instant espresso powder to the cocoa‑butter mixture. The coffee deepens the chocolate flavor and adds a subtle bitterness that balances the sweetness of the marshmallows.
White Chocolate & Raspberry
Swap half of the dark chocolate chips for white chocolate chips and fold in a handful of freeze‑dried raspberry pieces. The tart berries cut through the richness, while the white chocolate adds a creamy, buttery note.
Nutty Crunch
Mix in a quarter cup of toasted chopped pecans or walnuts. The nuts add a crunchy texture that contrasts the soft marshmallow pockets, giving each bite a satisfying bite.
Storing and Bringing It Back to Life
Fridge Storage
Place the cooled brownies in an airtight container and store them in the refrigerator for up to five days. The cool environment keeps the chocolate from blooming and the marshmallows from becoming overly sticky. When you’re ready to eat, let a piece sit at room temperature for ten minutes or microwave for 10‑15 seconds for that fresh‑out‑of‑the‑oven feel.
Freezer Friendly
Wrap individual squares tightly in plastic wrap, then place them in a freezer‑safe zip‑top bag. They’ll keep for up to three months. To reheat, microwave a single square for 20 seconds, then add a tiny splash of water to the plate and cover with a damp paper towel – the steam revives the fudgy texture.
Best Reheating Method
For the ultimate warm‑up, preheat your oven to 300°F (150°C), place the brownies on a foil‑lined baking sheet, and heat for 8‑10 minutes. The edges will crisp slightly while the center stays molten. Adding a teaspoon of water to the pan before reheating creates steam that prevents the brownies from drying out.