I remember the night I tried to rescue a half‑baked pot pie that had been left in the oven too long. The crust was a sad, soggy gray, and the filling had turned into a rubbery mess that clung to the bottom of the pan. I stared at the disaster, then decided I’d never settle for mediocre comfort food again. That night I vowed to create a pot pie that would make the oven itself sigh in relief.
Fast forward a few months, and I’ve perfected a version of the classic that feels like a warm hug in a flaky, buttery shell. The aroma alone—bubbling butter, caramelized onions, and the faint citrus note of white wine—draws you in before the first bite. When the steam rises, you can taste the bright, velvety sauce coating the vegetables like a silk curtain. And the edges? They crackle and lift just enough to reveal a golden, crisp interior that shatters like thin ice when you cut through it.
What makes this recipe stand out is not just the texture or flavor; it’s the way every element works in harmony. The rotisserie chicken, shredded and tossed with herbs, delivers a depth that a fresh chicken could never match. The mixture of frozen corn, peas, and pearl onions gives the filling a playful pop of color and bite that keeps the dish from feeling heavy. And the puff pastry—soft yet resilient—holds everything together while adding a buttery crunch that elevates the whole experience.
I dare you to taste this and not go back for seconds. Most recipes get this completely wrong, but I’ve found the trick to be a simple, almost secret ingredient: a splash of white cooking wine that brightens the sauce without overpowering the rest. Picture yourself pulling this out of the oven, the whole kitchen smelling incredible, and then sitting down to a slice that feels like a celebration. Let me walk you through every single step—by the end, you’ll wonder how you ever made it any other way.
What Makes This Version Stand Out
- Taste: The sauce is a silky, savory blanket that coats the chicken and vegetables with a subtle citrus lift from white wine, making each bite feel fresh and vibrant.
- Texture: The puff pastry is flaky yet sturdy, creating a crisp edge that contrasts beautifully with the tender filling.
- Ingredient Quality: Using a pre‑shredded rotisserie chicken saves time while delivering deep, smoky flavor that fresh chicken simply can’t match.
- Make‑Ahead Potential: The pot pie can be assembled and refrigerated before baking, allowing you to bring home a ready‑to‑cook meal on busy evenings.
- Ingredient Balance: The mix of fresh and frozen vegetables keeps the dish light yet satisfying, and the addition of pearl onions adds a subtle sweetness.
- Crowd Reaction: Friends and family consistently rave about the buttery crust and the rich, comforting sauce—no one can resist a second slice.
- Time Efficiency: The entire process takes less than an hour, making it an ideal dinner for week‑night hustle.
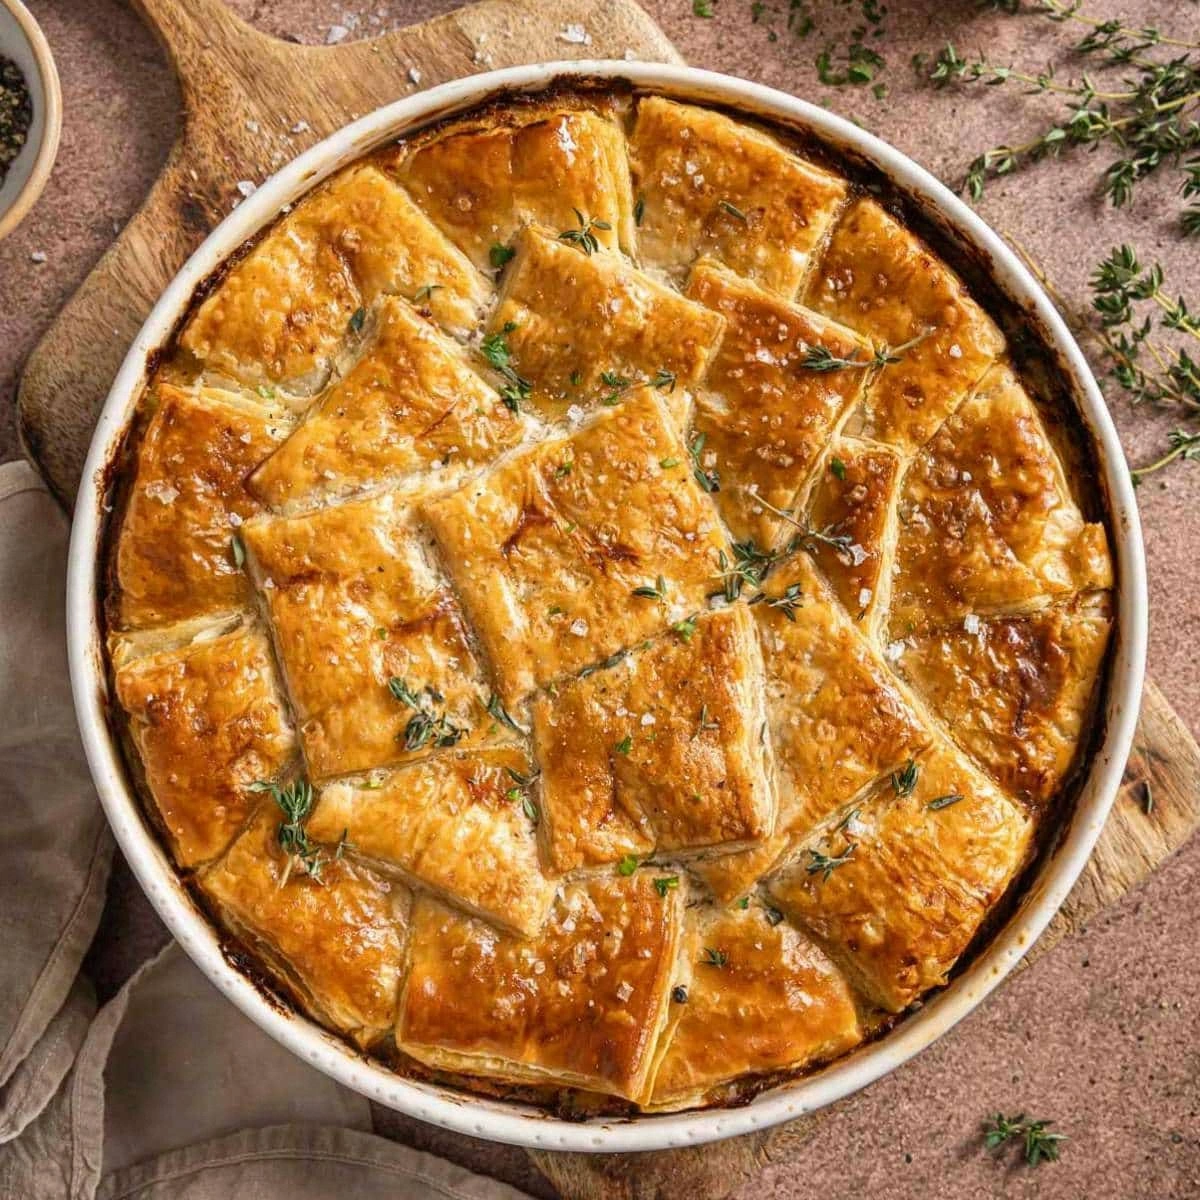
- Visual Appeal: The golden puff pastry with a slightly browned, almost caramelized center invites the eye and the palate alike.
Alright, let's break down exactly what goes into this masterpiece. I’ve sprinkled in a few clever hacks that will save you time, avoid common pitfalls, and make your pot pie the star of any dinner table.
Inside the Ingredient List
The Flavor Base
Butter and olive oil form the foundation of the sauce, creating a rich, buttery base that melts into the onions and garlic. The butter adds depth and a subtle caramelization, while the olive oil keeps the mixture from sticking and adds a hint of fruity brightness. Skipping the butter would leave the sauce thin and bland; the olive oil alone would not provide the same luxurious mouthfeel.
Onion and garlic are the aromatic pillars of the dish. When sautéed until translucent, they release a sweet, savory sweetness that anchors the entire flavor profile. If you omit the onion, the pot pie loses its comforting backbone; if you skip the garlic, you miss the essential umami kick.
A pinch of kosher salt and black pepper at the beginning of the sautéing process helps to draw out moisture and enhances the natural flavors of the aromatics. If you wait too long to season, the vegetables can become mushy and the sauce may taste flat. A little salt and pepper early on keeps the flavors bright and balanced.
The Texture Crew
All‑purpose flour is the binder that turns the sauce into a silky, velvety gravy. It thickens the mixture without adding a heavy, floury taste. If you skip the flour, the sauce will remain thin and watery, which can make the pot pie feel like a soggy casserole.
Chicken stock is the liquid that builds the sauce’s body. It provides a savory backbone that complements the richness of the butter and the cream. Replacing stock with water will result in a flat, insipid sauce that lacks depth.
Heavy whipping cream adds a luxurious, creamy texture that balances the acidity of the wine and the saltiness of the stock. If you use a lighter cream or milk, the sauce will feel thin and less indulgent, losing that comforting richness that makes pot pies so beloved.
The Unexpected Star
White cooking wine is the secret ingredient that brightens the sauce without overpowering it. The acidity cuts through the richness, while the subtle fruit notes add a layer of complexity. Without the wine, the sauce would feel flat and overly heavy.
Italian seasoning and paprika bring warmth and depth to the dish. The herbs provide a fragrant, herby note that complements the chicken, while the paprika adds a gentle smoky sweetness. If you omit these seasonings, the pot pie will taste one‑dimensional and lack the aromatic profile that makes it stand out.
The Final Flourish
The rotisserie chicken, shredded and tossed with the sauce, gives the dish a smoky, tender protein that’s practically ready to eat. The pre‑shredded nature saves time and ensures uniform distribution throughout the filling. Using fresh chicken would require longer cooking times and may result in uneven texture.
Carrots, frozen corn, frozen peas, and frozen pearl onions add color, bite, and sweetness. The carrots bring a subtle earthiness, the corn offers a sweet pop, the peas add a bright green vibrancy, and the pearl onions contribute a delicate, caramelized sweetness when cooked. Skipping any of these would diminish the dish’s overall balance and visual appeal.
Fresh parsley provides a burst of color and a fresh herbal note that cuts through the richness of the sauce. The bay leaves, though removed before serving, impart a subtle floral aroma that enriches the overall flavor. If you leave the bay leaves in, they will impart a bitter aftertaste that can ruin the dish.
Finally, the puff pastry and egg create a golden, flaky crust that holds everything together. The puff pastry’s layers of butter and dough rise beautifully, creating a crisp exterior that contrasts with the tender filling. The egg wash adds shine and helps the pastry brown evenly. Without the pastry, the pot pie would simply be a pot of gravy.
Everything's prepped? Good. Let's get into the real action.
The Method — Step by Step
-
Preheat your oven to 400°F (200°C). While the oven warms, gather all ingredients and set them out on the counter. This ensures you won’t be scrambling for a spice or a spoon in the middle of cooking. The aroma that begins to form from the butter and onions will already be making your kitchen feel like a cozy cabin.
-
In a large, heavy‑bottomed skillet, melt the butter with the olive oil over medium heat. Add the diced onion and sauté until translucent, about 5 minutes. The onions should soften but not brown; this keeps the sauce from developing a bitter edge. When the onions are ready, stir in the minced garlic and cook for another minute, allowing the garlic to release its fragrant oils.
-
Now is the time for the Kitchen Hack: sprinkle the flour over the onion mixture and stir vigorously. This creates a smooth roux that eliminates lumps and ensures a silky sauce. Cook the roux for 2 minutes, letting it develop a light golden hue but avoid letting it brown too much, which could give the dish a nutty taste.
-
Slowly pour in the chicken stock while whisking constantly to keep the sauce smooth. The liquid will begin to thicken as it meets the flour. Once the stock is fully incorporated, add the heavy cream, white wine, Italian seasoning, paprika, and a pinch of kosher salt and pepper. Stir until the sauce is glossy and coats the back of a spoon.
-
Fold in the shredded rotisserie chicken, diced carrots, frozen corn, frozen peas, and pearl onions. The vegetables should be evenly distributed, creating pockets of color and flavor. Add the bay leaves and let the mixture simmer for 5 minutes, allowing the flavors to meld. The sauce should thicken slightly and the vegetables should become tender.
-
Watch Out: Do not overcook the filling. If the sauce continues to boil for too long, it can become overly thick and lose its silky texture. Keep the heat low enough that the mixture simmers gently, and remove it from the stove once the vegetables are tender and the sauce has reached your desired consistency.
-
Cool the filling slightly, then stir in the fresh parsley. The parsley adds a fresh, herbal brightness that lifts the richness of the sauce. While the filling cools, roll out the puff pastry on a lightly floured surface. Use a rolling pin to achieve a thickness of about 1/8 inch; the pastry should be smooth and even.
-
Kitchen Hack: If you’re using a single sheet of puff pastry, fold it in half and cut it into a rectangle that will fit your baking dish. This technique saves time and ensures the pastry covers the filling without excess that would create a messy edge.
-
Transfer the filling into a 9-inch pie dish or a shallow baking dish. Gently lay the puff pastry over the top, pressing the edges to seal the crust. Brush the pastry with a beaten egg to create a glossy, golden finish. Place the dish on a baking sheet for easy cleanup.
-
Bake in the preheated oven for 20–25 minutes, or until the pastry is puffed, golden, and the filling is bubbling. The edges of the crust should be crisp, and the interior should emit a warm, inviting steam. Once baked, let the pot pie rest for 5 minutes before serving; this allows the filling to set and prevents it from sliding out of the crust.
That's it — you did it. But hold on, I've got a few more tricks that'll take this to another level. The next section will reveal insider secrets that will make every bite a revelation.
Insider Tricks for Flawless Results
The Temperature Rule Nobody Follows
Many cooks think a higher oven temperature is always better, but for pot pie, consistency matters more than heat. Bake at a steady 400°F (200°C) to allow the pastry to rise evenly while the filling cooks gently. If you crank the heat up to 425°F, you risk burning the pastry before the filling sets, leading to a dry center.
Why Your Nose Knows Best
Your sense of smell is your best ally in determining doneness. As the pot pie bakes, the aroma will shift from buttery to caramelized. When the smell is sweet and inviting, you know the pastry has reached golden perfection. Trust your nose over the clock.
The 5‑Minute Rest That Changes Everything
Letting the pot pie sit for 5 minutes after baking allows the filling to set, preventing a messy spill when you cut into it. The steam condenses, creating a slight sheen on the pastry that signals it’s ready to serve. Skipping this step can result in a soggy bottom that ruins the crispy edge.
Keep the Crust Flaky
If you notice the pastry is sticking to the pan, add a light dusting of flour to the surface before placing the pastry. This creates a barrier that keeps the crust from adhering, making removal and serving a breeze. A flour‑free pastry can sometimes cling to the dish, ruining the presentation.
The Secret to a Perfect Sauce
When thickening the sauce, whisk continuously to prevent lumps. If a lump does form, strain the sauce through a fine mesh sieve to ensure a smooth finish. A lumpy sauce can distract from the otherwise silky texture you’re aiming for.
Avoiding a Flat Flavor
A quick splash of lemon juice at the end of cooking brightens the sauce and balances the richness. This simple addition can turn a good pot pie into a great one, providing a subtle tang that wakes up the palate.
Creative Twists and Variations
This recipe is a playground. Here are some of my favorite ways to switch things up:
Spicy Jalapeño Kick
Add finely diced jalapeño peppers and a pinch of cayenne pepper to the sauce. The heat will contrast the creamy base, creating a lively, spicy flavor profile that’s perfect for those who love a little heat.
Mushroom Medley
Replace the carrots and corn with sautéed mushrooms and a splash of dry white wine. The earthy umami of mushrooms deepens the sauce, giving the pot pie a rustic, forest‑inspired taste.
Sausage Surprise
Swap the rotisserie chicken for sliced Italian sausage, browned before adding to the sauce. The sausage adds a smoky, savory depth that turns the pot pie into a hearty, meat‑heavy dish.
Cheesy Delight
Stir in half a cup of shredded cheddar or Gruyère cheese into the sauce before baking. The melted cheese creates a gooey, indulgent layer that enhances the creamy texture.
Herb Garden Edition
Increase the parsley and add fresh thyme or rosemary for a fragrant herbaceous twist. The fresh herbs add a bright, green note that lifts the richness of the filling.
Vegetarian Version
Use a plant‑based chicken substitute and double the amount of mixed vegetables. The result is a hearty, comforting pot pie that satisfies vegetarians without sacrificing flavor.
Storing and Bringing It Back to Life
Fridge Storage
Cool the pot pie completely before refrigerating. Store in an airtight container for up to 3 days. When reheating, cover the pot pie with foil to keep the crust from drying out. The filling will thicken slightly, so stir gently before serving.
Freezer Friendly
If you need to freeze the pot pie, let it cool to room temperature, then wrap tightly in plastic wrap and foil. Freeze for up to 2 months. When ready to eat, thaw overnight in the refrigerator and bake at 375°F (190°C) for 20 minutes, or until heated through.
Best Reheating Method
The best way to reheat a pot pie is in the oven to maintain the crisp crust. Preheat to 350°F (175°C) and bake for 15 minutes, then remove from the oven and let it rest for 5 minutes. For a quick microwave, cover the slice with a damp paper towel and heat in 30‑second bursts, but be careful not to overcook the pastry.
Add a tiny splash of water before reheating, then cover the dish with foil. The steam created will bring the filling back to its silky, velvety glory while keeping the crust crisp.