I was halfway through a weeknight dinner, juggling a pot of pasta, a salad in the fridge, and a toddler demanding dessert when my phone buzzed with a text from a friend: “You’ve got to try this new Instant Pot turkey rice. It’s a game changer.” My kitchen, usually a chaotic playground of pots and pans, suddenly felt like a stage set for a culinary revelation. I stared at the empty pot, imagined the clack of the lid, and decided that if I wasn’t going to make this dish, I would at least be the first to document how to do it right.
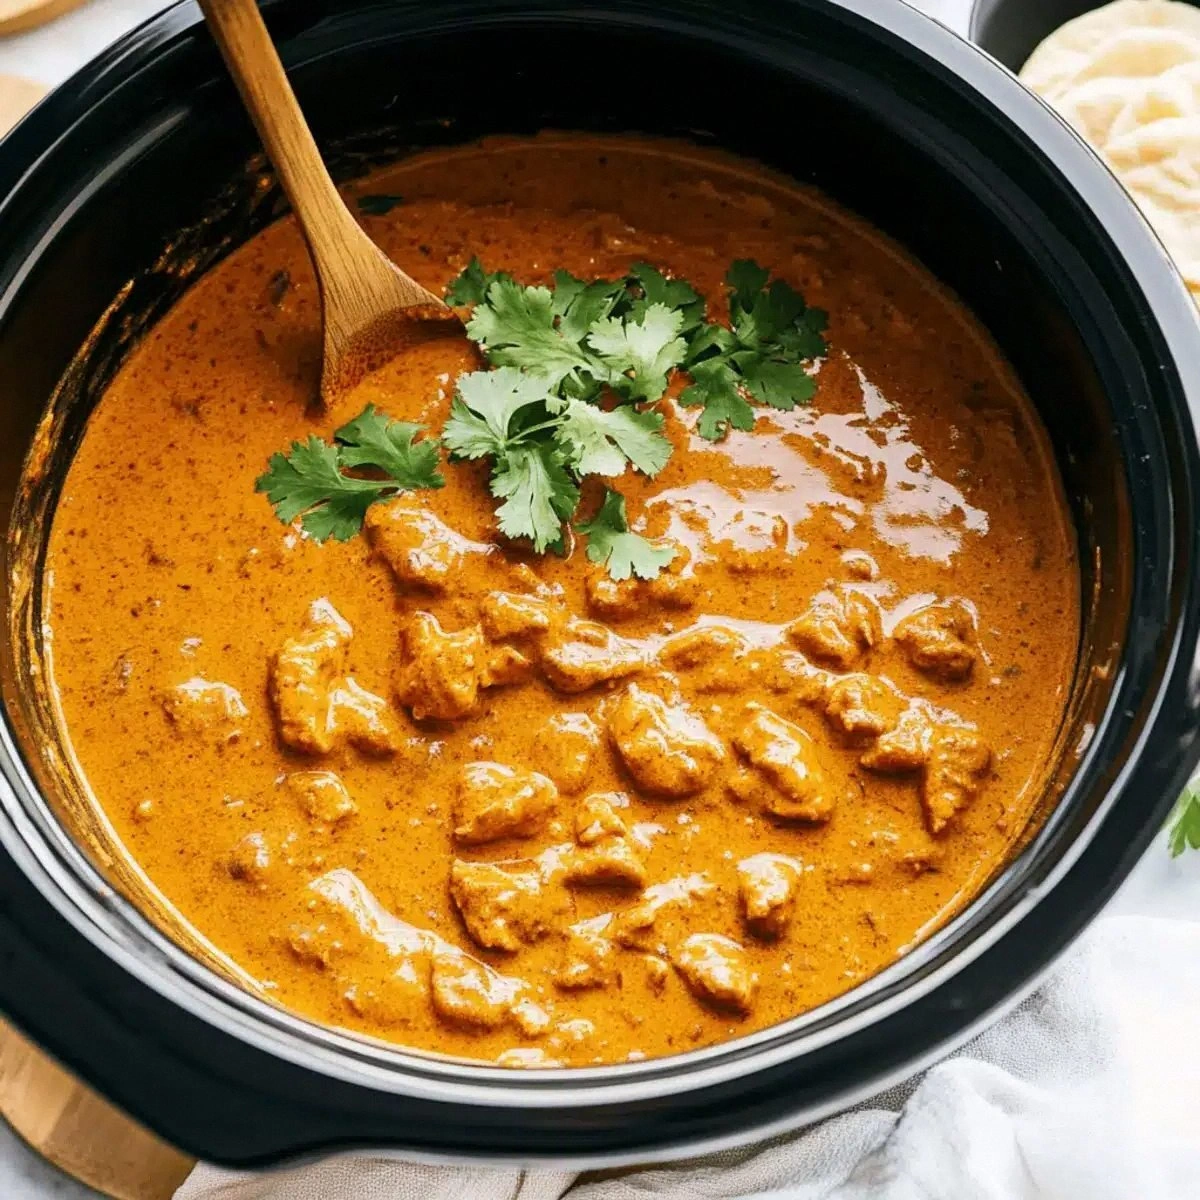
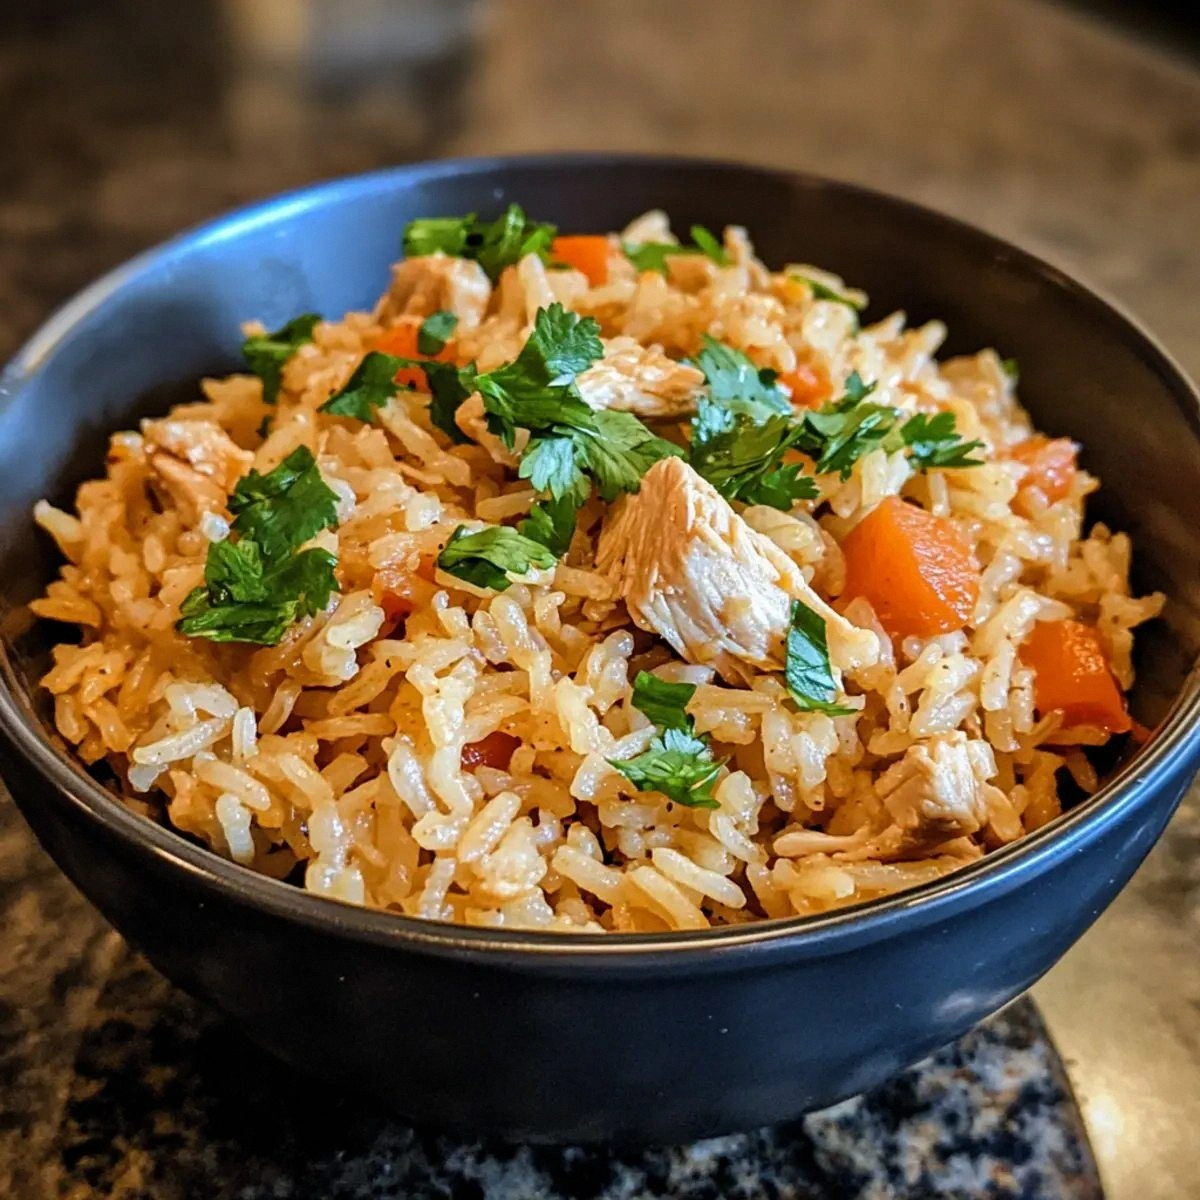
The aroma that greeted me when I cracked the lid open was unmistakably comforting: a blend of garlic, onion, and the warm, earthy scent of paprika that promised a depth of flavor I’d been missing from my standard weeknight meals. The sizzling sound of ground turkey browning in olive oil was a drumbeat that set the rhythm for the rest of the cooking process. Visually, the rice swelled in the pot, absorbing the broth and spices, turning from pale grains into a golden, almost buttery canvas. The texture was a subtle balance—rice fluffy yet firm, peas popping with a gentle snap, and turkey pieces that were tender but still held their shape. The final dish looked like a vibrant mosaic of colors that made even the most skeptical foodie pause.
What makes this version stand out is not just the combination of ingredients but the method that turns a simple Instant Pot meal into an orchestra of flavors. The instant pot does the heavy lifting, but the technique—sautéing first, layering, and allowing the rice to steam in a flavorful broth—creates a dish that is both comforting and impressive. It’s the kind of recipe that can be a crowd pleaser at a family gathering or a quick, satisfying dinner after a long day. And the best part? It’s so straightforward that even a novice can master it.
I dare you to taste this and not go back for seconds. The combination of smoky paprika, aromatic thyme, and the subtle umami of parmesan creates a flavor profile that feels like a hug in a bowl. If you’ve ever struggled with the “what to do after the pot finishes” step, this recipe is your solution. Picture yourself pulling this out of the Instant Pot, the whole kitchen smelling incredible, and the family lining up for a second helping. Let me walk you through every single step — by the end, you’ll wonder how you ever made it any other way.
What Makes This Version Stand Out
- Flavor Depth: The blend of paprika, thyme, and parmesan creates a savory profile that feels both hearty and sophisticated.
- Texture Harmony: The rice remains fluffy yet slightly sticky, providing a comforting mouthfeel that pairs perfectly with tender turkey.
- Time Efficiency: From prep to plate, the entire process takes under an hour, making it ideal for busy weekdays.
- Ingredient Quality: Using fresh onions, garlic, and high-quality ground turkey elevates the dish beyond a simple one-pot meal.
- Versatility: The recipe can be adapted with different proteins or vegetables without compromising the core flavor.
- Crowd Appeal: It’s a dish that satisfies both kids and adults, making it a safe choice for family dinners.
- Make-Ahead Potential: Leftovers keep well, and reheating restores the original texture and flavor.
- Low Clean-Up: One pot, one pan, and a few utensils—minimal dishes and a quick clean-up.
Inside the Ingredient List
The Flavor Base
Ground turkey is the star of this dish, providing lean protein and a neutral canvas that absorbs the spices. When you brown it, the Maillard reaction creates a subtle caramelization that adds depth. Skipping the browning step will leave the turkey with a raw, undeveloped flavor that feels flat. For a richer taste, you can use a mix of ground turkey and ground chicken.
Onions and garlic are the aromatic backbone. They release sweetness and pungency that mingle with the spices. If you’re a garlic lover, feel free to add an extra clove; if you’re sensitive to onion, use a small amount of onion powder instead. The key is to let them soften before adding the rice, allowing their flavors to permeate.
The Texture Crew
Long-grain white rice is chosen for its ability to stay separate and fluffy. Arborio or short-grain rice would result in a mushy texture that doesn’t pair well with the protein. The 2 cups of chicken broth not only cook the rice but infuse it with savory undertones. If you prefer a dairy twist, substitute half the broth with cream for a richer mouthfeel.
Frozen peas or mixed veggies add a pop of color and a burst of sweetness. They also help balance the savory profile. If you’re using fresh peas, reduce the cooking time by a minute to prevent overcooking. The peas should be tender yet bright green, not mushy.
The Unexpected Star
Parmesan cheese is the finishing touch that gives the dish a silky, umami finish. It melts into the rice, coating each grain in a subtle cheese crust. If you’re vegan, a sprinkle of nutritional yeast can mimic the cheesy flavor. The key is to add it after the pot has released pressure, so it doesn’t get overcooked.
Everything's prepped? Good. Let's get into the real action.
The Method — Step by Step
- Step 1: Sauté the Aromatics. Turn your Instant Pot to the sauté setting and add the tablespoon of olive oil. Once hot, toss in the diced onion and minced garlic, letting them soften for about 2 minutes until translucent. The aroma that fills the kitchen should be unmistakably inviting, signaling that the base flavor is forming.
- Step 2: Brown the Turkey. Push the aromatics to the side and add the ground turkey in a single layer. Allow it to sear without stirring for 3-4 minutes; this creates a golden crust that locks in flavor. Flip the turkey, breaking it into crumbles, and continue cooking until fully browned. The sizzling sound is a cue that the Maillard reaction is working its magic.
- Step 3: Season the Meat. Sprinkle in the salt, pepper, thyme, paprika, and a pinch of sugar if you like a touch of sweetness. Stir everything together, ensuring the spices coat the turkey evenly. The mixture should emit a warm, aromatic perfume, signaling readiness for the next step.
- Step 4: Add Rice and Broth. Pour the long-grain rice into the pot, spreading it evenly over the turkey. Carefully pour in the chicken broth, making sure the liquid covers the rice by at least an inch. This layering technique ensures even cooking and a fluffy texture.
- Step 5: Seal and Cook. Close the lid, set the valve to seal, and select the “Manual” or “Pressure Cook” setting for 8 minutes at high pressure. The countdown starts, and the aroma intensifies. When the timer ends, let the pressure release naturally for 5 minutes before quick releasing the remaining pressure.
- Step 6: Add Veggies. Open the lid carefully and stir in the frozen peas or mixed veggies. The residual heat will warm them through without overcooking, preserving their bright color and crispness.
- Step 7: Finish with Parmesan. Sprinkle the grated Parmesan over the hot mixture, stirring until it melts into a silky coating. The cheese should cling to the rice, adding a subtle nutty flavor that rounds out the dish.
- Step 8: Serve and Garnish. Ladle the rice into bowls, optionally topping with fresh herbs like parsley or a squeeze of lemon for brightness. The dish should feel warm, fragrant, and ready to devour. Enjoy the harmony of textures and flavors.
That's it — you did it. But hold on, I've got a few more tricks that'll take this to another level.
Insider Tricks for Flawless Results
The Temperature Rule Nobody Follows
Many cooks skip the sauté step, assuming the Instant Pot will brown the turkey on its own. I’ve learned that letting the meat brown at a higher temperature before pressure cooking locks in moisture and enhances flavor. The key is to let the meat sit for 2-3 minutes before stirring, creating a caramelized crust that adds depth.
Why Your Nose Knows Best
The aroma of the dish is your best indicator of progress. If the smell is more broth than rice, it’s time to stir. A sweet, caramelized scent signals that the turkey is perfectly browned. Trust your nose; it’s a seasoned guide that often outperforms the timer.
The 5-Minute Rest That Changes Everything
After the pressure release, let the pot sit for five minutes before opening. This resting period allows the steam to redistribute, ensuring the rice is fully cooked and fluffy. Skipping this step can lead to uneven texture and a slightly underdone rice.
Parmesan Timing Is Everything
Adding Parmesan too early can cause it to clump or burn. Wait until the pot is fully vented and the mixture is hot before sprinkling the cheese. This ensures a smooth, even coating that melts into the rice without forming lumps.
Veggie Variety Without Overcooking
If you’re using fresh veggies, add them at the very end of the cooking cycle. Frozen veggies are fine to add during the pressure release because they’re pre-cooked. This approach keeps the vegetables vibrant and prevents them from turning mushy.
Creative Twists and Variations
This recipe is a playground. Here are some of my favorite ways to switch things up:
Mexican Fiesta
Swap paprika for chipotle powder, add a dash of cumin, and top with fresh cilantro and a squeeze of lime. The result is a vibrant, slightly smoky dish that feels like a taco bowl in a pot.
Asian Fusion
Replace the chicken broth with a mix of soy sauce and mirin, add a teaspoon of sesame oil, and stir in chopped green onions after cooking. Finish with a sprinkle of toasted sesame seeds for crunch.
Greek Inspired
Use oregano instead of thyme, add a handful of kalamata olives, and finish with a drizzle of feta cheese. The salty, herby profile transforms the dish into a Mediterranean staple.
Breakfast Boost
Add a beaten egg to the pot after pressure release, stirring until it forms silky ribbons. Top with a dash of hot sauce and a sprinkle of cheddar for a hearty breakfast bowl.
Low-Carb Edition
Replace the rice with cauliflower rice, and use a low-sodium broth. The dish becomes a lean, protein-packed meal that still delivers on flavor.
Vegan Version
Use plant-based ground “turkey” or lentils, substitute the chicken broth with vegetable stock, and finish with nutritional yeast. The dish remains hearty and satisfying while staying plant-based.
Storing and Bringing It Back to Life
Fridge Storage
Cool the dish to room temperature before transferring it to an airtight container. Store in the refrigerator for up to 3 days. When you’re ready to eat, reheat in the microwave for 2-3 minutes or on the stovetop over low heat.
Freezer Friendly
Divide the dish into single-serving portions, place each in a freezer bag, and seal tightly. Freeze for up to 2 months. Thaw overnight in the refrigerator or use the defrost setting on your microwave.
Best Reheating Method
Add a splash of water or broth before reheating to prevent the rice from drying out. Cover and heat on low for 5 minutes, stirring halfway through. The dish should steam back to its original fluffy texture.