I was halfway through a week‑long marathon of burnt lasagna, when my neighbor called, eyes wide, “Do you have a quick, comforting stew?” I stared at the fridge, feeling the familiar sting of culinary desperation. The pantry was a gray, lifeless maze, until I remembered the two pounds of beef chuck I’d left in the freezer and the handful of celery that had been staring at me like a silent threat. I grabbed a handful of onions, a few cloves of garlic, and the forgotten bag of frozen peas, and decided to let the Instant Pot do the heavy lifting. The result? A stew that tasted like a hug, with a depth of flavor that would make your taste buds do a double‑take. That night, the kitchen smelled like home, the walls echoed with the sizzle, and I felt the triumphant rush that only a perfectly cooked pot of stew can bring.
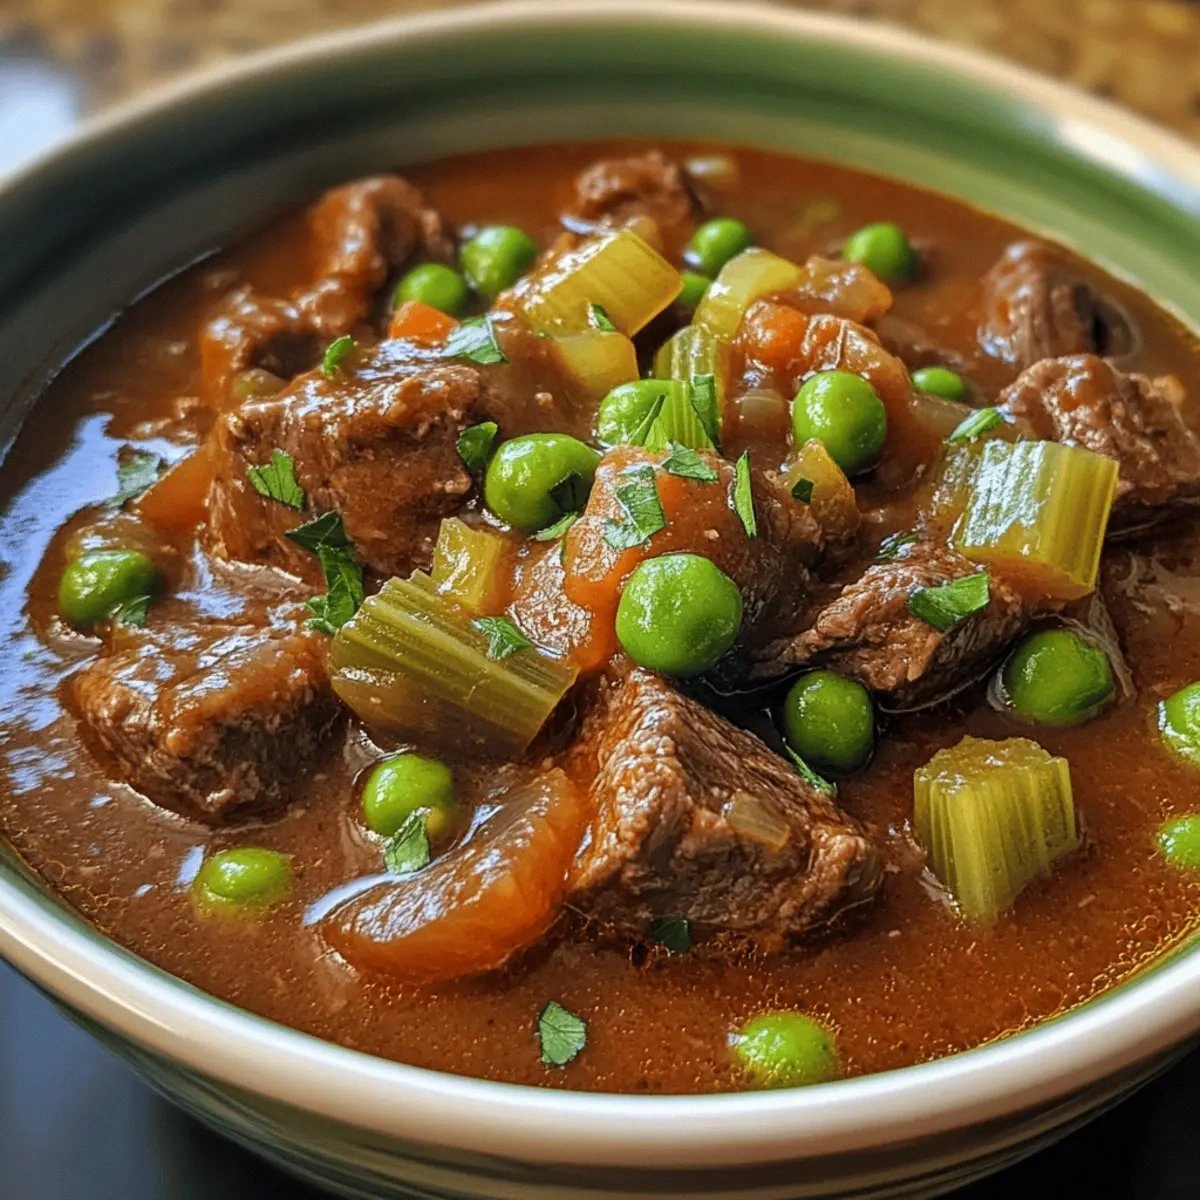
Picture the first spoonful: the broth thickened with tomato paste, the beef so tender it practically melts, and the carrots and celery releasing their subtle sweetness into a savory symphony. The steam rises like a fragrant cloud, carrying the scent of thyme and bay leaves, while the peas add a pop of color that brightens the dish. The sound of the Instant Pot’s whistle punctuates the silence, a gentle reminder that the magic is almost ready. The texture is a comforting contrast between the silky meat and the crisp vegetables, all enveloped in a rich, velvety broth. Your senses are engaged in a culinary dance that feels both effortless and deeply satisfying.
What makes this version stand out? It’s not just the combination of ingredients, but the way they’re coaxed into harmony. I’ve spent years tweaking the timing and seasoning, and this is the culmination of that experimentation. The beef is seared to lock in flavor before pressure cooking, the garlic is caramelized to bring out its natural sweetness, and the peas are added at the very end to preserve their bright green color and delicate crunch. The result is a stew that’s as beautiful to look at as it is delicious to taste, a dish that feels like a warm blanket on a cold evening. If you’ve ever struggled to get a stew that’s both hearty and flavorful, you’re not alone—this recipe fixes that for good.
I dare you to taste this and not go back for seconds. The subtle umami of the beef, the slight earthiness of the celery, and the sweet finish of the peas combine to create a flavor profile that is both complex and comforting. It’s hands down the best version you’ll ever make at home, and it’s surprisingly simple to pull together. The secret? A splash of tomato paste, a handful of bay leaves, and a touch of thyme that brings everything together in a fragrant, savory bouquet. This isn’t just stew—it’s a culinary experience that will leave you craving more.
If you’ve ever been tempted to skip the searing step or rush the broth, you’re missing the key to depth. That sizzle when the beef hits the pan? Absolute perfection. Picture yourself pulling this out of the Instant Pot, the whole kitchen smelling incredible, and the steam rising like a gentle promise of comfort. Stay with me here—this is worth it, because the flavor depth you’ll get from a properly browned base will transform this simple stew into a masterpiece that feels like a warm hug on a cold night.
What Makes This Version Stand Out
- Depth of Flavor: The searing step caramelizes the beef, creating a rich, savory base that elevates the entire dish. Without it, the stew feels flat and uninspired.
- Texture Contrast: Tender beef, crisp celery, and a pop of green from the peas provide a satisfying mouthfeel that keeps every bite interesting.
- Ease of Preparation: The Instant Pot reduces cooking time to under an hour, making it perfect for busy weeknights without sacrificing quality.
- Ingredient Quality: Using fresh, high‑quality beef chuck and garden‑fresh vegetables makes a noticeable difference in taste.
- Make‑Ahead Friendly: This stew keeps well in the fridge for up to four days and freezes beautifully for future comfort meals.
- Versatility: The recipe can be tweaked with different herbs or a splash of red wine for a more robust flavor profile.
Inside the Ingredient List
The Flavor Base
Beef chuck is the star of this stew, providing a rich, meaty backbone that’s essential for depth. When you brown it in a hot pan before pressure cooking, you lock in a caramelized flavor that’s impossible to replicate with raw meat alone. If you’re looking for a leaner option, try using a mix of sirloin and chuck; the sirloin will reduce fat content while the chuck maintains flavor. Always choose a cut with a good marbling pattern; this ensures the meat stays juicy throughout the cooking process.
The Texture Crew
Celery adds a subtle crunch and bright green hue that balances the richness of the beef. Slice it into 1‑inch pieces to allow it to soften just enough without losing its bite. Carrots bring natural sweetness and a pop of orange color; use medium carrots to keep them tender yet slightly firm. The frozen peas are a game‑changer—they keep their vibrant color and a hint of sweetness when added at the end of cooking, preventing them from turning mushy.
The Unexpected Star
Tomato paste is the unsung hero that thickens the broth and adds a subtle acidity that balances the beef’s richness. A tablespoon goes a long way; if you don’t have tomato paste, a tablespoon of tomato sauce can work, but the texture will differ slightly. The bay leaves and thyme are aromatic staples that infuse the stew with an earthy, herbal note. For a deeper flavor, add a pinch of smoked paprika or a splash of dry red wine during the sauté phase.
The Final Flourish
Fresh parsley is added just before serving to bring a burst of color and a bright, herbal finish. The parsley’s subtle peppery taste cuts through the richness, leaving a clean finish on the palate. If you’re in a pinch, dried parsley will work, but fresh is always preferable for that vibrant burst of flavor. The final touch of black pepper gives the stew a gentle kick that balances the sweetness of the carrots and peas.
Everything’s prepped? Good. Let’s get into the real action…
The Method — Step by Step
- Turn the Instant Pot to the “Sauté” setting and let it heat up. Add a tablespoon of olive oil and wait until it shimmers. Then, add the beef cubes in a single layer, letting them brown on all sides. This caramelization step is crucial; it creates a deep, savory flavor that will carry through the stew. Don’t overcrowd the pot—brown in batches if necessary.
- Once the beef is browned, remove it and set aside. In the same pot, add the diced onion and minced garlic, sautéing until the onion turns translucent and the garlic releases its aroma. This layer of flavor is the backbone of the stew. If you’re watching your sodium, use a splash of low‑sodium broth instead of water to deglaze the pan, lifting all those tasty browned bits.
- Return the beef to the pot, then add the celery and carrots. Stir everything together, ensuring the vegetables are coated in the flavorful oil and juices. Sprinkle in the tomato paste and stir until it’s evenly distributed—this thickens the broth and adds a rich, slightly sweet depth. The pot should now have a fragrant, aromatic base that smells like a savory kitchen dream.
- Pour in the beef broth, ensuring the liquid covers the meat and vegetables by at least an inch. Add the bay leaves, thyme, salt, and pepper. Give it a quick stir to combine all the flavors. The liquid should be fragrant and ready to be sealed for pressure cooking.
- Close the lid, set the valve to “Sealing,” and choose the “Manual” or “Pressure Cook” setting. Cook on high pressure for 35 minutes. The beef should be fork‑tender, and the vegetables should have absorbed the flavors of the broth. The Instant Pot’s efficient heat distribution ensures even cooking, so you won’t have to worry about unevenly cooked meat.
- Once the cooking cycle is complete, perform a quick release by carefully turning the valve to “Venting.” This will release the steam safely and quickly. After the pressure has fully released, open the lid and give the stew a good stir. The broth should have thickened slightly; if it’s too thin, let the pot return to “Sauté” mode for 5 minutes to reduce.
- Add the frozen peas and fresh parsley to the pot. Stir gently to distribute the peas evenly. Let the stew simmer for an additional 5 minutes—this allows the peas to heat through without losing their vibrant green color and crispness. Taste and adjust the seasoning if needed, adding a pinch more salt or pepper to suit your preference.
That’s it— you did it. But hold on, I’ve got a few more tricks that will take this to another level. A friend tried skipping the quick release step once—let’s just say it didn’t end well, as the stew became overly watery and the beef didn’t soften properly. The next time you cook, keep the lid sealed until the pressure cycle is complete to preserve the meat’s tenderness.
Insider Tricks for Flawless Results
The Temperature Rule Nobody Follows
Many cooks assume that any high‑pressure setting works for all stews, but the beef chuck benefits from a slightly lower temperature to prevent toughening. Use the “Manual” setting on medium‑high pressure if your Instant Pot offers it—this gives the meat just enough time to break down collagen without overcooking. The result is a melt‑in‑your‑mouth texture that feels like a luxury in a pot.
Why Your Nose Knows Best
When the stew finishes cooking, open the lid and inhale deeply. A rich, caramelized aroma is a clear sign that the searing step was successful. If the smell is bland, the beef may need more browning or a splash of red wine to develop depth. Trust your senses—your nose is your best quality control tool.
The 5‑Minute Rest That Changes Everything
After the pressure release, let the stew rest for five minutes before serving. This short rest allows the flavors to settle and the liquid to thicken slightly, creating a more cohesive texture. It also prevents the stew from spilling over when you ladle it into bowls—an often overlooked but essential step for a polished presentation.
The Secret to Bright Peas
Frozen peas can sometimes turn gray if cooked for too long. Add them at the very end of the cooking cycle and let them steam in the residual heat. If you prefer a softer texture, give them a quick stir in a pan with a splash of butter before adding them to the pot. The result is peas that stay bright green and have a delightful bite.
The Final Touch of Freshness
Fresh parsley is more than a garnish—it’s a flavor enhancer. Sprinkle it over the stew right before serving to add a burst of color and a subtle herbal note. If you’re short on time, a handful of chopped basil or oregano can be a fun swap that gives the stew a Mediterranean twist. The fresh herbs finish the dish with a bright, aromatic finish that makes every spoonful feel fresh.
Creative Twists and Variations
This recipe is a playground. Here are some of my favorite ways to switch things up:
Smoky Chipotle Stew
Add a teaspoon of chipotle powder or a splash of chipotle in adobo sauce during the sauté phase. The smoky heat pairs beautifully with the beef’s richness, creating a stew that’s perfect for a winter night. Serve it with a dollop of sour cream to balance the heat.
Red Wine Infusion
Replace half of the beef broth with a dry red wine like Cabernet Sauvignon. The wine adds depth and a subtle fruitiness that complements the beef’s umami. Reduce the wine on the sauté step before adding the broth to intensify the flavor.
Herb‑Infused Delight
Swap thyme for rosemary or add a sprig of fresh sage during the pressure cook. The herb’s strong aroma adds a different layer of complexity. Be sure to remove the herb sprig before serving to avoid overpowering the dish.
Mushroom Medley
Add sliced mushrooms to the sauté phase for an earthy undertone. The mushrooms release their juices, enriching the broth and giving the stew a deeper, forest‑like flavor. A pinch of dried thyme enhances the mushroom’s natural taste.
Coconut Cream Finish
Stir in a tablespoon of coconut cream after the pressure release for a silky, tropical twist. The cream adds a subtle sweetness that pairs well with the savory broth. It’s a great way to introduce a creamy texture without using dairy.
Storing and Bringing It Back to Life
Fridge Storage
Cool the stew to room temperature, then transfer it to a shallow airtight container. Store in the refrigerator for up to four days. The flavors continue to meld, making it even more delicious the next day. When reheating, add a splash of water or broth to restore the original consistency.
Freezer Friendly
For longer storage, portion the stew into freezer‑safe containers or zip‑top bags. Label with the date and freeze for up to three months. Thaw overnight in the refrigerator before reheating. The beef remains tender, and the vegetables hold their texture well after freezing.
Best Reheating Method
Reheat the stew on the stove over medium heat, stirring occasionally. If the broth has thickened too much, add a tablespoon of water or broth to achieve the desired consistency. Bring to a gentle simmer and let it heat through, ensuring the peas are warm but not overcooked. The stew will taste as fresh as the day you made it.