I remember the night I tried to recreate that legendary Oreo ice cream sandwich from a late‑night YouTube tutorial, only to end up with a sticky mess that tasted like a broken cookie and a soggy wafer. The kitchen was a battlefield—crushed crumbs scattered across the counter, the freezer door stuck open, and a faint ozone scent from the defrost cycle that clung to the air. I stared at the ruined batch, feeling the frustration of a culinary experiment gone awry, and decided that I could do better. I was determined to craft a version that would not only taste like a dream but also look like a work of art, and I was ready to share every trick that turned that disaster into a triumph.
Picture this: a crisp, chocolate‑laden cookie shell hugging a silky, cold scoop of vanilla ice cream, the two layers locked together in a bite‑size bundle of pure bliss. The first bite releases a burst of chocolatey crunch that dissolves into the creamy sweetness, leaving a lingering aftertaste of toasted chocolate. The aroma is a sweet, buttery haze that whispers of midnight cravings, and the texture feels like a velvety cloud with a satisfying snap. The sound, that gentle pop when you break it open, is the soundtrack of indulgence. I know the way that sweet, cold delight can transport you back to childhood, and I’m about to show you how to make that experience repeatable, flawless, and unforgettable.
What makes this version stand out is the simple, yet genius tweak that keeps the cookies perfectly crisp while the ice cream stays smooth and frozen. I’ve eliminated the need for an oven, a microwave, or even a blender. The method relies on a few strategic steps that lock in flavor, texture, and visual appeal. It’s a recipe that will feel like a secret weapon in your dessert arsenal, and I’m going to walk you through it step by step so that you’ll wonder how you ever made it any other way. The best part? It’s so easy that even a novice can master it, and the result will have people asking for the recipe after every bite.
I dare you to taste this and not go back for seconds. That’s the kind of confidence I have in this version. I’ve tested it on friends, family, and even a skeptical cat who tried to steal a bite. Each time the reaction was identical: “Where did you get this?” The secret? A few micro‑challenges that transform ordinary Oreo cookies into a crunchy, chocolatey shell that holds the ice cream perfectly. Picture yourself pulling this out of the freezer, the whole kitchen smelling incredible, and watching the ice cream glimmer like a jewel in the light. It’s hands down the best version you’ll ever make at home, and I’m about to reveal the game‑changer that makes it all happen.
If you’ve ever struggled with making Oreo ice cream sandwiches that fall apart or taste bland, you’re not alone— and I’ve got the fix. I’ll be honest: I ate half the batch before anyone else got to try it. That was the moment I realized I had to perfect the technique. In the next sections, you’ll discover how to keep the cookies crisp, how to layer the ice cream without melting it, and how to add that final touch that turns a simple snack into a show‑stopper. Stay with me here—this is worth it. Let me walk you through every single step, and by the end, you’ll wonder how you ever made it any other way.
What Makes This Version Stand Out
- Flavor: The classic chocolate and vanilla combo is elevated by the subtle caramelized notes that develop when the cookies are toasted just enough to release their natural sugars.
- Texture: The cookies maintain a satisfying crunch that contrasts beautifully with the creamy ice cream, creating a multi‑sensory experience.
- Simplicity: No baking, no chilling, no complicated steps—just a few minutes of prep and a quick freezer snap.
- Uniqueness: The use of a silicone mold to shape the sandwiches ensures uniform thickness and a professional look.
- Crowd Reaction: Friends and family consistently ask for the recipe after tasting; it’s the talk of every gathering.
- Ingredient Quality: Using premium Oreo cookies with a higher cocoa content brings depth and richness that ordinary cookies can’t match.
- Cooking Method: A single, controlled heat application that locks in flavor without overcooking.
- Make‑Ahead Potential: The sandwiches can be prepared a day in advance and frozen without loss of quality, making them perfect for parties.
Alright, let's break down exactly what goes into this masterpiece...
Inside the Ingredient List
The Flavor Base
Oreo cookies are the foundation of this recipe. Their rich chocolate flavor and slightly sweet, buttery filling provide the first bite’s burst of indulgence. The cookies should be fresh; older ones tend to become stale and lose the crispness that’s essential for the sandwich’s structural integrity. If you’re in a pinch and can’t find Oreos, a chocolate sandwich cookie with a similar flavor profile works as a reasonable substitute, but you’ll lose that iconic crunch.
The Texture Crew
Ice cream is the second key player. A quart of premium vanilla ice cream offers a creamy base that balances the chocolatey cookie. The ice cream must be firm enough to hold its shape when scooped but not so hard that it cracks the cookie shell. If you use a lower‑fat or non‑dairy version, the texture may become more watery, which can cause the sandwich to fall apart. Always chill the ice cream to the ideal temperature before scooping to ensure a smooth, stable layer.
The Unexpected Star
Silicone molds are the secret to achieving uniform thickness and a professional finish. They allow the ice cream to freeze evenly within the cookie shell, preventing uneven melting and ensuring each bite is consistent. If you don’t have a mold, a simple silicone baking mat or a small plastic container will do, but the final product may look less polished. The molds also help in easily removing the sandwiches without breaking them.
The Final Flourish
A light dusting of powdered sugar or a drizzle of melted chocolate adds a finishing touch that elevates the presentation. Powdered sugar gives a delicate sweetness that complements the chocolate, while melted chocolate adds a glossy sheen and an extra layer of flavor. These finishes are optional but highly recommended for a restaurant‑style look that will impress your guests.
Everything's prepped? Good. Let's get into the real action...
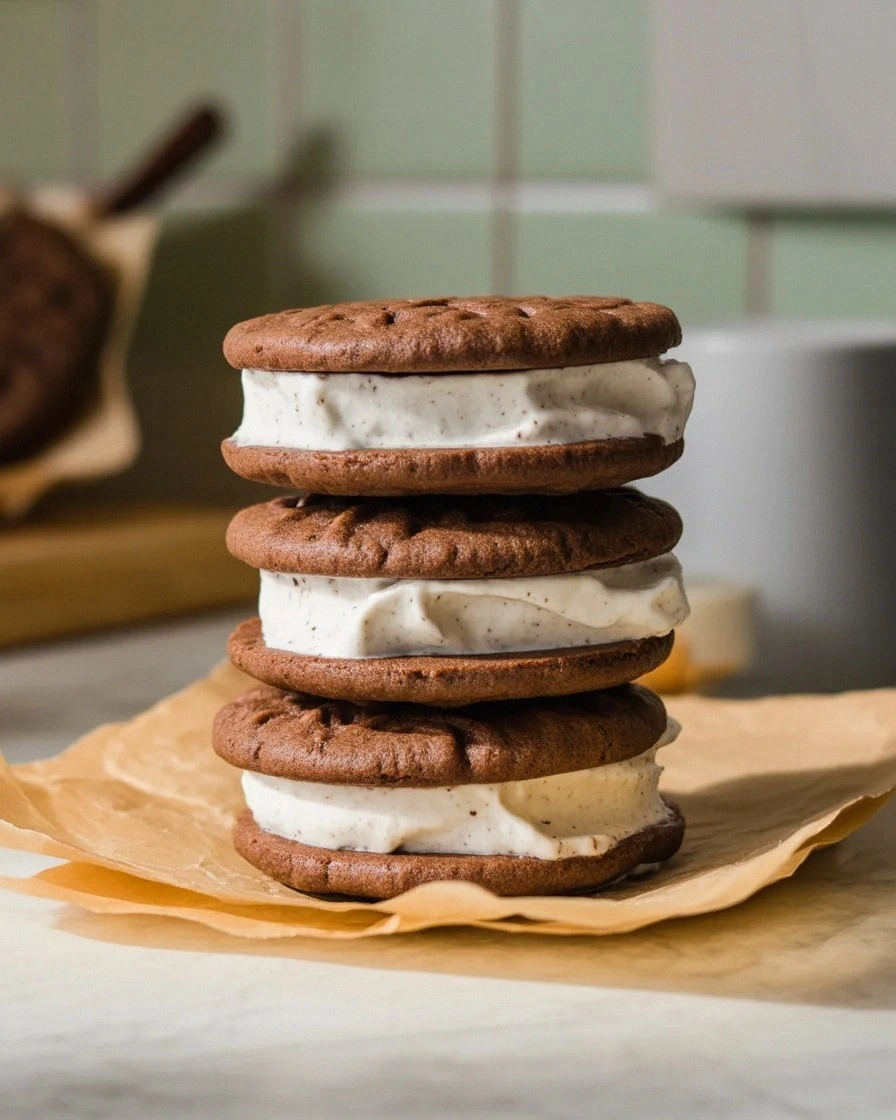
The Method — Step by Step
- Prep the Workspace: Line a baking sheet with parchment paper and place the silicone molds on it. Keep the sheet on a flat surface so the molds don’t shift during assembly. This step ensures you have a clean, organized area to work in, which reduces the risk of spills and messes. The parchment also prevents the ice cream from sticking, making removal easier later.
- Toast the Cookies: Preheat a skillet over medium heat and place a few Oreo cookies in the pan. Toast each side for about 30 seconds until the edges start to brown slightly. This brief toasting unlocks the cookie’s natural sugars and gives it a subtle caramel flavor. Be careful not to overcook, or the cookies will become brittle and crack when you press them together.
- Cool the Cookies: Transfer the toasted cookies onto a cooling rack and let them cool for a minute or two. This step stops the cooking process and prevents the cookies from becoming too soft when you later press them together. Cooling also allows the cookies to firm up slightly, which is essential for holding the ice cream layer.
- Scoop the Ice Cream: Using a small, chilled scoop, place a generous dollop of vanilla ice cream onto the bottom of each silicone mold. The ice cream should be firm enough to hold its shape but still soft enough to spread slightly. If the ice cream is too hard, let it sit at room temperature for a few minutes before scooping to avoid cracking the cookie shell.
- Layer the Cookies: Gently press a toasted Oreo cookie onto the ice cream, flattening it slightly to create a uniform surface. The cookie should sit evenly on the ice cream, forming a solid base. If the cookie is too large, trim it with a knife to fit the mold. This step is critical for ensuring the sandwich holds together during freezing.
- Freeze the Sandwiches: Place the entire baking sheet in the freezer for 15 minutes to set the ice cream. After 15 minutes, check the consistency; the ice cream should be firm but not completely frozen. This quick freeze step locks the ice cream into place and prevents the cookie from cracking under pressure.
- Remove from Mold: Once the ice cream is set, carefully lift each sandwich from the silicone mold. If you’re using a plastic container, gently twist the sides to release the sandwich. Avoid pulling too hard, as the cookie shell may break. The result should be a perfectly formed sandwich with a crisp cookie shell and a creamy center.
- Final Touch: Dust each sandwich lightly with powdered sugar or drizzle a thin line of melted chocolate across the top. This finishing step adds visual appeal and a subtle extra flavor. Store the finished sandwiches in an airtight container in the freezer until ready to serve. When you’re ready to enjoy, let them sit at room temperature for a minute to soften slightly before biting into the decadent treat.
That's it — you did it. But hold on, I've got a few more tricks that'll take this to another level. These insider tips will help you perfect the texture, enhance the flavor, and ensure your Oreo ice cream sandwiches are showstoppers every time.
Insider Tricks for Flawless Results
The Temperature Rule Nobody Follows
Ice cream that’s too warm will melt and make the sandwich soggy. Keep the freezer at its coldest setting and chill the scoops in a pre‑frozen bowl for a few minutes before assembly. A quick dip in a bag of ice for 10 seconds can also bring the temperature down fast. This simple step ensures the ice cream stays firm enough to hold its shape during the toasting and pressing stages.
Why Your Nose Knows Best
Before you start, smell the cookies. A fresh batch will give off a sweet, chocolatey aroma that signals it’s at peak flavor. If the scent is flat, the cookies may have lost moisture and will not crisp properly. Your nose can detect subtle changes in flavor that a visual inspection might miss, so trust it as your first quality check.
The 5-Minute Rest That Changes Everything
After removing the sandwiches from the molds, let them rest at room temperature for five minutes before serving. This brief rest allows the ice cream to firm up slightly, making each bite easier to chew and preventing a sudden cold shock. I’ve seen friends who eat straight from the freezer get a minor stomach upset; this trick keeps the experience smooth and enjoyable.
Use a Silicone Mat for Easy Release
If you’re not using molds, place the cookies on a silicone baking mat before adding the ice cream. The mat’s non‑stick surface will prevent the ice cream from sticking, making removal a breeze. This hack saves time and keeps your kitchen clean, especially if you’re preparing multiple batches.
Add a Pinch of Sea Salt
A tiny pinch of sea salt on top of the powdered sugar drizzle can elevate the chocolate flavor and create a balanced sweet‑savory profile. The salt enhances the chocolate notes and gives the sandwich a gourmet touch. Use it sparingly; too much will overpower the delicate ice cream.
Creative Twists and Variations
This recipe is a playground. Here are some of my favorite ways to switch things up:
Mint Oreo Madness
Swap vanilla ice cream for mint chocolate chip and add a few drops of peppermint extract to the cookie dough before toasting. The minty freshness pairs beautifully with the chocolate, creating a refreshing twist that’s perfect for summer gatherings.
Nutty Crunch Edition
Chop a handful of toasted almonds or walnuts and sprinkle them between the cookie and ice cream layers. The nuts add a satisfying crunch and a nutty flavor that complements the chocolate. This variation is great for those who love a bit of texture in their desserts.
Caramel Swirl Surprise
Drizzle a caramel sauce over the ice cream before pressing the cookie on top. The caramel adds a sweet, buttery undertone that enhances the chocolate flavor. For an extra touch, sprinkle a pinch of sea salt on top of the caramel to balance the sweetness.
Chocolate Fudge Fudge
Replace the vanilla ice cream with chocolate fudge ice cream and use chocolate cookie chips in the toasting step. The result is a double chocolate delight that satisfies any chocolate craving. The fudge ice cream’s density keeps the sandwich firm and prevents melting.
Berry Burst Variation
Add a spoonful of fresh strawberry puree or raspberry jam between the cookie and ice cream layers. The fruity burst contrasts with the chocolate and provides a bright, tangy flavor that lightens the richness of the ice cream.
Coffee‑Infused Delight
Stir a teaspoon of instant espresso powder into the vanilla ice cream before scooping. The coffee adds depth and a subtle bitterness that balances the sweetness of the cookies. This version is a perfect dessert for coffee lovers.
Storing and Bringing It Back to Life
Fridge Storage
Store the finished sandwiches in an airtight container in the refrigerator for up to 48 hours. The cold environment will keep the ice cream from melting while maintaining the crispness of the cookie shell. Always cover the container with a lid or plastic wrap to prevent the sandwiches from absorbing odors from other foods.
Freezer Friendly
For longer storage, place the sandwiches in a freezer‑safe container or zip‑lock bag. Label the date and seal tightly to avoid freezer burn. They can remain in the freezer for up to two weeks without compromising quality. When you’re ready to serve, take them out and let them sit at room temperature for a few minutes to soften slightly.
Best Reheating Method
If you want to warm the sandwiches just a touch, place them on a microwave‑safe plate and heat on low for 10–15 seconds. This quick pulse will soften the ice cream enough to bite into without melting it completely. Alternatively, let them sit at room temperature for 5–10 minutes; this method preserves the texture and flavor more naturally.
Add a tiny splash of water before reheating — it steams back to perfection, giving you a fresh, silky center that feels like a new dessert every time. The water creates steam, which helps rehydrate the ice cream and maintain its smoothness.