I was staring at a rack of turkey wings in the freezer, feeling a familiar pang of disappointment that comes from trying to make something that sounds great but ends up a kitchen disaster. The last time I attempted a “baked wings” version, I had a batch that came out soggy, bland, and frankly, a little sad. That night I was craving the crispy, savory bite of restaurant‑style wings but without the deep‑frying guilt. I swore to myself that I’d find a way to make them melt‑in‑your‑mouth, and after a marathon of trial and error, I finally cracked the code. The result? A baked turkey wings recipe that feels like a secret family recipe, only better because you can make it at home, no fryer required, and with a sauce that coats the meat like velvet.
Picture the kitchen at 7 p.m., the oven preheated to 400 °F, the aroma of onions sautéing and garlic sizzling in a skillet. The air tastes like anticipation, and the sound of the timer ticking is the soundtrack to a meal that’s about to change your perception of turkey wings forever. I’ve spent hours perfecting the balance of moisture and crispness, and I’m ready to share the exact steps that turned a humble piece of poultry into a crowd‑pleasing masterpiece. I dare you to taste this and not go back for seconds—because once you’ve had the first bite, you’ll know why this is hands down the best version you’ll ever make at home.
What makes this recipe stand out is not just the crispy edges that shatter like thin ice, but the way the sauce envelopes each wing in a savory, slightly sweet, mushroom‑infused glaze. It’s a dish that delivers the comforting familiarity of a classic wing, with the wholesome touch of turkey and the creamy depth of a mushroom soup base. The best part? You can pull this out of the oven, the whole kitchen smelling incredible, and serve it immediately—no waiting for the wings to rest or reheat. Let me walk you through every single step—by the end, you’ll wonder how you ever made it any other way.
This isn’t just another recipe; it’s a revelation. Most recipes get this completely wrong by over‑baking the wings until they’re dry, or by using a sauce that’s too watery and never sticks. I’ve taken the time to dissect each component—seasonings, cooking method, and sauce consistency—to create a dish that’s juicy inside, crispy outside, and utterly addictive. If you’ve ever struggled with turkey wings that end up limp, you’re not alone—and I’ve got the fix. Stay with me here—this is worth it.
What Makes This Version Stand Out
- Flavor: The blend of seasoned salt, poultry seasoning, and minced garlic creates a savory base that permeates the meat, while the cream of mushroom soup adds a velvety, umami richness that sets this apart from standard wing recipes.
- Texture: The careful balance of baking time and sauce viscosity results in wings that are tender on the inside but still boast a crisp, golden crust that shatters delightfully when you bite into them.
- Simplicity: With only eight ingredients and a straightforward method, you can have a restaurant‑quality dish on the table in under an hour, making it perfect for weeknight dinners or spontaneous gatherings.
- Uniqueness: The use of cream of mushroom soup as a sauce base is unconventional for wings, giving the dish a creamy, comforting twist that pairs beautifully with crunchy veggies or a light salad.
- Crowd Reaction: Friends and family who have tried this version report that the wings are “the best turkey wings I’ve ever had” and that the sauce is “so good, it’s like a second meal.”
- Ingredient Quality: By selecting fresh, high‑quality turkey wings and using a can of premium cream of mushroom soup, the dish achieves depth and flavor without relying on artificial additives.
- Cooking Method: Baking rather than frying keeps the dish healthier, while the oven’s even heat ensures a consistent crust across all pieces.
- Make‑Ahead Potential: The wings can be prepared a day in advance, refrigerated, and reheated with minimal loss of texture, making it an excellent option for meal prep.
Inside the Ingredient List
The Flavor Base
The 1 small onion, chopped finely, is the first layer of flavor. It releases sweetness that balances the savory seasonings and adds a subtle depth that’s almost invisible but essential. If you skip the onion, the sauce will taste flat, and the wings won’t have that complex undertone that makes them memorable. For a different twist, try a splash of apple cider vinegar with the onion to introduce a slight tang.
The Texture Crew
Turkey wings are the star of the show, but their texture is what makes or breaks the dish. Selecting wings that are fresh and not frozen for long helps preserve moisture. If you’re working with frozen wings, thaw them overnight in the fridge and pat them dry before seasoning to ensure a crisp finish. The 1 tsp seasoned salt and 1 tsp poultry seasoning work together to season the meat from the inside out; they’re the backbone of the flavor profile. A pinch of smoked paprika can add a subtle smokiness without overpowering the dish.
The Unexpected Star
Cream of mushroom soup may seem like an odd choice for wings, but it’s the key to the sauce’s creamy, velvety texture. The soup’s natural thickeners create a glaze that clings to each wing, delivering a burst of umami with every bite. If you’re looking for a lower‑fat version, opt for a light cream of mushroom soup or add a splash of low‑fat milk to thin the sauce slightly. The soup also carries the onion and garlic flavors, turning a simple sauce into a complex, mouth‑watering coating.
The Final Flourish
The 1 1/2 cups of water, divided, help build the sauce’s body and keep the wings moist during baking. The first cup is used to sauté the onions and garlic, while the second cup is added to the sauce to adjust thickness. Ground black pepper, just a tsp, adds a subtle heat that cuts through the richness. If you’re a fan of heat, sprinkle a pinch of cayenne pepper into the sauce for a spicy kick.
Everything's prepped? Good. Let's get into the real action.
The Method — Step by Step
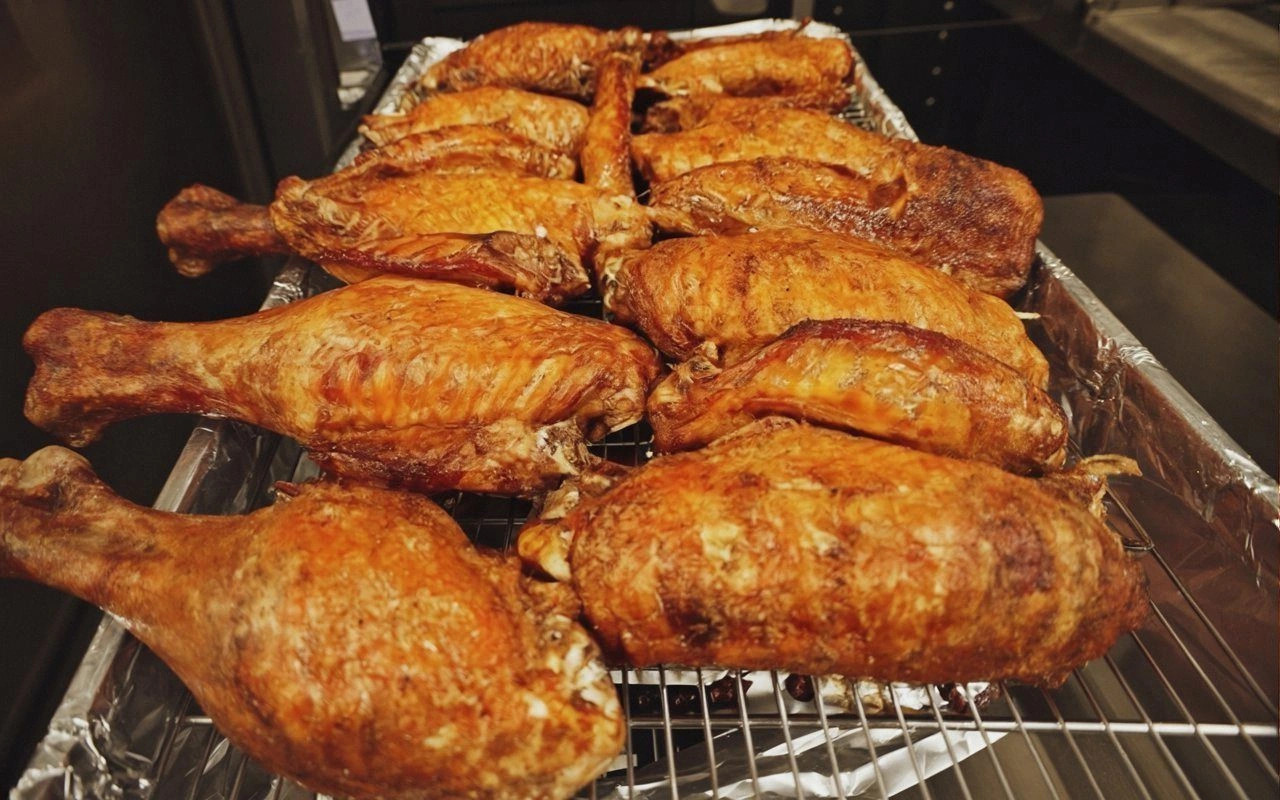
- Preheat your oven to 400 °F (200 °C). Line a large baking sheet with parchment paper or a silicone mat to prevent sticking. Arrange the turkey wings in a single layer, skin side up, ensuring they don’t touch. The air circulation will help them crisp evenly.
- In a medium skillet, heat 1 tablespoon of olive oil over medium heat. Add the chopped onion and sauté until translucent, about 3–4 minutes. The onion should release a sweet fragrance that signals it’s ready.
- Add the minced garlic to the skillet and cook for an additional 30 seconds, just until aromatic. Stir constantly to prevent burning. The garlic’s aroma should mingle with the onion, forming the flavor base for the sauce.
- Pour in 1 cup of water to deglaze the pan, scraping up any browned bits. Bring to a gentle simmer, allowing the liquid to reduce slightly. This step extracts maximum flavor from the pan and creates a thin broth that will become part of the sauce.
- Stir in the can of cream of mushroom soup, mixing until fully incorporated. Add the seasoned salt, poultry seasoning, ground black pepper, and a pinch of smoked paprika if you like. Let the mixture simmer for 2 minutes, then remove from heat. It should be thick enough to coat the back of a spoon.
- Return the skillet to low heat and add the remaining 1/2 cup of water. The sauce should be smooth, glossy, and slightly thickened. This is the moment of truth—if the sauce is too watery, it won’t cling to the wings.
- Place the seasoned turkey wings on the prepared baking sheet. Brush each wing generously with the sauce, ensuring every surface is coated. The sauce should cling to the skin, creating a glossy glaze that will caramelize in the oven.
- Bake in the preheated oven for 25–30 minutes, flipping the wings halfway through. The wings are done when the skin is golden brown and the internal temperature reaches 165 °F (74 °C). The edges should pull away from the skin, indicating crispness.
- Remove the wings from the oven and let them rest for 5 minutes. This allows the juices to redistribute, keeping the meat moist and tender. While resting, you can brush them with a final splash of sauce for extra flavor.
- Serve immediately with your favorite dipping sauces, celery sticks, and a side of ranch or blue cheese dressing. The aroma will fill the house, and the first bite will confirm that your hard work paid off.
That’s it—you did it. But hold on, I’ve got a few more tricks that will take this to another level.
Insider Tricks for Flawless Results
The Temperature Rule Nobody Follows
Many cooks think a high oven temperature is the key to crisp wings, but it can actually cause the outside to burn while the inside remains undercooked. I found that baking at 400 °F (200 °C) strikes the perfect balance—enough heat to caramelize the sauce without drying out the meat. If you’re using a convection oven, reduce the temperature by 25 °F to avoid over‑browning.
Why Your Nose Knows Best
Trust your nose. As the wings bake, the aroma will shift from a mild, savory scent to a rich, caramelized fragrance. This is a reliable indicator that the sauce has thickened and the skin is crisping. If the smell is still watery, give them a few more minutes.
The 5‑Minute Rest That Changes Everything
Resting the wings for 5 minutes after baking allows the juices to redistribute, preventing a dry bite. During this time, the sauce continues to thicken slightly, giving each wing a glossy finish. I’ve seen people skip this step and end up with wings that feel like they’re still raw in the middle.
The Secret Sauce Layer
If you want an extra burst of flavor, drizzle a thin line of honey or maple syrup over the wings before the final 5 minutes of baking. The natural sugars will caramelize, adding a subtle sweetness that balances the savory mushroom base. Just a light touch—too much will make the wings sticky.
The Quick Cooling Trick
After baking, place the wings on a wire rack instead of a flat surface. The airflow underneath prevents the wings from steaming and keeps the crust crisp. This is especially useful if you’re serving them immediately at a party.
The Flavor Layering Technique
For a more complex flavor profile, add a splash of soy sauce to the sauce mixture. The umami from the soy pairs beautifully with the mushroom soup, creating a depth that feels almost Asian‑inspired. Just be careful not to overdo it, as soy sauce is salty.
Creative Twists and Variations
This recipe is a playground. Here are some of my favorite ways to switch things up:
Spicy Sriracha Glaze
Swap a portion of the cream of mushroom soup with sriracha sauce for a fiery kick. The heat pairs well with the creamy base, creating a bold flavor profile that’s perfect for heat lovers.
Herb‑Infused Parmesan
After baking, dust the wings with grated Parmesan and chopped fresh thyme. The nutty cheese and herbal aroma elevate the dish to a gourmet level, making it ideal for a dinner party.
Asian Fusion Twist
Replace the seasoned salt with five‑spice powder and add a splash of hoisin sauce. Serve with pickled vegetables for a complete Asian‑inspired meal that’s both sweet and savory.
Mediterranean Marinade
Marinate the wings in olive oil, lemon zest, oregano, and garlic for 30 minutes before baking. The citrusy notes brighten the dish, and the oregano adds a Mediterranean flair.
Sweet & Smoky BBQ
Swap the mushroom soup for a smoky BBQ sauce and sprinkle a pinch of smoked paprika over the wings before baking. The result is a sweet, smoky, and slightly spicy flavor that’s a crowd‑pleaser.
Low‑Carb Delight
Use a low‑fat, low‑carb version of cream of mushroom soup or replace it with a homemade roux made from butter and almond flour. This keeps the dish flavorful while reducing the carbohydrate count.
Storing and Bringing It Back to Life
Fridge Storage
Cool the wings completely, then store them in an airtight container in the refrigerator for up to 3 days. The sauce may thicken slightly, but the wings will remain moist and flavorful.
Freezer Friendly
Wrap each wing individually in plastic wrap and place them in a freezer bag. They can be frozen for up to 2 months. When ready to eat, thaw overnight in the fridge and reheat in a preheated oven at 350 °F (175 °C) for 10 minutes.
Best Reheating Method
Add a splash of water or broth to the wings before reheating to prevent them from drying out. Cover loosely with foil and heat until warmed through. The added moisture helps restore the sauce’s glossy finish.