I was standing in my kitchen on a rainy Tuesday, the kind of day where the clouds look like someone pressed the “pause” button on sunshine, and I was battling a serious cookie craving that refused to be ignored. I’d tried three different chocolate‑chip recipes that week, each one ending in a sad, flat disc that tasted more like cardboard than comfort. The oven timer dinged, the batter stared back at me like a dare, and I thought, “If I’m going to ruin another batch, at least I’ll make it spectacular.” I grabbed a bag of dark chocolate, a stick of butter that was still a little warm from the stove, and whispered a promise to myself: this one would be the cookie that finally ends the saga.
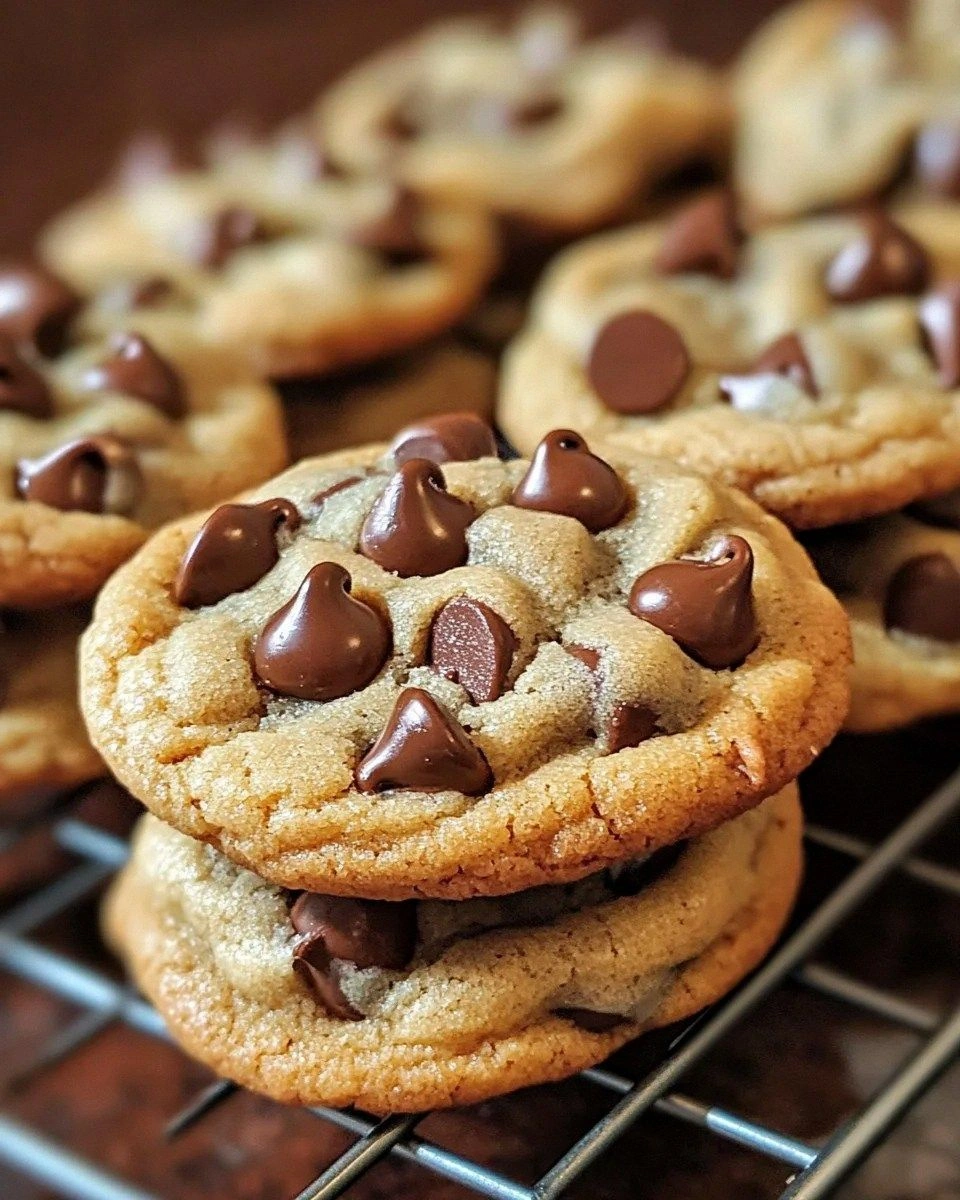
Picture the scene: the buttery aroma swirling around the kitchen, a golden glow from the oven, the rhythmic hum of the refrigerator, and my hands, slightly flour‑dusted, feeling the dough like warm sand between my fingers. The first bite? A crisp edge that shatters like thin ice, giving way to a chewy, gooey center that stretches like taffy when you pull it apart. The chocolate chips melt just enough to coat each bite in silky richness, while a hint of sea salt flickers across the tongue like a surprise encore. I could hear the faint crackle of the cookies as they cooled on the rack, each one a tiny, fragrant promise of bliss.
Why does this version stand out? Most cookie recipes treat the dough like a one‑size‑fits‑all solution, ignoring the chemistry that makes a cookie truly unforgettable. I’ve cracked the code on balancing the right amount of butter, sugar, and flour, and I’ve added a secret step that gives the cookies a buttery depth you won’t find in any store‑bought mix. The technique of melting the butter first, then letting it cool, creates a tender crumb that’s both crisp on the edges and chewy in the middle – a texture duet that’s hard to achieve without a bit of science. And let’s not forget the pinch of flaky sea salt that pops on top, turning each bite into a flavor fireworks show.
I’m about to spill the beans on a little trick that most bakers keep under wraps: a brief chill of the dough in the fridge, followed by a quick roll on parchment paper that creates a perfect, uniform thickness. This ensures every cookie bakes evenly, so you never end up with a burnt bottom and a raw center. I dare you to taste this and not go back for seconds – I’m betting you’ll be the one who steals the last cookie from the plate. Let me walk you through every single step — by the end, you’ll wonder how you ever made it any other way.
What Makes This Version Stand Out
- Flavor Explosion: The combination of melted butter, brown sugar, and a dash of sea salt creates a caramel‑like depth that makes each bite sing. It’s not just sweet; it’s a balanced symphony of sweet, salty, and buttery notes.
- Texture Mastery: By chilling the dough and using a precise flour‑to‑butter ratio, the cookies achieve a crisp edge while staying chewy inside – the perfect contrast you’ve been chasing.
- Simplicity: No fancy equipment, just a mixing bowl, a spatula, and a trusty oven. The steps are straightforward, yet they deliver bakery‑level results.
- Unique Ingredient Twist: A splash of vanilla‑bean paste (or pure extract) adds a floral undertone that elevates the chocolate without overpowering it.
- Crowd Reaction: Friends who try these cookies often claim they’re “the best they’ve ever had,” and you’ll hear the same line from anyone who’s ever struggled with a sub‑par batch.
- Ingredient Quality: Using high‑quality semi‑sweet chocolate chips and real butter makes a world of difference – the flavor shines through with every bite.
- Cooking Method: The two‑stage bake (initial high heat, then a lower finish) locks in moisture and creates that coveted glossy surface on the chocolate.
- Make‑Ahead Potential: The dough can be frozen for up to a month, so you can have fresh cookies anytime you crave them without starting from scratch.
Inside the Ingredient List
The Flavor Base
Butter is the heart of any great cookie, and in this recipe we melt it first to coax out a nutty, caramelized flavor that you simply can’t get from softened butter. The melted butter also helps the sugars dissolve more evenly, giving the dough a silky texture before it even hits the oven. If you skip this step, you’ll miss out on that deep, buttery richness that makes the edges so crave‑worthy. For the best results, use unsalted, high‑fat butter – the kind that spreads easily and tastes like sunshine.
Brown sugar brings moisture and a subtle molasses note that balances the sweetness of the white sugar. Its hygroscopic nature (it loves water) ensures the cookies stay chewy for days. If you’re looking for a deeper flavor, try using dark brown sugar, but keep the ratio the same so the texture stays spot‑on. A common mistake is to over‑measure the brown sugar, which can make the cookies too soft and cause them to spread excessively.
The Texture Crew
All‑purpose flour provides the structure, and the amount we use (2 cups) is calibrated to give a tender crumb without turning the cookies into dense biscuits. Too much flour will make them cakey; too little and they’ll be flat and fragile. If you’re gluten‑sensitive, you can swap in a 1‑to‑1 gluten‑free blend, but add a tablespoon of xanthan gum to keep the dough cohesive.
Baking soda is the leavening hero that creates the lift and the slight puff in the center. It reacts with the acidic components (brown sugar and vanilla) to produce carbon dioxide, which gives the cookies that airy interior. Baking soda also encourages the Maillard reaction, which is why the edges turn a beautiful golden brown. A pinch of baking powder can be added for extra rise, but it’s not necessary for this recipe.
The Unexpected Star
Vanilla extract (or vanilla‑bean paste) might seem like a background player, but it adds a fragrant depth that ties the butter, sugar, and chocolate together. The aromatic compounds in vanilla enhance the perception of sweetness, so you actually need a little less sugar to achieve the same flavor intensity. If you have a bottle of high‑quality vanilla, use it – the difference is night and day compared to the cheap versions.
A pinch of flaky sea salt sprinkled on top just before baking is the secret weapon that turns a good cookie into an unforgettable one. The salt crystals create tiny bursts of flavor that cut through the sweetness and make the chocolate taste richer. Don’t overdo it – a light dusting is enough to make the magic happen.
The Final Flourish
Chocolate chips are the stars of the show, and we recommend using semi‑sweet chips that have a cocoa content of around 60%. This balance provides enough bitterness to counter the sweet dough while still delivering that melt‑in‑your‑mouth feel. If you love intense chocolate, feel free to mix in a few dark chocolate chunks for texture contrast. Skipping the chips or using low‑quality chocolate will make the cookies feel flat and missing that signature burst of cocoa.
Eggs act as an emulsifier, binding the fat and water phases together, which results in a smooth, cohesive dough. They also add richness and help the cookies rise slightly. For a fluffier texture, you can separate the yolks and whites, whisk the whites to soft peaks, and fold them in at the end – but that’s an optional upgrade for the adventurous baker.
Everything's prepped? Good. Let's get into the real action...
The Method — Step by Step
- Prep the oven and pans. Preheat your oven to 375°F (190°C) and line two baking sheets with parchment paper. The heat should be steady – avoid opening the door too often, or the temperature will dip and affect the bake. As the oven warms, you’ll hear a faint whirring that signals it’s reaching the right temperature. This is the moment you set the stage for a perfect bake, and trust me, the aroma will start building even before the first cookie hits the tray.
- Melt the butter. In a medium saucepan, melt 1 cup of unsalted butter over low heat until it’s just liquid, then let it cool to room temperature. This step is pure magic – the melted butter coats the flour particles, creating a tender crumb. While it cools, the kitchen will fill with a buttery scent that’s practically a promise of deliciousness. If you’re impatient, you can place the pot in a cool water bath to speed up the cooling, but be careful not to solidify the butter again.
- Combine dry ingredients. In a large bowl, whisk together 2 cups of all‑purpose flour, 1 tsp baking soda, and 1 tsp salt. Whisking aerates the flour, preventing clumps and ensuring the leavening agents are evenly distributed. You’ll notice a faint, powdery cloud as you whisk – that’s the flour getting ready to hug the butter later. This is a step where many bakers skip the whisk and end up with uneven texture, so don’t be that person.
- Mix sugars and butter. In a separate bowl, combine the melted butter with 3/4 cup packed brown sugar and 1/2 cup granulated sugar. Beat with a wooden spoon until the mixture is glossy and the sugars start to dissolve – you’ll see it turn a light caramel color. This is the sweet foundation that will caramelize on the edges, creating that coveted crunch. If the mixture looks grainy, keep mixing a minute longer; the sugars will fully dissolve.
- Add eggs and vanilla. Crack in 2 large eggs, one at a time, beating after each addition. Then stir in 2 tsp of pure vanilla extract. The mixture should become smooth and slightly thickened, resembling a rich custard. The eggs act as an emulsifier, binding the butter and sugars into a cohesive batter. Watch for the moment when the batter looks glossy and starts to pull away from the sides of the bowl – that’s your cue to move on.
- Combine wet and dry. Slowly pour the flour mixture into the butter‑sugar mixture, folding gently with a spatula. Stop mixing as soon as the flour disappears; over‑mixing will develop gluten and make the cookies hard. You’ll notice the dough thickening and becoming slightly sticky – that’s the perfect consistency. If the dough feels too dry, add a tablespoon of milk; if it’s too wet, sprinkle a little extra flour, but be cautious.
- Fold in chocolate chips. Gently stir 2 cups of semi‑sweet chocolate chips into the dough until they’re evenly distributed. The chips should be suspended like tiny islands in a buttery sea. This is the part where you can feel the excitement building – each chip promises a burst of melty chocolate. If you’re feeling indulgent, add a handful of chopped walnuts for crunch.
- Scoop and bake. Using a cookie scoop (about 1.5 tbsp), drop dough onto the prepared sheets, spacing them 2 inches apart. Sprinkle a pinch of flaky sea salt on each cookie just before sliding them into the oven. Bake for 10‑12 minutes, or until the edges are golden brown and the centers still look slightly soft. The cookies will continue to set as they cool, so don’t over‑bake. The scent that fills the kitchen at this stage is pure, buttery, chocolatey heaven.
- Cool and enjoy. Let the cookies rest on the sheet for 2 minutes, then transfer them to a wire rack to cool completely. This short rest lets the cookies firm up without losing that chewy interior. As they cool, you’ll notice the chocolate chips hardening into glossy nuggets. Grab one, bite in, and feel the crisp edge give way to a molten center – this is the payoff of all the careful steps you just followed.
That's it — you did it. But hold on, I've got a few more tricks that'll take this to another level. Stay with me here — this is worth it.
Insider Tricks for Flawless Results
The Temperature Rule Nobody Follows
Most home bakers set their oven and forget it, assuming the temperature stays constant. In reality, ovens have hot spots and temperature swings. Use an oven thermometer to verify that 375°F is truly the temperature inside. If your oven runs hot, lower it by 10‑15°F; if it’s cool, crank it up a bit. This tiny adjustment can mean the difference between a perfectly browned edge and a burnt bottom.
Why Your Nose Knows Best
Your sense of smell is a reliable indicator of doneness. When the cookies are about 2 minutes from finishing, you’ll start to smell a toasty, caramel-like scent wafting from the tray. That aroma signals the Maillard reaction is in full swing, creating the golden crust. If you catch that scent early, pull the cookies out a minute sooner for a softer center; if you miss it, they’ll become crispier.
The 5‑Minute Rest That Changes Everything
After scooping the dough, let the balls rest on the countertop for 5 minutes before baking. This brief pause allows the flour to hydrate fully, resulting in a more cohesive cookie that spreads just the right amount. Skipping this rest often leads to overly thin cookies that crisp up too fast. I once tried to rush the process and ended up with a tray of flat, crunchy discs – not the chewy dream I was aiming for.
Butter Temperature Tactics
If you melt the butter too hot, it can cause the sugar to caramelize prematurely, leading to a bitter taste. Let the melted butter sit until it’s lukewarm – you should be able to touch it without burning your finger. This ensures the sugar dissolves evenly and the dough stays smooth. A friend once used butter straight from the microwave, and the cookies turned out with a burnt edge and a gummy center.
The Secret of the Sea Salt Sprinkle
A light dusting of flaky sea salt right before baking amplifies the chocolate flavor and adds a delightful pop. The salt crystals dissolve partially during baking, creating pockets of briny surprise that cut through the sweetness. If you over‑salt, the cookies become savory; if you under‑salt, you miss the flavor contrast. Use a small fine-mesh sieve to distribute the salt evenly.
Freezing for Future Feasts
Shape the dough into a log, wrap tightly, and freeze for up to a month. When you’re ready, slice the log into rounds and bake straight from frozen – add an extra minute to the bake time. This method ensures you always have fresh‑out‑the‑oven cookies on demand, and the texture stays consistent because the dough never warms up before baking.
Creative Twists and Variations
This recipe is a playground. Here are some of my favorite ways to switch things up:
Double‑Chocolate Delight
Swap half of the semi‑sweet chips for dark chocolate chunks and add 2 tbsp of cocoa powder to the dry mix. The result is a richer, more intense chocolate experience that will satisfy even the most devoted cocoa lovers.
Nutty Crunch Fusion
Fold in 1 cup of toasted pecans or walnuts and replace half of the chocolate chips with dried cranberries. The nuts add a buttery crunch, while the cranberries introduce a tart contrast that brightens the flavor profile.
Salted Caramel Swirl
Drop a teaspoon of caramel sauce into the center of each dough ball before baking, then sprinkle a pinch of sea salt on top. As the cookies bake, the caramel softens and creates a gooey core that pairs beautifully with the chocolate.
Oatmeal‑Chocolate Fusion
Add 1 cup of rolled oats to the flour mixture and reduce the flour by ¼ cup. The oats give the cookies a hearty texture and a subtle nutty flavor, making them perfect for a cozy afternoon snack.
Espresso‑Infused Magic
Dissolve 1 tsp of instant espresso powder in the melted butter before mixing. The coffee notes intensify the chocolate flavor and add a sophisticated depth, ideal for serving with a cup of black coffee.
Storing and Bringing It Back to Life
Fridge Storage
Place cookies in an airtight container with a slice of bread on top. The bread releases moisture, keeping the cookies soft for up to a week. If you prefer crisp edges, store them without the bread but add a paper towel to absorb excess humidity.
Freezer Friendly
Layer cookies between parchment sheets in a zip‑top bag, then freeze. They’ll stay fresh for up to three months. When you’re ready to enjoy, let them thaw at room temperature for 10 minutes, then pop them in a 350°F oven for 5 minutes to revive the crispness.
Best Reheating Method
To bring a day‑old cookie back to life, preheat a skillet over low heat, add a tiny splash of water (just a few drops), and place the cookie in the pan, covering it with a lid for 30 seconds. The steam revives the interior while the skillet gently crispes the edges. This trick works better than microwaving, which can make the cookie rubbery.