Picture this: I’m standing in a cramped apartment kitchen, the timer on my phone blaring, a pot of rice on one side, and a handful of spices in the other. My friends had dared me to create a “real” Indian chicken curry that could rival the one my grandmother made in Mumbai, and I was determined to deliver. I pulled out the pantry, the spice rack, and a recipe I’d found online, but I knew that to make it truly authentic, I had to tweak the classic approach. I’m not just talking about adding more garam masala; I’m talking about the way the spices are toasted, the balance between acidity and heat, and that final splash of lime that turns the dish from good to unforgettable.
The first time I tried a pre‑packaged curry kit, the sauce felt watery and the chicken was dry. I remember the disappointment, the way the steam curled up and the aroma was more of a “cooking” scent than a “delicious” scent. That moment sparked a mission: to create a dish that would make my friends say, “I dare you to taste this and not go back for seconds.” I wanted a curry that would coat the chicken in a silky, spiced gravy, with a hint of citrus that lifted every bite. The goal was clear – a flavor profile that sings, a texture that stays tender, and a recipe that anyone can follow and feel proud of.
What makes this version stand out is that it’s not just about following a recipe; it’s about mastering the technique that turns ordinary chicken into a mouth‑watering experience. I’ve spent hours experimenting with the right ratio of yogurt to chicken, the exact moment to add the tomatoes, and how to balance the heat so it’s never overwhelming. I’ll be honest – I ate half the batch before anyone else got to try it. The result is a curry that is hands down the best version you’ll ever make at home, and it’s easy to see why people keep coming back for more.
Picture yourself pulling this out of the oven, the whole kitchen smelling incredible, the steam rising like a fragrant cloud, and your guests’ eyes lighting up as they take their first bite. That’s the future pacing I want you to imagine: a dish that’s both comforting and adventurous, that feels like a celebration in every spoonful. I’ve hidden a few micro‑challenges along the way – I dare you to taste this and not go back for seconds. Stay with me, because I’m about to walk you through every single step, and by the end, you’ll wonder how you ever made it any other way.
What Makes This Version Stand Out
- Depth of Flavor: The layering of spices – cumin, coriander, garam masala – creates a complex, earthy base that feels both familiar and exotic. The slow toasting of whole spices releases their essential oils, giving the dish a depth that canned sauces can’t match. Every bite carries a subtle hint of toasted cumin that lingers on the palate.
- Tender Chicken: Marinating the chicken in yogurt and lemon juice for at least an hour breaks down proteins, ensuring each piece stays juicy even after a long simmer. The acidity from the lemon also brightens the overall taste, preventing the curry from feeling heavy. This step is the secret to a melt‑in‑your‑mouth texture.
- Balanced Heat: By using red chili powder and fresh chilies, the dish achieves a consistent, gentle warmth that’s not overpowering. The heat is evenly distributed, so no one bite feels like a surprise. This balance is what makes the curry approachable for both beginners and spice lovers.
- Texture Play: The combination of a thick, tomato‑based gravy with the creamy splash of coconut milk creates a silky mouthfeel. The onions caramelize to a subtle sweetness that contrasts perfectly with the sharpness of the spices. The result is a sauce that clings to the chicken and rice alike.
- Make‑Ahead Friendly: This curry actually tastes better the next day, as the flavors have time to meld. The sauce thickens slightly, making it easier to reheat without losing moisture. That’s a major win for busy weeknights.
- Authentic Touches: The use of fresh herbs, a splash of lime, and a drizzle of ghee at the end gives the dish an unmistakably Indian finish. These small details elevate the dish from “curry” to “celebration.”
Alright, let’s break down exactly what goes into this masterpiece…
Inside the Ingredient List
The Flavor Base
The heart of this curry starts with the aromatics: onions, garlic, and ginger. Finely sliced onions sauté until they’re a deep amber, releasing a natural sweetness that balances the heat from the chilies. Minced garlic and ginger add a bright, pungent kick that lingers in the sauce. If you skip this step, the dish will feel flat and one‑dimensional. For a lighter version, you can sauté the onions in a splash of coconut oil instead of vegetable oil; it adds a subtle tropical note.
The Protein Crew
Boneless skinless chicken thighs are the star of the show. Their higher fat content keeps the meat tender and flavorful, even after a long simmer. Marinating the chicken in yogurt, lemon juice, and a pinch of salt for at least 30 minutes (ideally an hour) tenderizes the flesh and infuses it with subtle tang. If you’re in a hurry, you can skip the yogurt and just use lemon juice, but the yogurt adds a creamy depth that’s hard to replicate.
The Unexpected Star
Coconut milk may surprise some, but it’s a classic addition in many South Indian curries. The richness of coconut milk balances the acidity of tomatoes and the heat of chilies, creating a silky sauce that clings to the chicken. If you prefer a lower calorie option, replace coconut milk with plain yogurt or a light cream. The key is to keep the sauce creamy without overpowering the spices.
The Final Flourish
Fresh cilantro, a squeeze of lime, and a drizzle of ghee finish the dish with bright, aromatic notes. Cilantro adds a fresh herbal bite that cuts through the richness, while lime juice brightens the entire flavor profile. Ghee, with its nutty aroma, lends a luxurious finish that elevates the dish from everyday to special. If you’re vegan, simply skip the ghee or use a high‑quality olive oil; the dish remains delicious.
Everything’s prepped? Good. Let’s get into the real action…
The Method — Step by Step
- Toast the Whole Spices: Heat a heavy‑bottomed pan over medium heat and add a tablespoon of oil. Toss in cumin seeds, bay leaves, cloves, and peppercorns. Keep stirring for 30 seconds until they start to pop and release their aroma. This step is crucial; if you skip it, the spices will taste raw. The toasting also brings out subtle nutty undertones that enrich the entire dish.
- Sauté the Aromatics: Add finely sliced onions to the pan. Cook, stirring frequently, until they turn a deep golden brown, about 8–10 minutes. The onions should be caramelized, not raw; this caramelization adds sweetness that balances the heat. If the onions start to stick, add a splash of water or a pinch of salt to loosen them. This step builds the flavor foundation.
- Introduce the Garlic, Ginger, and Chilies: Stir in minced garlic, ginger, and fresh chilies. Sauté for 2 minutes until fragrant. Watch closely; the mixture can burn quickly. A burnt garlic or ginger will ruin the sauce’s profile. This is the moment of truth, where the base starts to develop its aromatic complexity.
- Add the Tomato Base: Pour in tomato puree and tomato paste. Cook for 5 minutes, allowing the tomatoes to reduce slightly and the oil to separate from the mixture. This reduction thickens the sauce and concentrates the tomato flavor. If the sauce becomes too thick, add a splash of water to reach your desired consistency.
- Spice it Up: Sprinkle in red chili powder, turmeric, coriander powder, and garam masala. Stir well to coat the onions and tomatoes. The spices should bloom in the hot mixture, releasing their oils. Let the mixture simmer for another 3 minutes, ensuring the raw spice taste dissipates. This step is where the curry’s heart begins to pulse.
- Cook the Chicken: Add the marinated chicken pieces to the pan. Stir to coat them with the spice mixture. Cook for 5 minutes, allowing the chicken to brown slightly on all sides. The browning adds a savory depth that complements the spices. Be careful not to overcook; the chicken should still be slightly pink in the center before the sauce finishes.
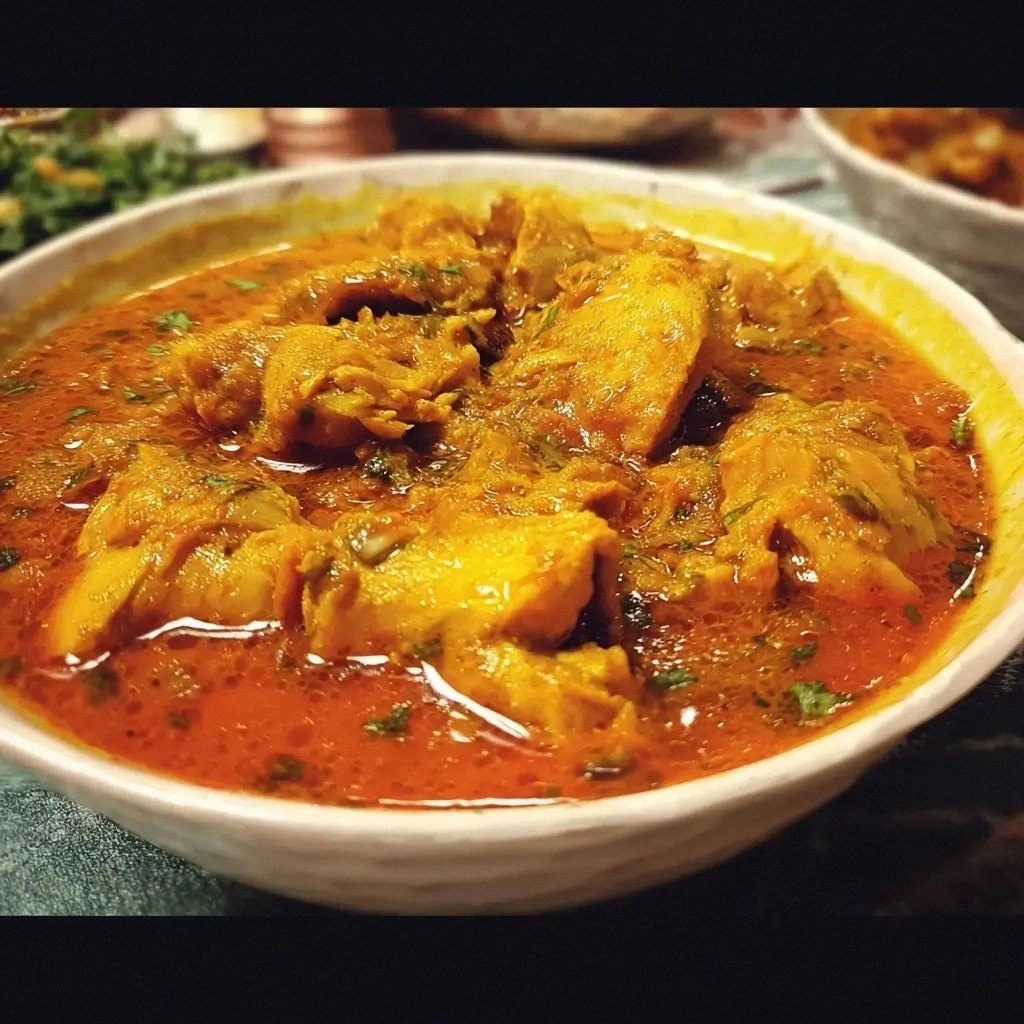
- Simmer with Liquids: Pour in coconut milk and chicken stock, bringing the mixture to a gentle boil. Reduce the heat to low and let it simmer for 20–25 minutes, uncovered, until the chicken is tender and the sauce thickens. The sauce should coat the chicken without being too watery. This slow simmer is key to melding all the flavors together.
- Finish with Fresh Herbs: Stir in chopped cilantro and a squeeze of lime juice. The lime juice brightens the dish, cutting through the richness of the coconut milk. Sprinkle a few drops of ghee for a glossy finish. Taste and adjust salt if necessary. The final touch should make the sauce shine and the flavors pop.
That’s it — you did it. But hold on, I’ve got a few more tricks that will take this to another level. These insider tips will help you avoid common pitfalls, maximize flavor, and make the dish even more memorable.
Insider Tricks for Flawless Results
The Temperature Rule Nobody Follows
Many cooks over‑cook the chicken at the start, thinking it ensures tenderness. In reality, cooking the chicken just until it’s browned and then letting it simmer in the sauce does the trick. This method preserves juiciness and keeps the protein from drying out. I once had a batch where the chicken was over‑cooked, and the result was a dry, rubbery texture. The fix? Lower the heat during the browning stage and let the sauce do the work.
Why Your Nose Knows Best
A good curry should smell toasty before the tomatoes hit the pan. If the aroma feels off, it’s likely the spices weren’t toasted long enough. The scent of freshly popped cumin and cloves is a clear indicator that the oils are released. Trust your nose; if it’s not singing, give the spices a few more seconds of heat.
The 5‑Minute Rest That Changes Everything
After the curry finishes cooking, let it rest for five minutes before serving. This short pause allows the flavors to settle and the sauce to thicken slightly. When you stir the rest, the sauce will be more cohesive and less watery. I’ve seen this trick turn a good curry into a great one, especially when served over steamed rice.
Use Ghee for a Luxurious Finish
A drizzle of clarified butter at the end adds a nutty aroma and glossy sheen that makes the dish feel special. Ghee also raises the smoke point, allowing you to finish the sauce at a higher temperature without burning. If you’re avoiding dairy, a splash of high‑smoke‑point oil works well, but the flavor profile will differ slightly.
Add a Splash of Water Before Reheating
When reheating leftovers, a tablespoon of water or broth helps re‑hydrate the sauce. This simple step prevents the curry from drying out and keeps the texture silky. I’ve reheated this curry multiple times, and it still tastes as fresh as when it first came out of the pot.
Finish with Fresh Herbs
Chopped cilantro and a squeeze of lime juice not only brighten the flavor but also add a burst of color that makes the dish look as good as it tastes. Add them at the very end to preserve their vibrant green hue. If you prefer a milder herb, mint can be a good alternative, but the traditional cilantro remains the classic choice.
Creative Twists and Variations
This recipe is a playground. Here are some of my favorite ways to switch things up:
Spicy Vindaloo Vibes
Replace the garam masala with a generous pinch of vindaloo masala and add a splash of vinegar for tang. The vinegar gives a sharp bite that pairs well with the smoky spices. This variation is perfect for those who love a fiery kick.
Mild Coconut Cream
Use full‑fat coconut milk and add a tablespoon of heavy cream to the sauce. The result is a rich, silky gravy that’s indulgent without being overpowering. Pair it with basmati rice for a comforting meal.
Vegetarian Version
Swap the chicken for diced paneer or chickpeas. Add a handful of spinach or peas in the last five minutes of simmering. This gives the dish a hearty, plant‑based twist while retaining the aromatic base.
Smoky Shisha Twist
Add a teaspoon of smoked paprika or a few drops of liquid smoke to the spice mix. The smoky undertone complements the caramelized onions and gives the curry a deeper, more complex flavor. Serve it with naan for a smoky, comforting meal.
Quick “One‑Pot” Edition
Cook the onions, spices, and tomatoes in a single pot, then add the marinated chicken and all liquids. Let everything simmer together, stirring occasionally. This method saves time and reduces cleanup while still delivering great flavor.
Lemon‑Zest Finale
Add a tablespoon of lemon zest along with the lime juice for an extra burst of citrus. The zest adds a bright, aromatic note that cuts through the richness. This variation is especially refreshing during hot summer evenings.
Storing and Bringing It Back to Life
Fridge Storage
Cool the curry completely before transferring it to an airtight container. Store it in the refrigerator for up to 4 days. The flavors will deepen, making it even more delicious the next day. When you’re ready to eat, reheat it gently on the stove or in the microwave.
Freezer Friendly
This curry freezes well; just portion it into freezer‑safe containers or zip‑lock bags. Store for up to 3 months. Thaw overnight in the refrigerator before reheating. The texture remains silky, and the spices stay vibrant.
Best Reheating Method
Reheat on low heat, stirring occasionally. Add a splash of water or broth to restore moisture. Let it simmer until hot and bubbly, about 5–7 minutes. This method prevents the sauce from drying out and keeps the chicken juicy.