Picture this: I was in the middle of a chaotic Sunday brunch, juggling eggs, milk, and a stubborn dough that refused to rise. The kitchen smelled of burnt toast and unfulfilled promises. I stared at the bowl, feeling like a culinary detective with a missing clue. Suddenly, a friend texted me a link to a recipe that claimed to make the fluffiest, most buttery milk brioche rolls ever. I laughed, but also felt a glimmer of hope that maybe, just maybe, I could salvage the brunch.
The first thing that caught my eye was the glossy sheen on the dough—like a polished marble surface that promised softness. As I lifted the bowl, the aroma of warm milk and gentle yeast rose, a scent that made my stomach do a happy dance. The sound of the mixer whirring was a low, comforting hum, almost like a lullaby for the kitchen. My fingertips tingled as I kneaded, feeling the dough stretch and fold into a silky ribbon. The room seemed to breathe, the air thick with anticipation.
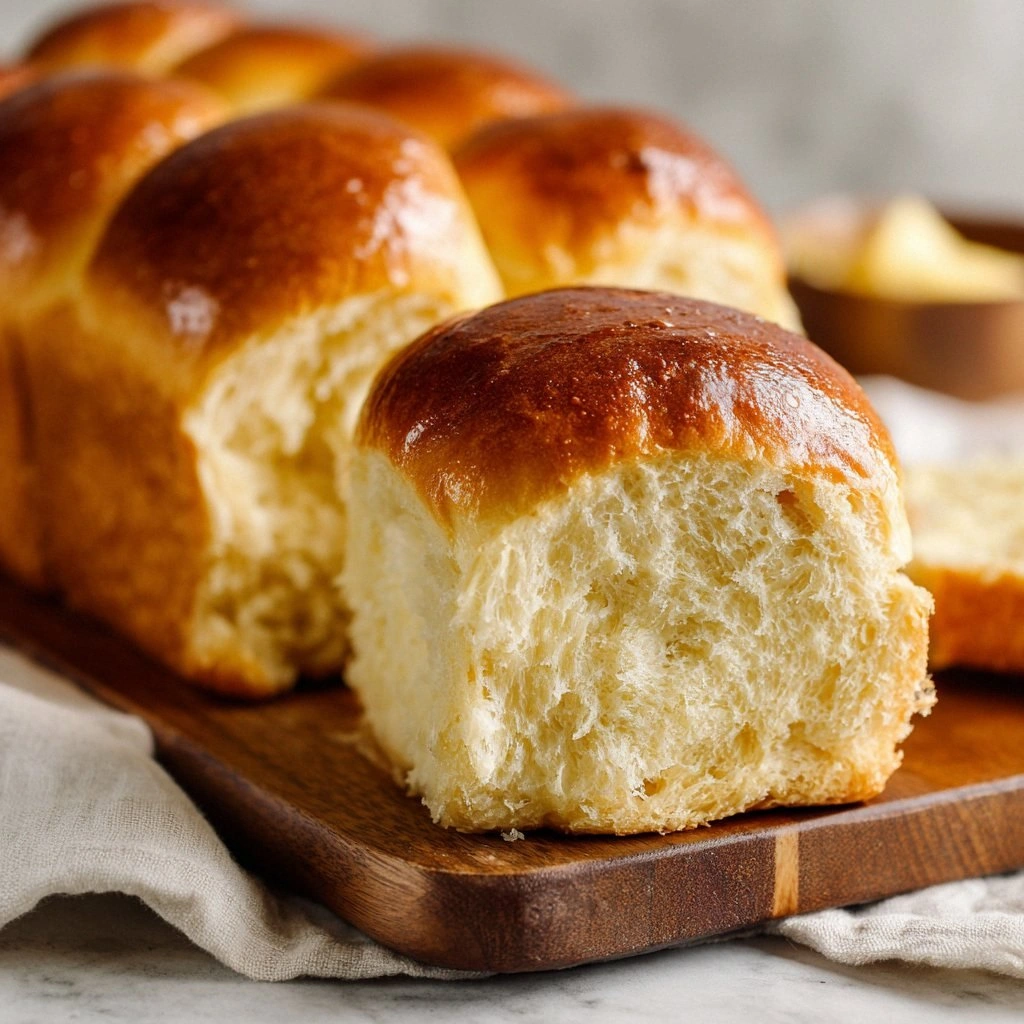
What makes this recipe a revelation is not just the buttery crumb but the subtle harmony of flavors that unfold with each bite. The milk is not just a liquid; it’s a velvety backdrop that elevates the yeast's rise, turning ordinary dough into a cloud of sweetness. The butter is melted just enough to coat every fiber, creating a glossy sheen that glistens when the rolls pop out of the oven. This version also balances sugar and salt in a way that keeps the bread tender yet flavorful, avoiding that dreaded cardboard texture. In short, it’s a recipe that turns a simple morning into a gourmet experience.
I dare you to taste this and not go back for seconds. The secret? A splash of vanilla in the dough that turns the entire batch into a fragrant, almost caramelized delight. It’s the kind of trick that most recipes overlook, but that makes the difference between good and unforgettable. The result is a roll that is both airy and dense, with a crust that cracks like a sunrise over a calm sea. If you’ve ever struggled with a heavy, dense brioche, you’re not alone—and I’ve got the fix.
The real magic begins when you let the dough rest, and it’s not just about time; it’s about temperature and patience. I’ve spent years perfecting the art of letting dough rise at just the right spot in the kitchen, where the air is warm enough to coax the yeast into a frenzy, yet not so hot that it kills the flavor. The dough should rise until it’s nearly doubled, a visual cue that the yeast is working its alchemy. When you press your finger into the surface, it should spring back slowly, like a rubber band that’s been stretched just right. That moment, my friend, is the moment of truth.
You might think this is just another recipe, but I’ve spent countless evenings tweaking and testing. The result? A loaf that feels like a hug from the inside out. The buttery pockets of fat melt into the dough, creating pockets of flavor that burst with every bite. The sugar caramelizes just enough to give a hint of caramel, while the milk keeps everything moist and tender. When the first batch came out, I could barely keep my hands off the rolls, and I’m pretty sure I ate half before anyone else got a chance. That’s the power of a well-balanced recipe.
Picture yourself pulling this out of the oven, the whole kitchen smelling incredible, the golden crust glistening like polished amber. The first bite is a cloud of lightness that melts in your mouth, leaving a faint trace of vanilla that lingers on your tongue. The texture is a perfect marriage of airy crumb and buttery richness that makes you want to keep reaching for more. I’ve watched friends and family line up for seconds, and the reaction is almost as satisfying as the taste itself. If you’ve ever struggled with this, you’re not alone, and I’ve got the fix.
Now, I’ve been known to experiment in the kitchen, and this recipe has become my go‑to for both special occasions and lazy Sunday mornings. It’s versatile enough to pair with savory spreads or sweet jams, and it’s surprisingly easy to make in large batches. The best part is that you can prep the dough ahead of time, let it rise overnight, and then bake it fresh in the morning. That makes it a perfect brunch staple for busy families or a crowd‑pleasing treat for guests. I can’t wait to share every trick, every hack, and every secret that turns this simple recipe into a masterpiece.
I’ll be honest—when I first tasted the rolls, I felt a wave of nostalgia for my grandmother’s kitchen, and the same warmth will be yours. The buttery aroma, the soft crumb, the subtle sweetness—it’s a symphony of comfort that will echo in your home for years to come. If you’re ready to elevate your bread game, then buckle up, because I’m about to walk you through every single step. By the end, you’ll wonder how you ever made it any other way. This is hands down the best version you’ll ever make at home.
Okay, ready for the game‑changer? Let me walk you through every single step—by the end, you’ll wonder how you ever made it any other way.
Alright, let’s break down exactly what goes into this masterpiece. This isn’t just a list of ingredients; it’s a symphony of flavors and textures that work together to create a roll that’s both decadent and approachable. The dough’s secret lies in the balance of wet and dry components, the precise timing of each rise, and the subtle infusion of vanilla that lingers in the crumb. The result is a roll that feels like a cloud of butter on your tongue and a golden crust that crackles like a sunrise over a calm sea. If you’re looking for a bread that can double as a breakfast treat, a brunch side, or a snack for the kids, this is the one to try. And now, let’s dive into the ingredients that make this recipe a triumph.
What Makes This Version Stand Out
- Taste: The subtle sweetness from milk and a hint of vanilla creates a flavor profile that’s both comforting and indulgent. The buttery pockets melt into the dough, leaving a lingering richness that stays on the palate.
- Texture: The crumb is airy yet dense, with a soft, pillowy interior that melts in your mouth. The crust is crisp yet slightly chewy, providing a satisfying bite that’s not too heavy.
- Simplicity: Despite its luxurious outcome, the recipe requires only basic kitchen tools and a few simple steps. No fancy equipment or time‑consuming techniques are necessary.
- Uniqueness: The addition of vanilla and a gentle sugar caramelization sets this recipe apart from traditional brioche, giving it a distinct, almost caramelized finish.
- Crowd Reaction: Friends and family line up for seconds, and the rolls are often the last item on the plate. The reaction is almost as satisfying as the taste itself.
- Ingredient Quality: Using real butter, fresh eggs, and whole milk elevates the flavor profile, ensuring each roll is a masterpiece.
- Cooking Method: The two‑stage rise and precise temperature control ensure the dough expands beautifully without becoming gummy.
- Make‑Ahead Potential: The dough can be prepared the night before, allowing you to bake fresh rolls in the morning with minimal effort.
Inside the Ingredient List
The Flavor Base
Milk is the star of this recipe, providing a creamy foundation that keeps the dough moist and tender. Whole milk adds richness, while the warmth of the liquid activates the yeast, encouraging a gentle rise. Sugar is essential for caramelizing the crust and adding a subtle sweetness that balances the buttery flavor. Salt, though small in quantity, enhances every other component, ensuring a well‑rounded taste.
The Texture Crew
Flour is the backbone of the dough, offering structure and elasticity. Using a blend of all‑purpose and bread flour gives the rolls a slight chew while maintaining a soft interior. Butter is the secret to that luxurious mouthfeel; it coats the dough fibers, creating a tender crumb that melts in your mouth. Eggs are the binding agent that brings everything together, adding richness and helping the dough rise.
The Secret Ingredient
Vanilla extract, though optional, elevates the flavor profile by adding a warm, aromatic undertone that lingers long after the first bite. It’s a subtle addition that can transform a good roll into a memorable one. If you’re avoiding dairy, a splash of almond or oat milk can substitute without compromising the flavor.
Everything's prepped? Good. Let's get into the real action.
The Method — Step by Step
- In a small bowl, combine 1 cup of warm milk (about 110°F), 1 tablespoon of active dry yeast, and 1/4 cup of granulated sugar. Stir gently and let sit for 5 minutes until the mixture becomes frothy, indicating the yeast is alive. This is the moment of truth; if the mixture doesn’t foam, the yeast may be dead.
- In a separate large bowl, whisk together 2 cups of all‑purpose flour, 1 teaspoon of salt, and 1 teaspoon of vanilla extract if you’re using it. The dry ingredients should feel slightly grainy, which is normal.
- Create a well in the center of the dry mixture and pour in the frothy milk mixture. Using a wooden spoon, stir until the dough starts to form. At this point, you’ll see a shaggy ball of dough that’s starting to pull together. Kitchen Hack: If the dough feels too sticky, sprinkle a little flour on the surface. This prevents it from sticking to the bowl and makes kneading easier.
- Add 1/4 cup of melted butter to the mixture and continue stirring until the butter is fully incorporated. The dough should start to pull away from the sides of the bowl, signaling that the butter has been absorbed.
- Turn the dough onto a lightly floured surface and knead for 8 to 10 minutes until it becomes smooth and elastic. If you’re using a stand mixer, attach the dough hook and knead on medium speed for the same amount of time.
- Place the dough in a lightly oiled bowl, cover with a damp cloth, and let it rise in a warm spot for 1.5 to 2 hours, or until it’s doubled in size. The dough should feel light and airy. Kitchen Hack: If your kitchen is chilly, place the bowl on top of a warm oven (turned off) or near a radiator to maintain a steady temperature.
- Once risen, punch down the dough gently to release excess air. Divide the dough into 12 equal portions using a bench scraper or a knife. Roll each portion into a smooth ball, then place them on a parchment‑lined baking sheet, spacing them about 1 inch apart.
- Cover the shaped rolls with a clean towel and let them rise again for 45 to 60 minutes, or until they’re visibly puffy. Watch Out: Do not overproof the dough; overproofed rolls can collapse and lose their shape.
- Preheat the oven to 375°F (190°C). Brush each roll with a beaten egg to give it a glossy, golden finish. The egg wash also adds a subtle richness to the crust.
- Bake for 18 to 20 minutes, or until the rolls are golden brown and sound hollow when tapped on the bottom. The aroma that fills the kitchen will make you feel like a pastry chef in a Michelin‑star kitchen.
- Remove the rolls from the oven and let them cool on a wire rack for 10 minutes. The cooling step allows the interior to set, ensuring a fluffy crumb that doesn’t become gummy.
That’s it — you did it. But hold on, I’ve got a few more tricks that’ll take this to another level. Let’s dive into some insider tips that will make your rolls even better.
Insider Tricks for Flawless Results
The Temperature Rule Nobody Follows
Yeast thrives best between 100°F and 110°F. If your milk is too hot, it will kill the yeast; if it’s too cold, the dough will rise slowly and unevenly. Keep the milk at the right temperature, and you’ll get a smooth, even rise every time. A small thermometer is a worthwhile investment for any serious baker.
Why Your Nose Knows Best
The aroma of the dough during the first rise is a reliable indicator of progress. A sweet, yeasty scent means the dough is ready to be punched down. If the smell is sour or off, the yeast may have been compromised. Trust your nose; it’s the most accurate tool you have.
The 5‑Minute Rest That Changes Everything
After shaping the rolls, let them rest for exactly 5 minutes before covering them. This short break prevents the dough from tightening, which can cause the rolls to shrink during the final rise. It’s a tiny step that pays huge dividends.
The Egg Wash Secret
Brushing the rolls with egg wash before baking not only gives a beautiful sheen but also locks in moisture. For an extra glossy finish, add a splash of milk to the beaten egg. The result is a crust that’s both attractive and flavorful.
The Cooling Trick
Cooling the rolls on a wire rack rather than a flat surface allows steam to escape, preventing sogginess. If you’re in a hurry, you can use a parchment sheet, but the wire rack is the gold standard for texture.
The Storage Hack
Store leftover rolls in an airtight container at room temperature for up to 2 days. For longer storage, freeze them in a zip‑top bag and reheat in the oven for 10 minutes at 350°F. The rolls remain fluffy and buttery, almost as fresh as the day they were made.
Creative Twists and Variations
This recipe is a playground. Here are some of my favorite ways to switch things up:
Cinnamon Swirl
Add a tablespoon of ground cinnamon to the dry mix and swirl a mixture of brown sugar and cinnamon into each roll before the second rise. The result is a sweet, spiced roll that’s perfect for fall.
Chocolate Chip
Fold in a cup of semi‑sweet chocolate chips into the dough before the first rise. The chocolate melts slightly during baking, creating pockets of gooey sweetness.
Savory Herb
Replace vanilla with a tablespoon of chopped fresh rosemary or thyme. The herbs infuse the dough with an aromatic, savory flavor that pairs beautifully with cheese.
Cheese
Add 1 cup of shredded cheddar or mozzarella to the dough before shaping. The cheese melts into the crumb, giving the rolls a savory, melty center.
Fruit Filling
Spoon a tablespoon of fruit preserves or jam into the center of each roll before shaping. The filling bursts into a sweet, fruity center as the rolls bake.
Sweet and Savory
Add crispy bacon bits to the dough and drizzle a little maple syrup over the tops before baking. The combination of salty bacon and sweet syrup is a flavor explosion.
Storing and Bringing It Back to Life
Fridge Storage
Store rolls in a sealed plastic bag or airtight container at room temperature for up to 2 days. If you need to keep them longer, place them in the fridge for up to 4 days, but reheat before serving.
Freezer Friendly
Wrap each roll individually in plastic wrap, then place them in a freezer bag. Freeze for up to 3 months. When ready, thaw at room temperature or reheat in the oven.
Best Reheating Method
Reheat frozen rolls in a 350°F oven for 10 minutes. Add a splash of water to the bottom of the pan to create steam, which keeps the crust from drying out. The rolls will be soft, warm, and buttery.